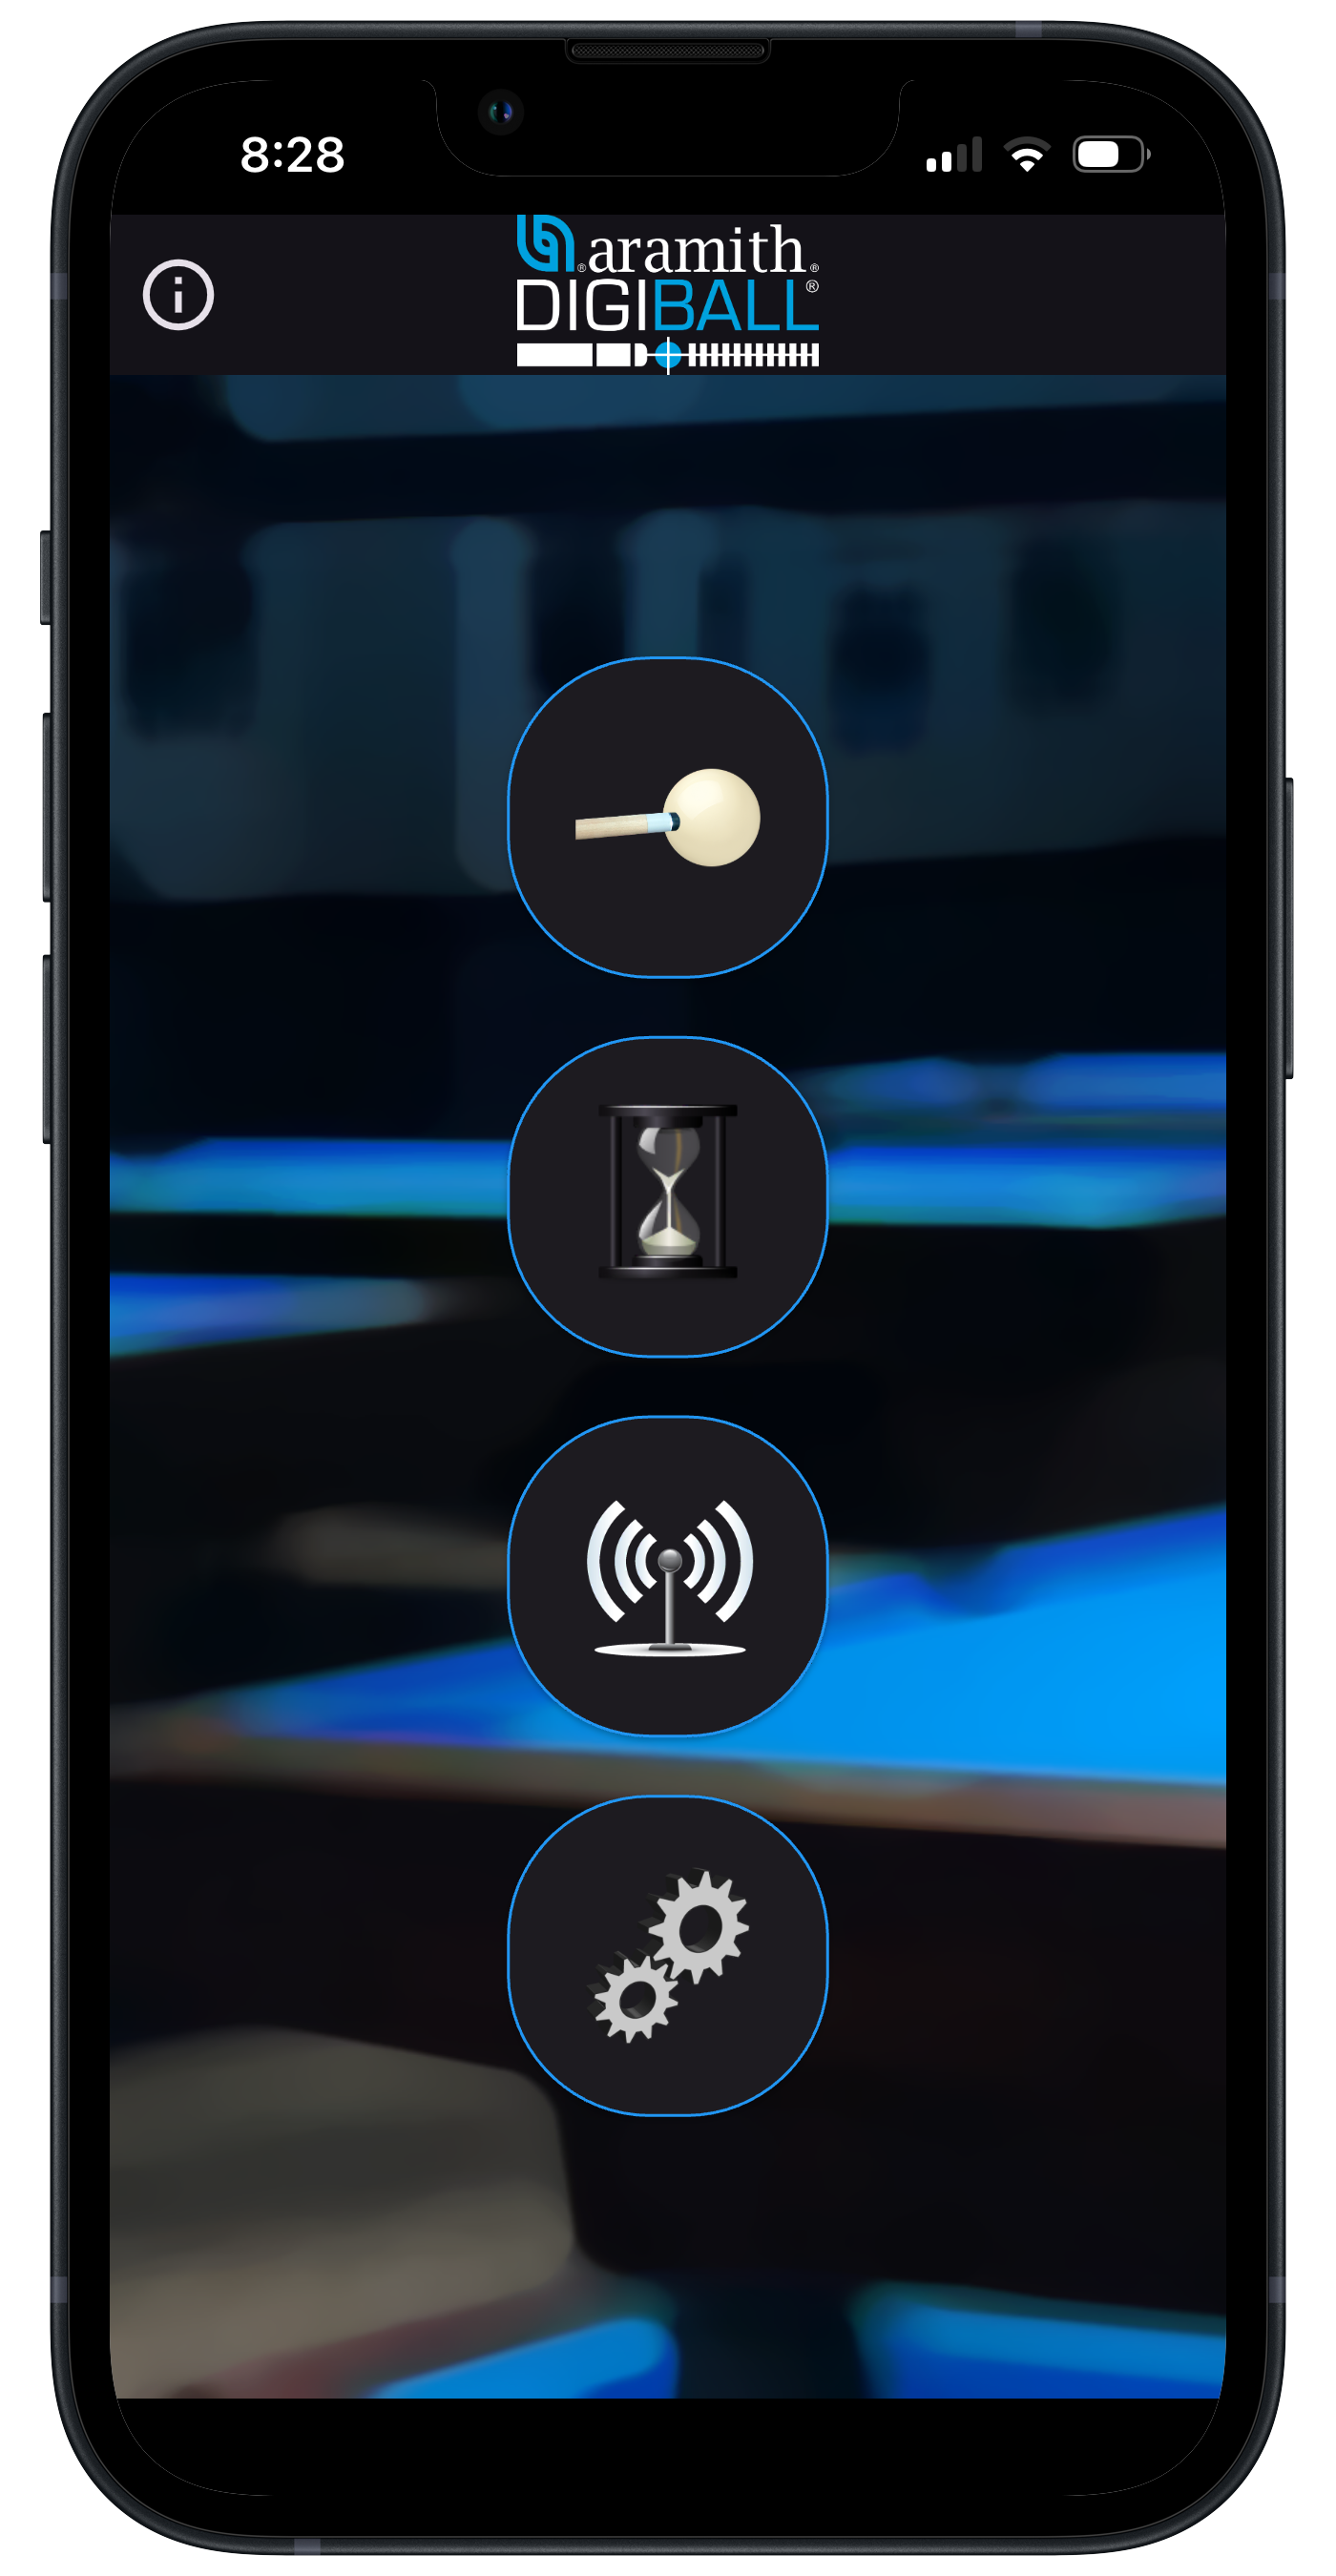
When you open the app you will see four buttons. Pressing them will lead you to the following pages (from top to bottom): Shooting page, History page, Devices page and Settings page. Also notice the letter 'i' with a circle around it. Press this button at any time for a quick start guide, more information, and app version.
Navigate to the Devices page. If you are presented with this option, click on Settings to enable wireless connectivity. In your device settings (for iOS) click on the enable button. Android settings are similar but may differ from the image shown.
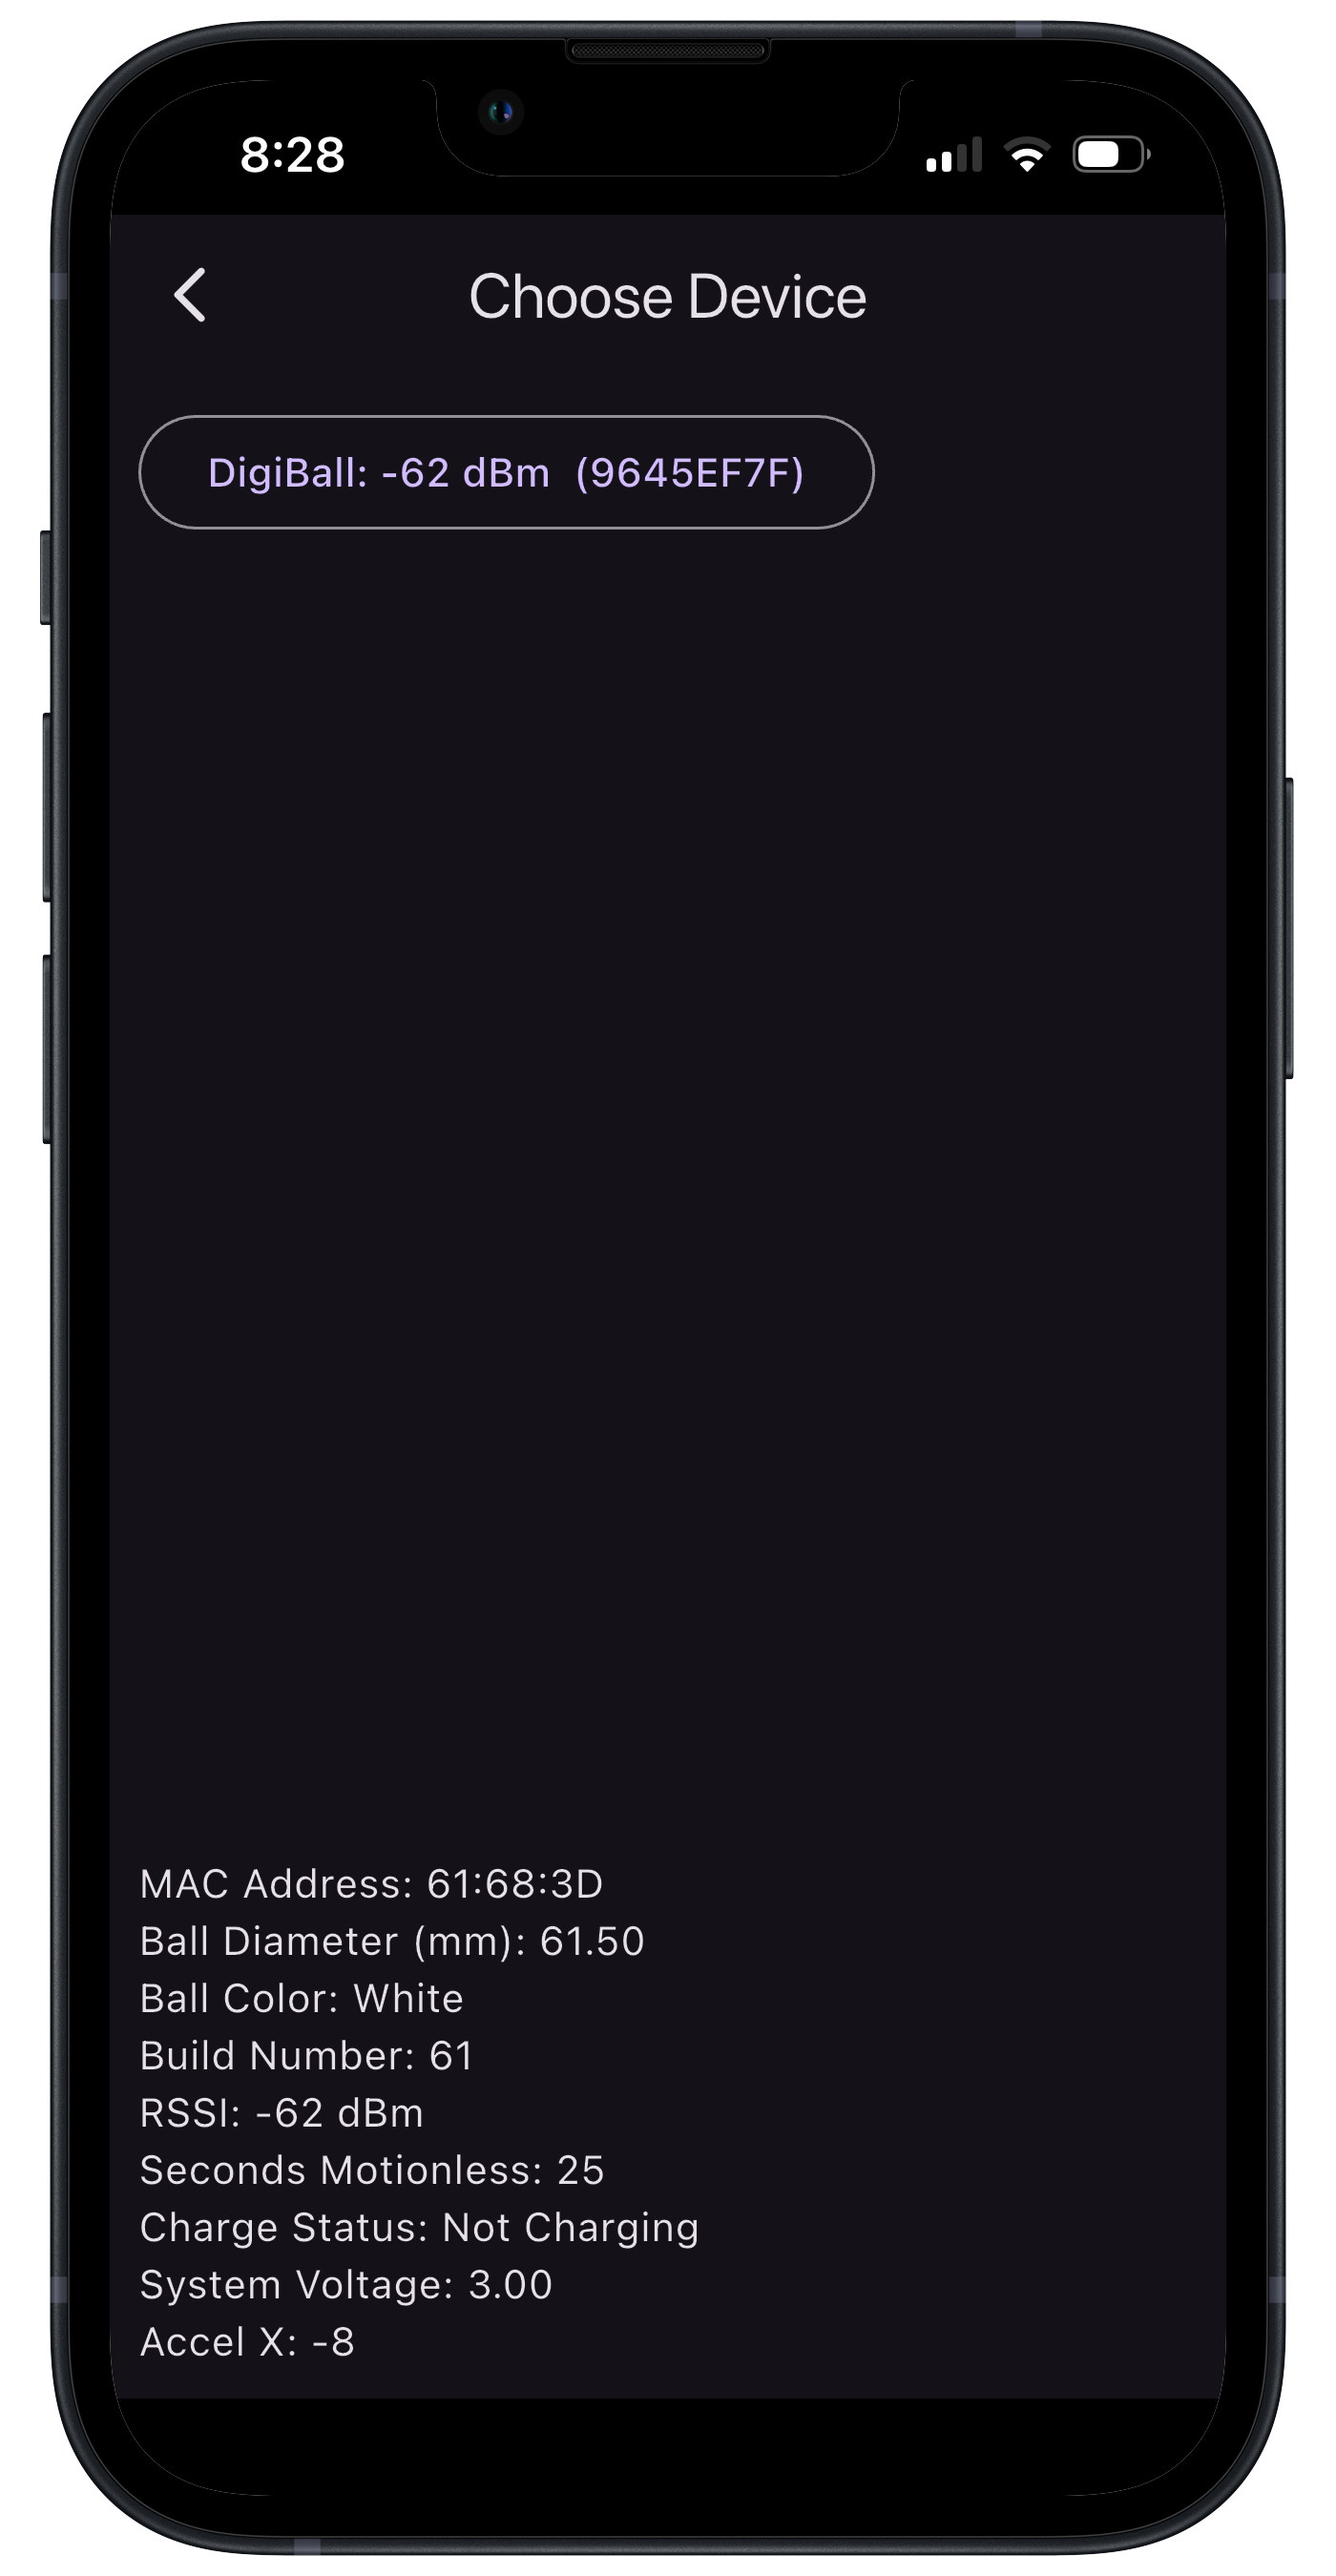
Return to the Devices page. Ensure that the DigiBall is fully charged and that you have removed the DigiBall from shipmode by placing it on the charger, black dot facing down. If the DigiBall has already been removed from shipmode but it is asleep, rotate the DigiBall to wake it up. A button with the text 'DigiBall' should appear along with the signal level and device ID, as shown in the image. Press the button to select the device. Verify that after selected, more information is displayed at the bottom of the screen.
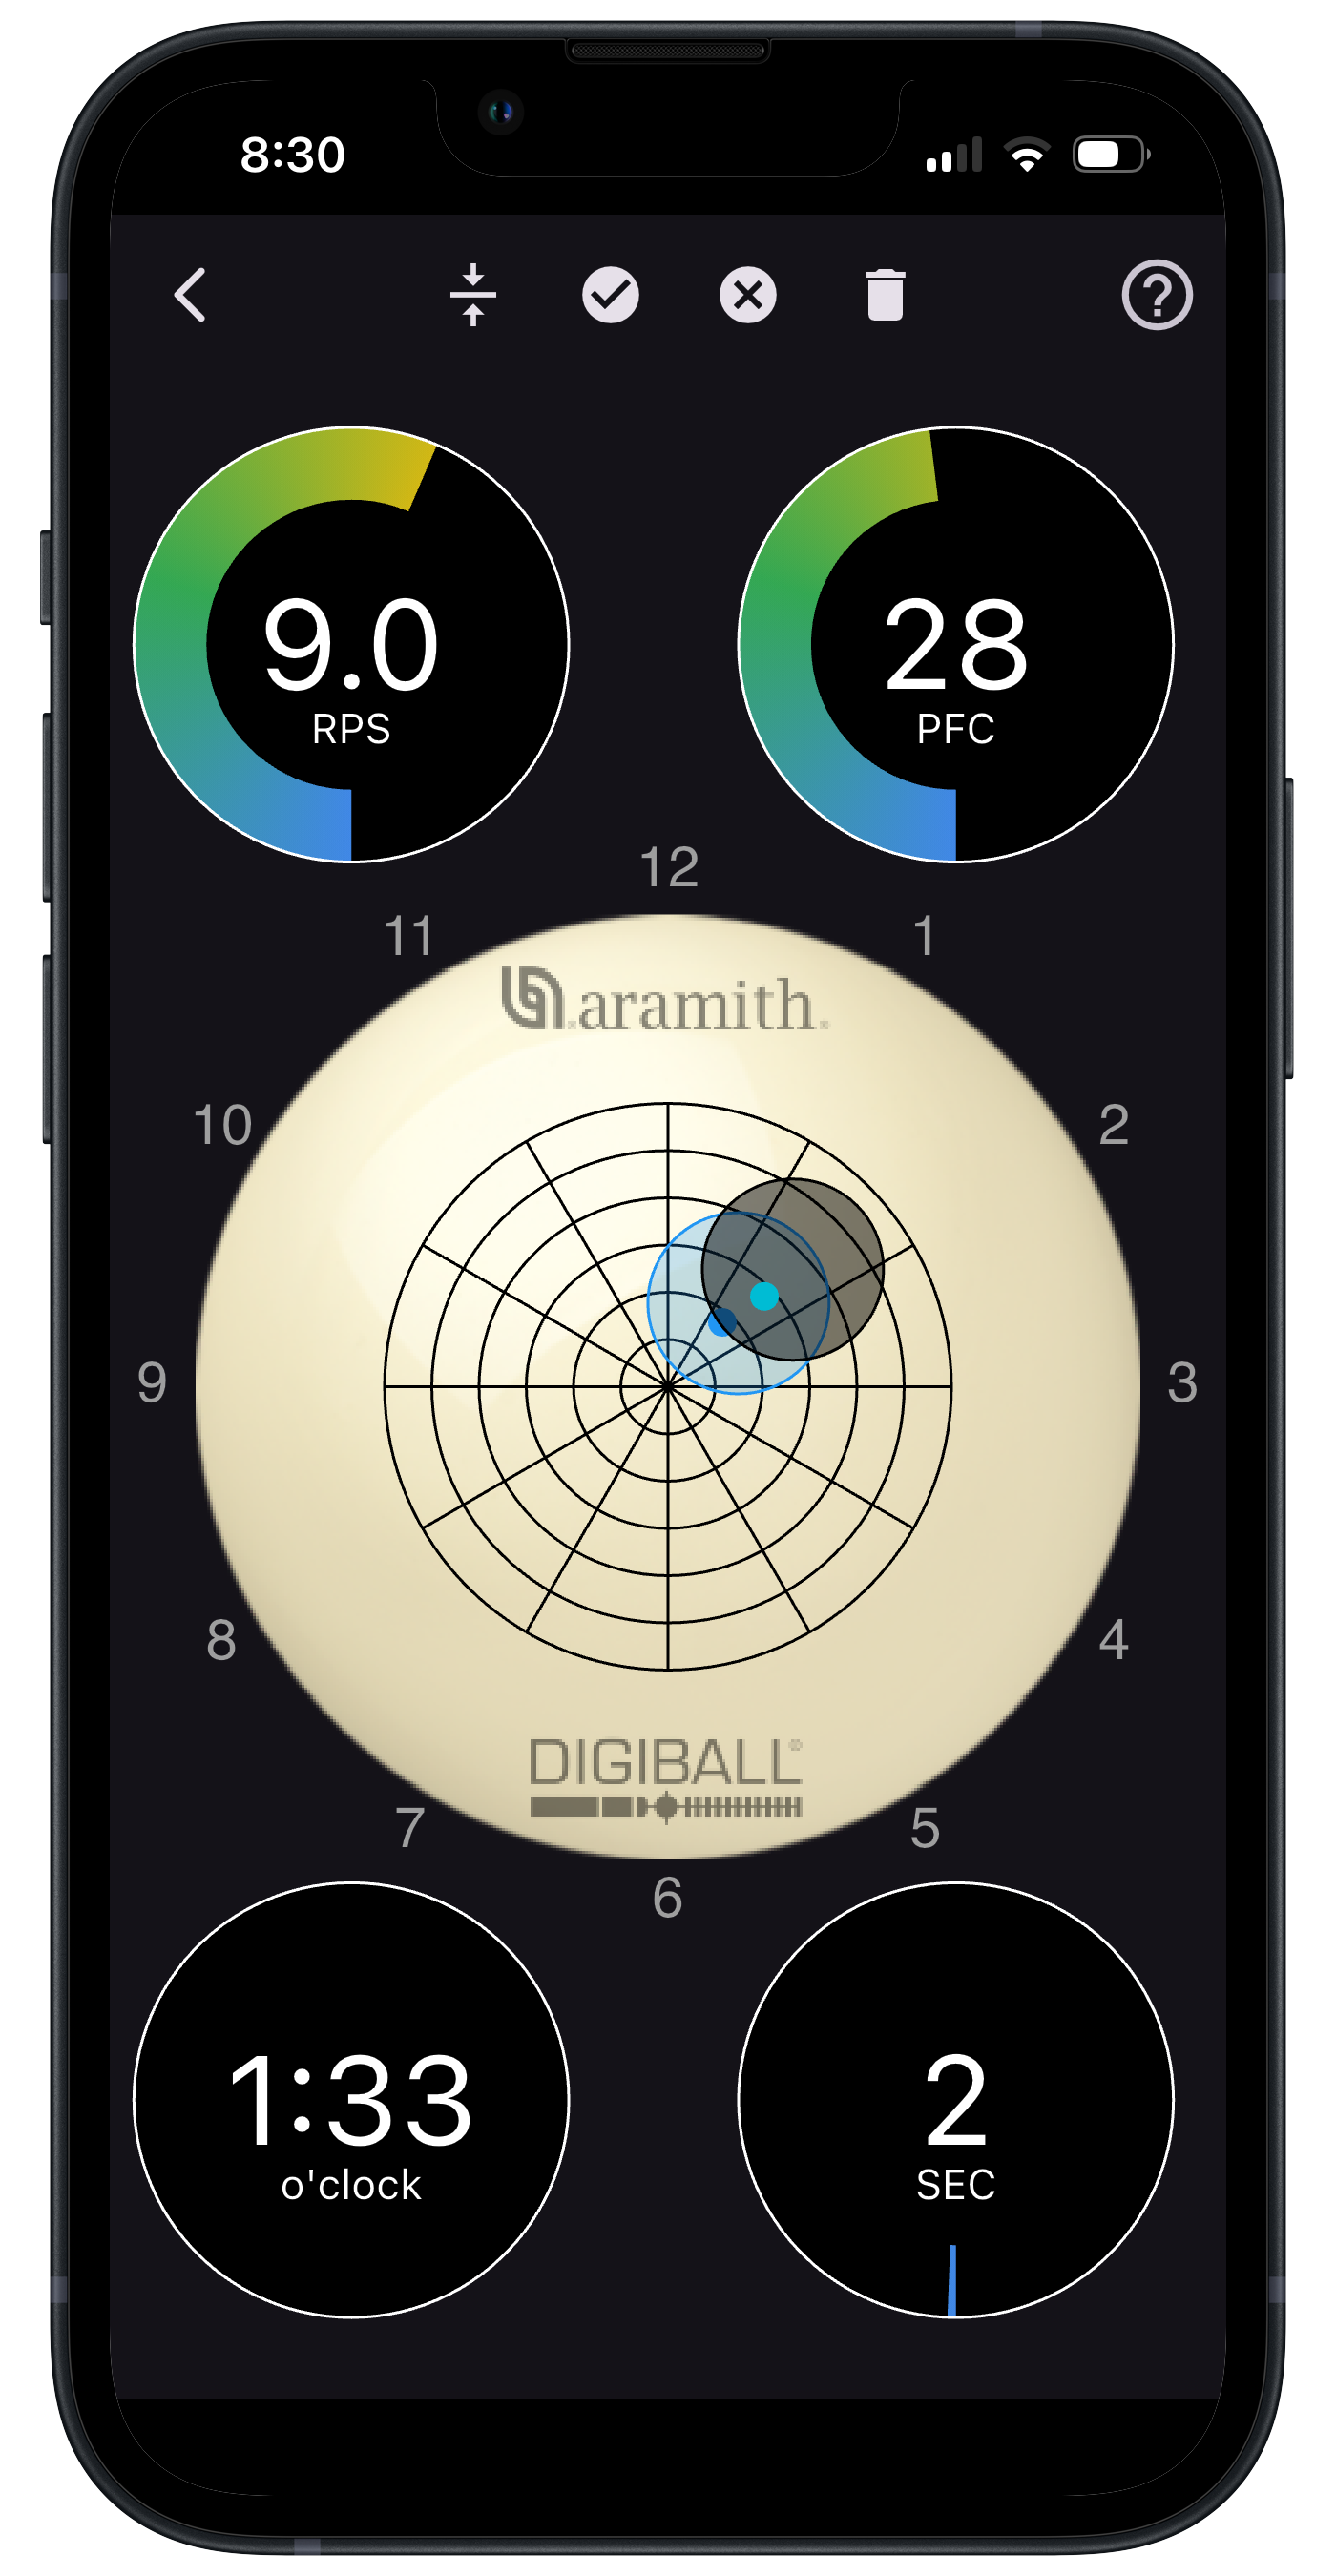
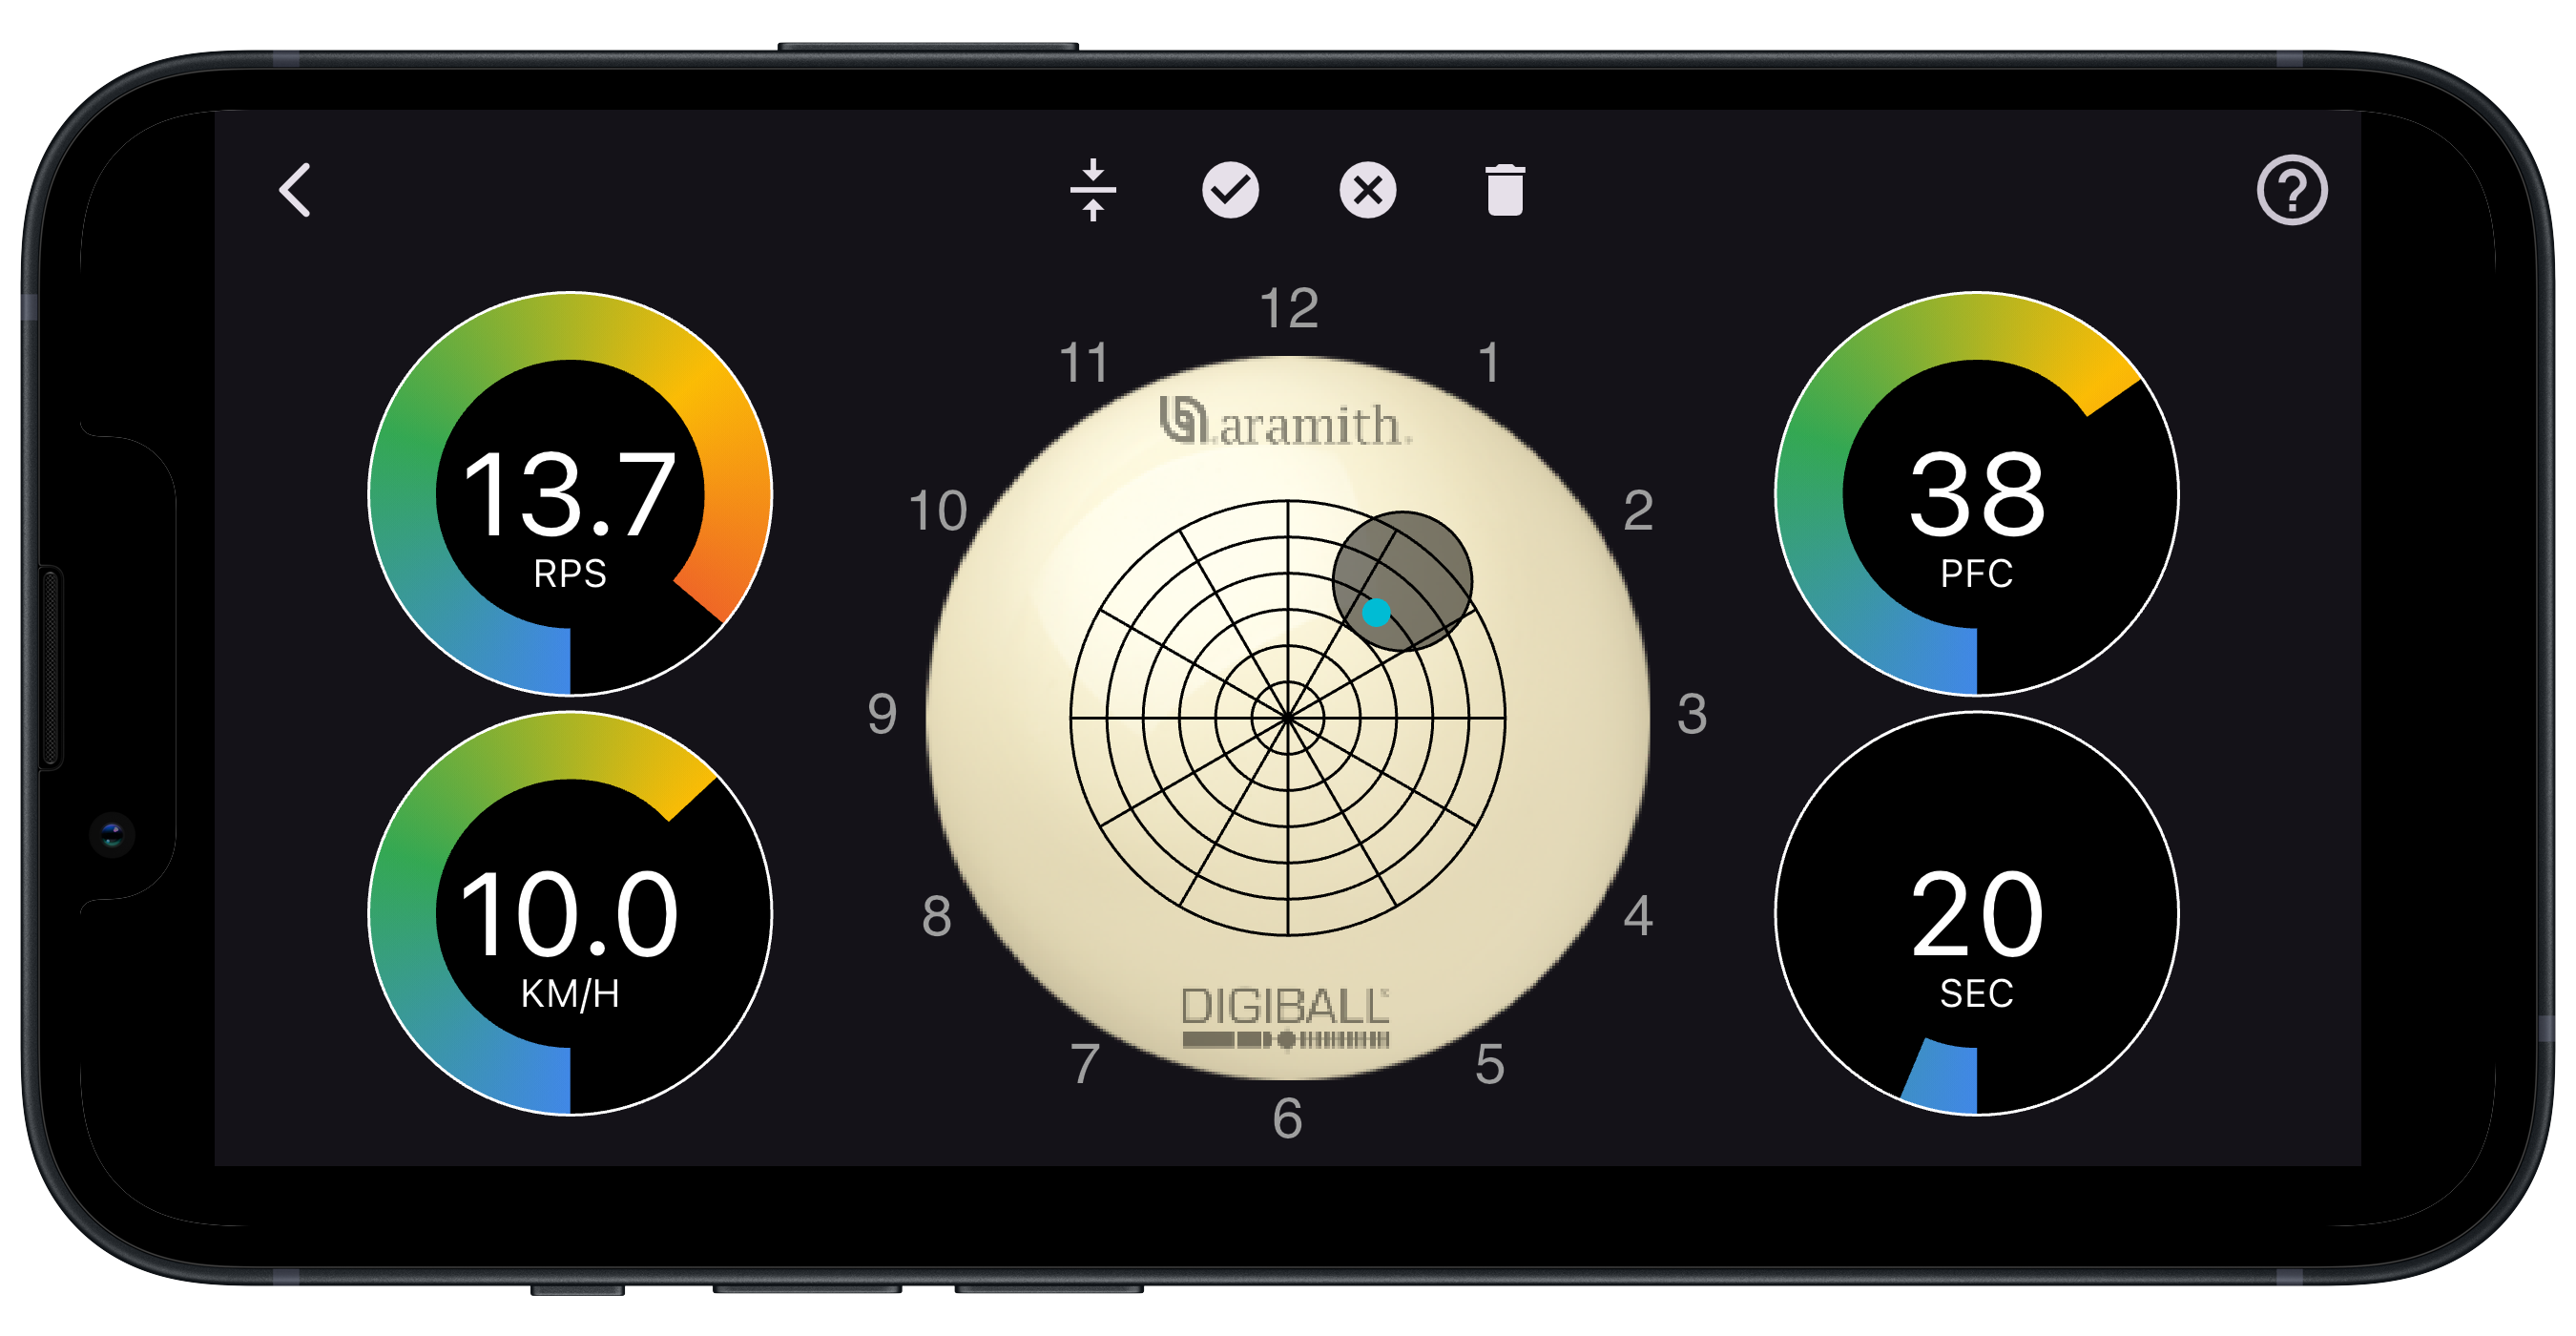
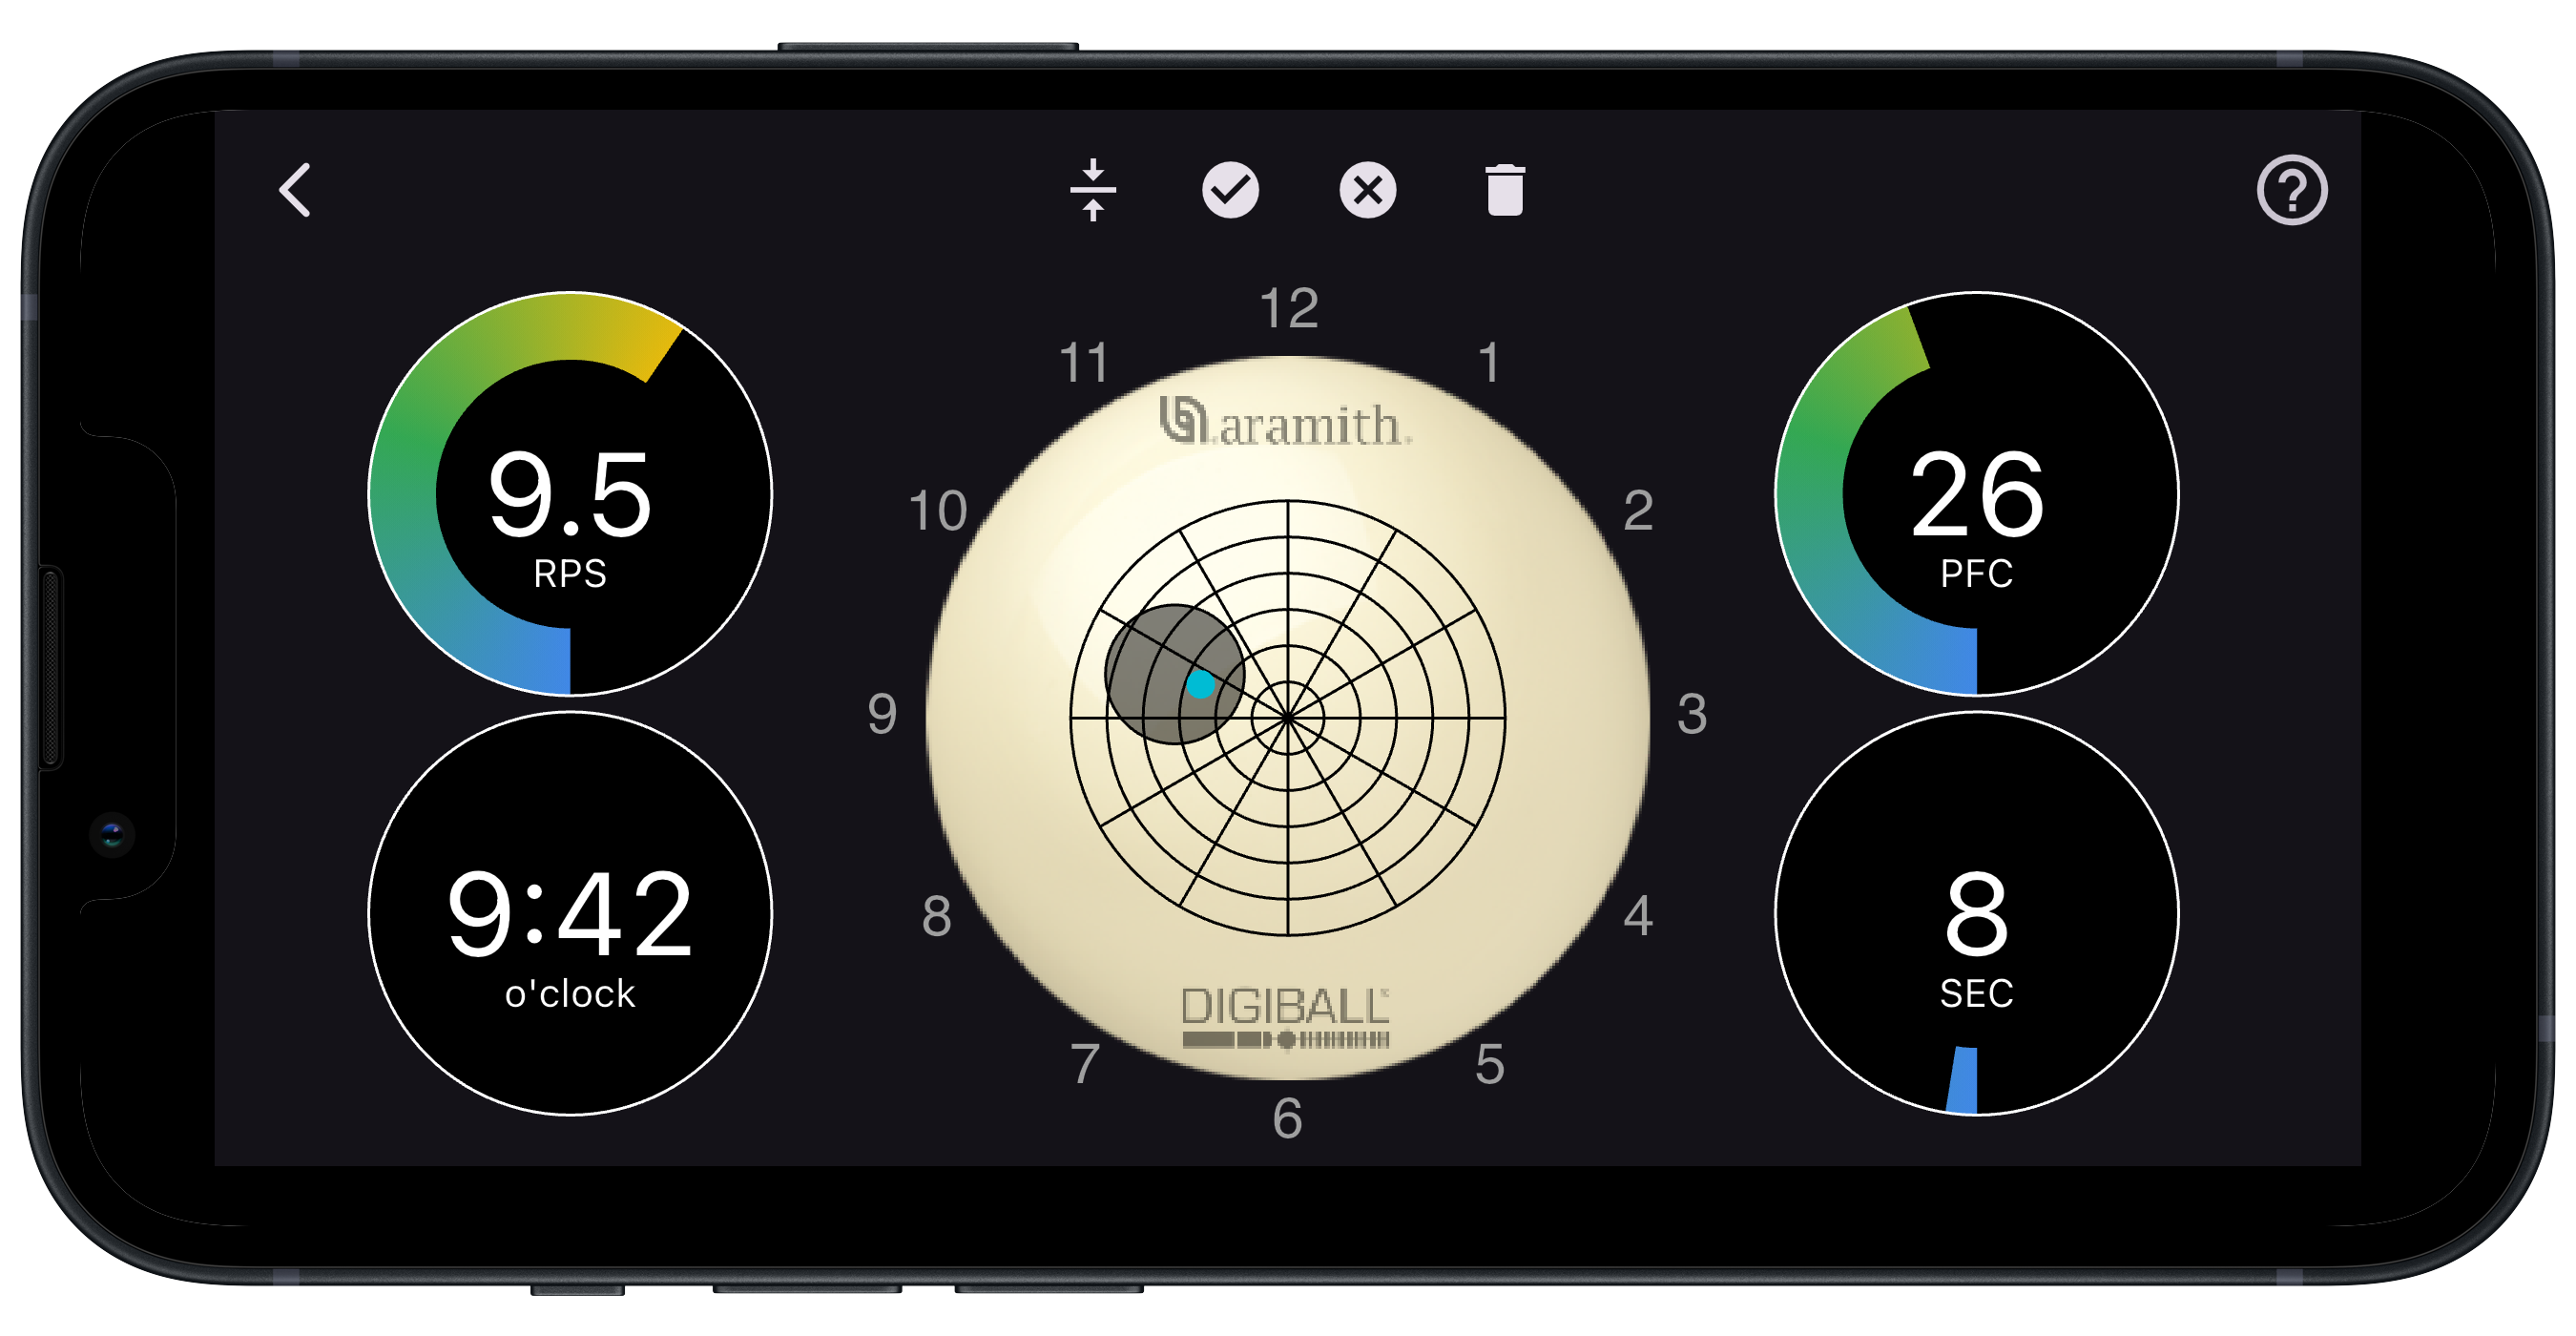
Navigate to the shooting page and start shooting. The app will show you exactly where you hit the face of the cue ball with your cue. The dark grey circle is the outline of your tip, and the bright blue dot is the tip contact point. You can also draw a prediction outline for an intended target by dragging your figer on the screen. The dials in the corners of the screen represent spin magnitude in rotations per second (rps), the percent of ball radius that you hit from center (percent from center, or PFC), the angle of English applied, as if the face of the ball were an analog clock (o'clock) and the elapsed number of seconds since the ball last stopped moving (sec). More detailed information is available pressing the question mark '?' with the circle around it in the upper right corner of the screen.
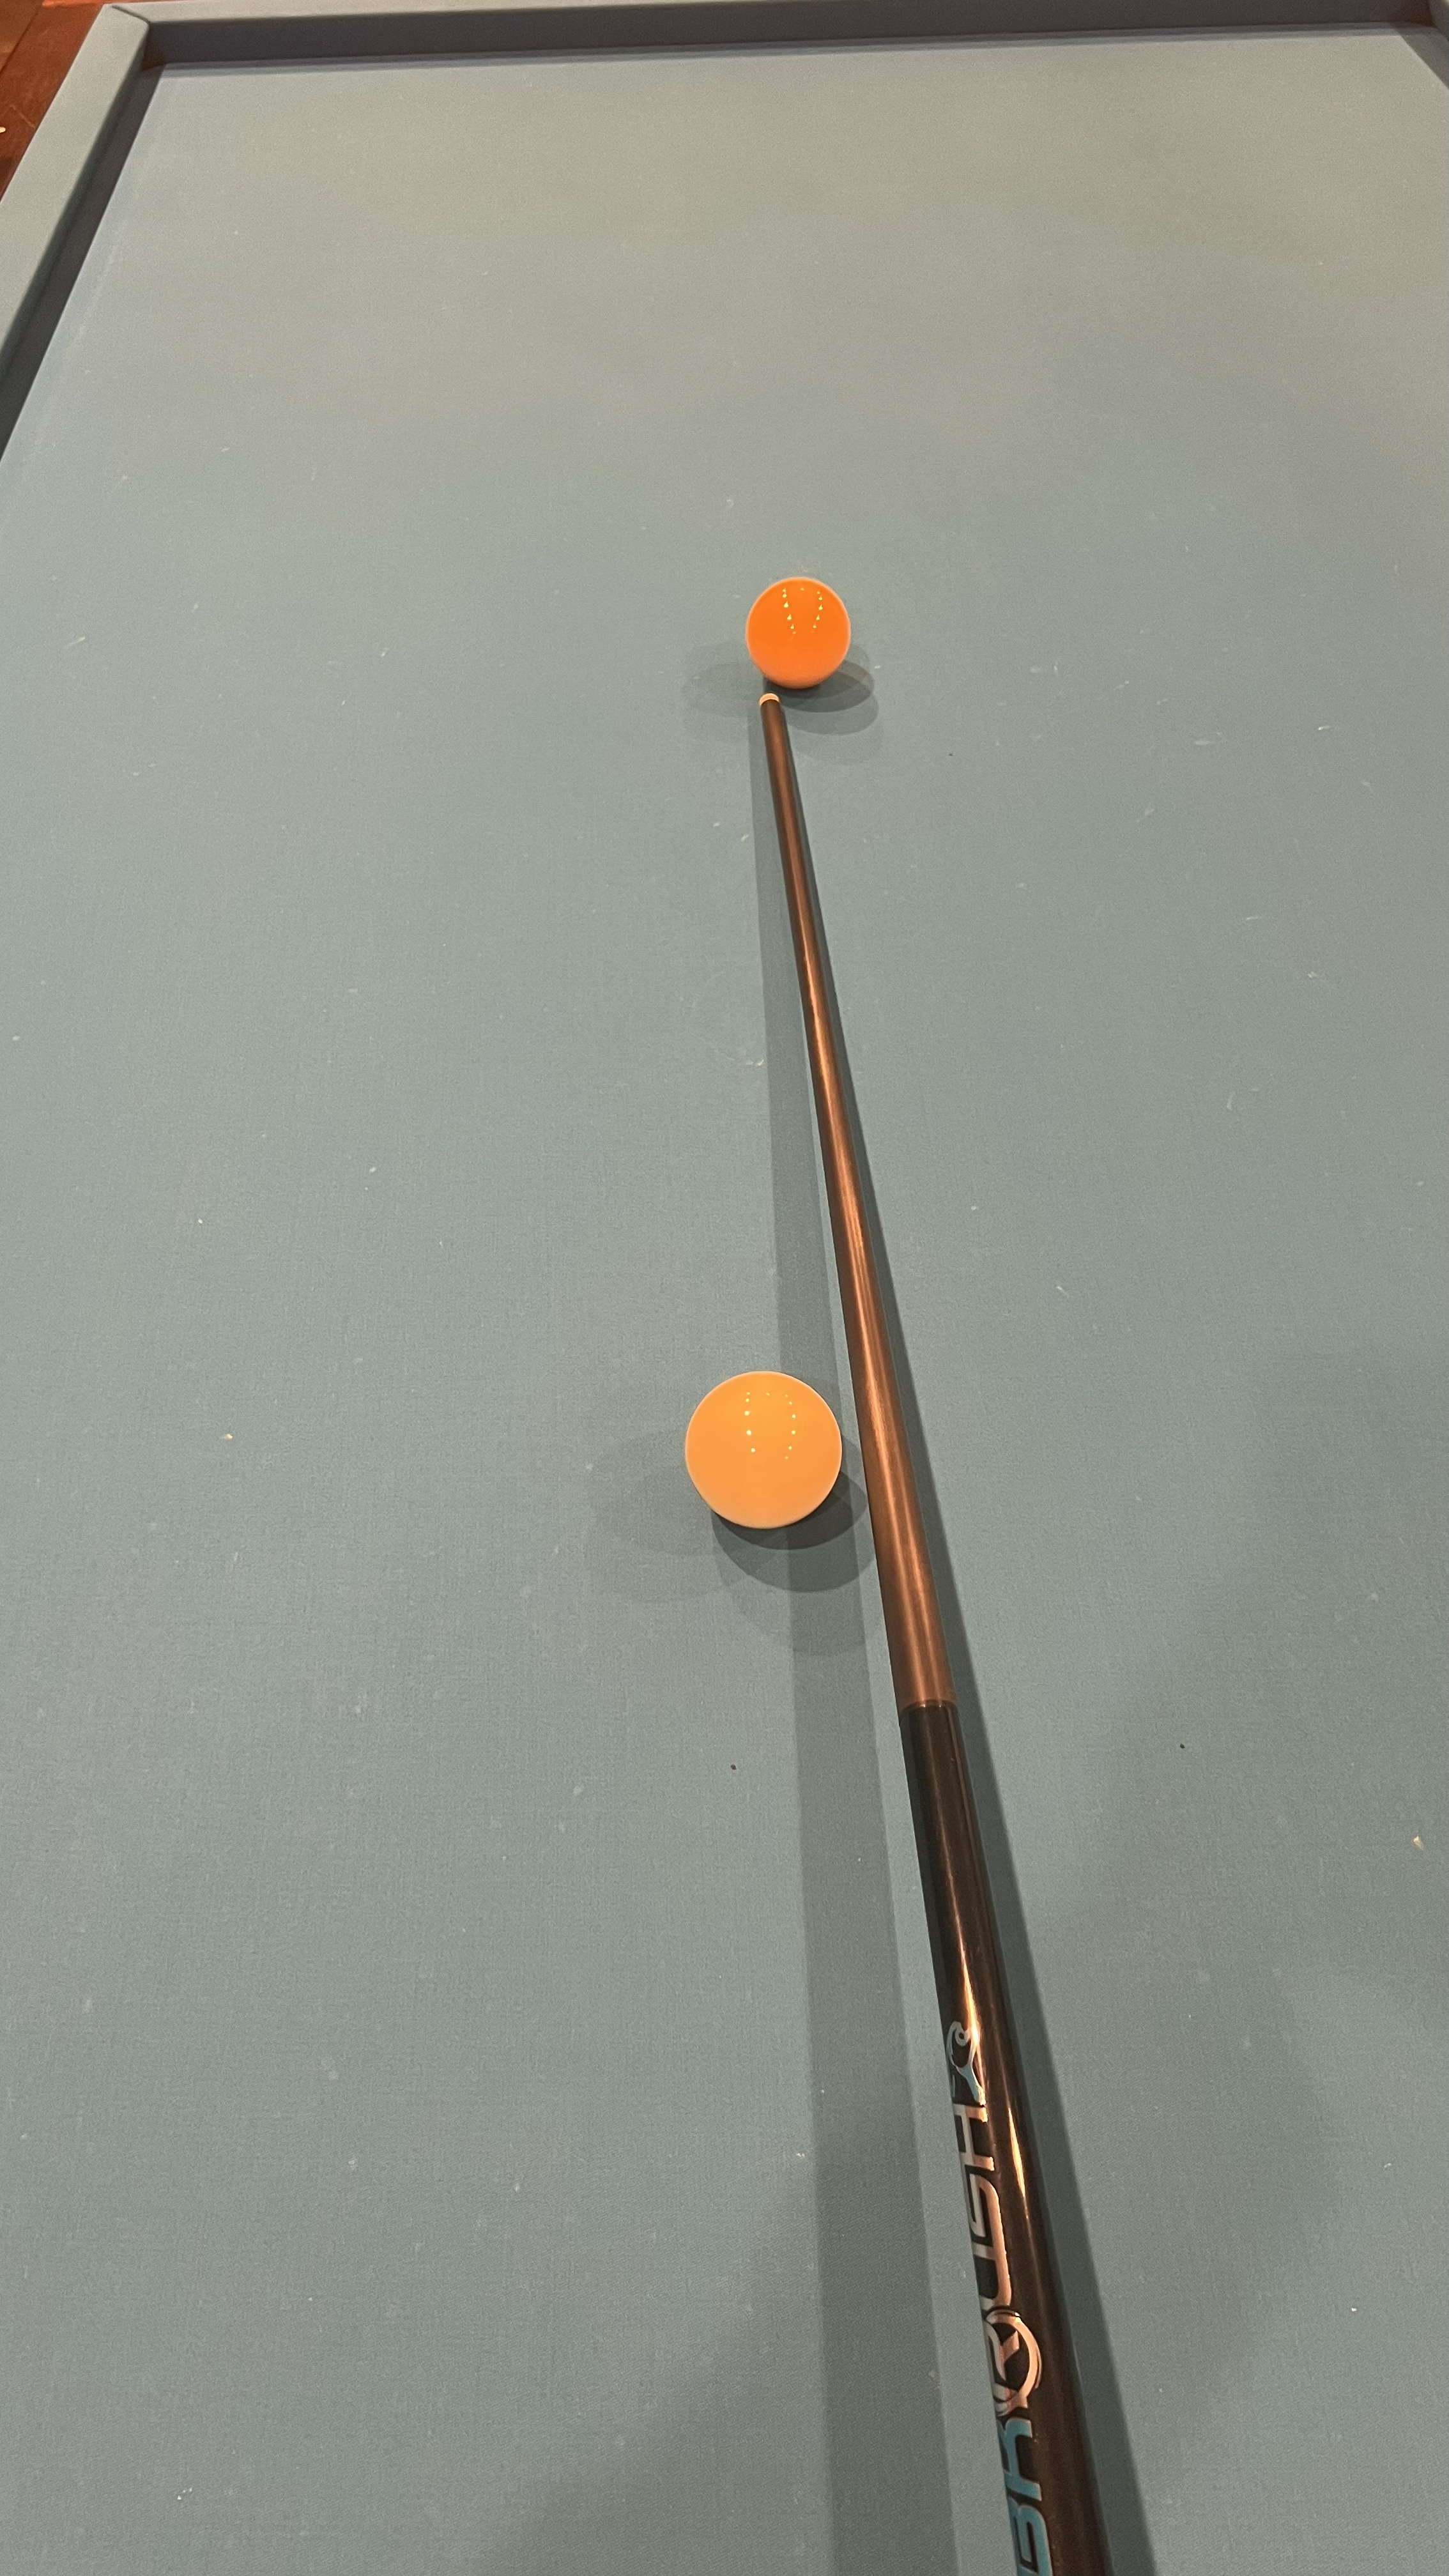
Optionally, you can accurately measure shot speed. First, use your cue as a visual aid to approximate the distance between the object ball and the DigiBall.
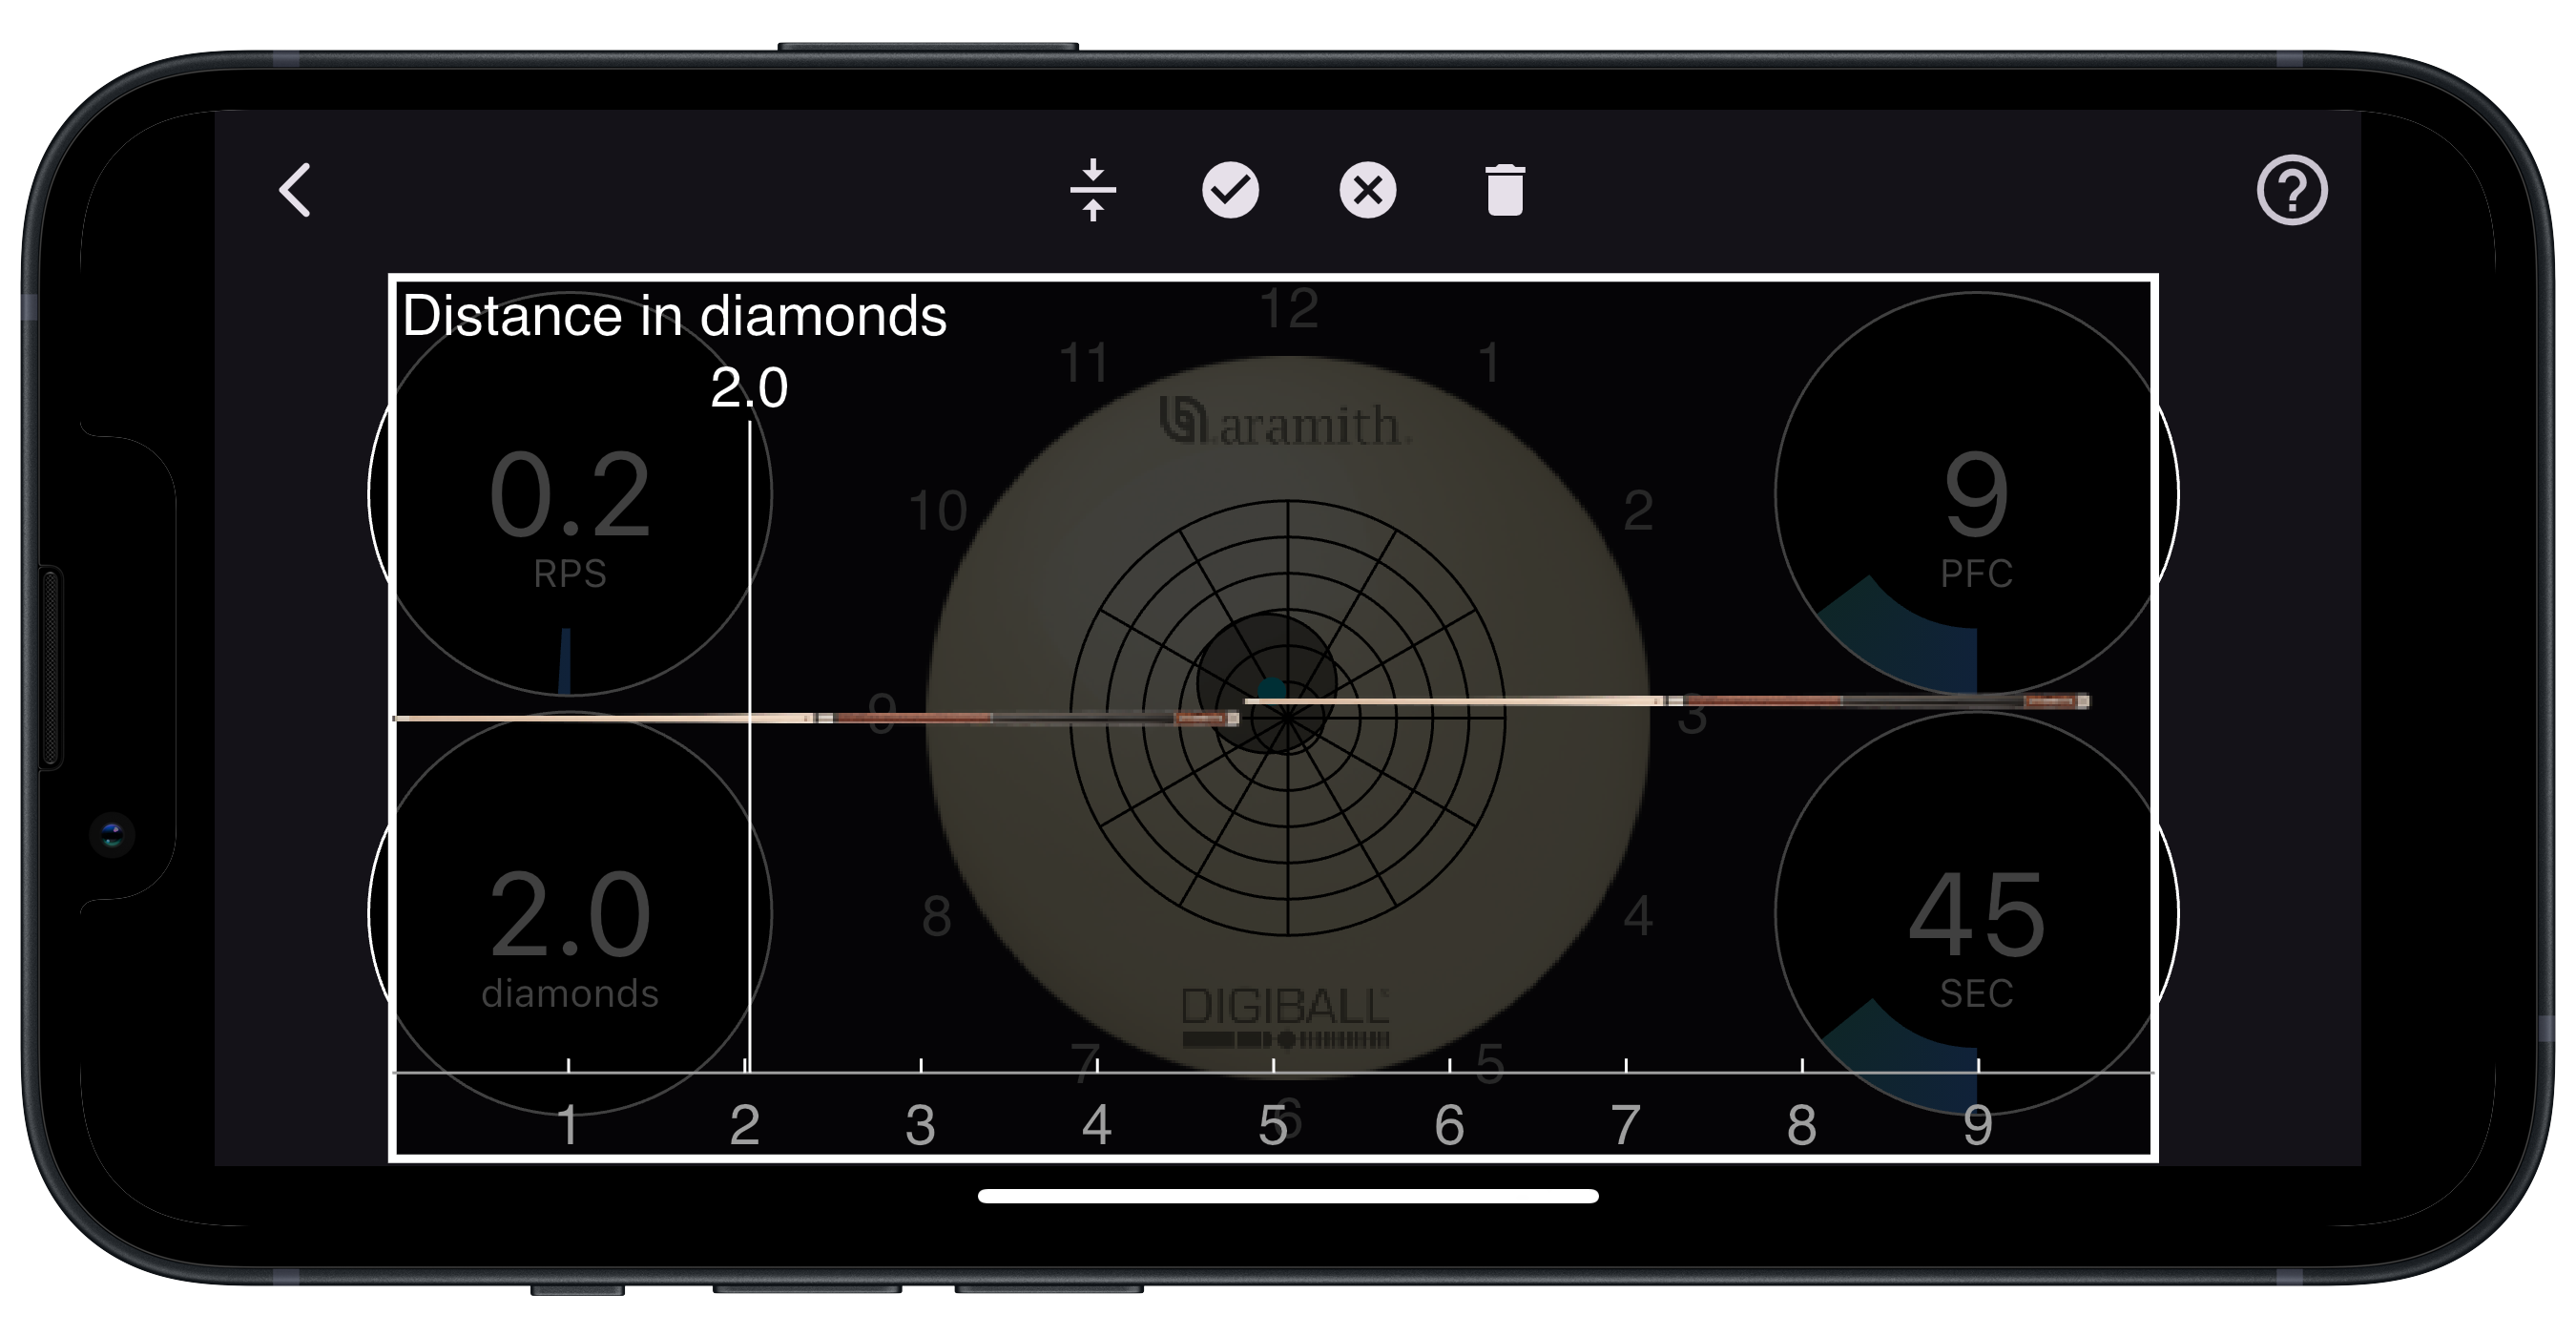
Press and hold the lower left dial (o'clock), and slide your finger left and right. A distance slider will appear as shown in the image. Match the location of the slider on the picture of your cue to the visual reference you made. Or, you can count the number of diamonds manually.
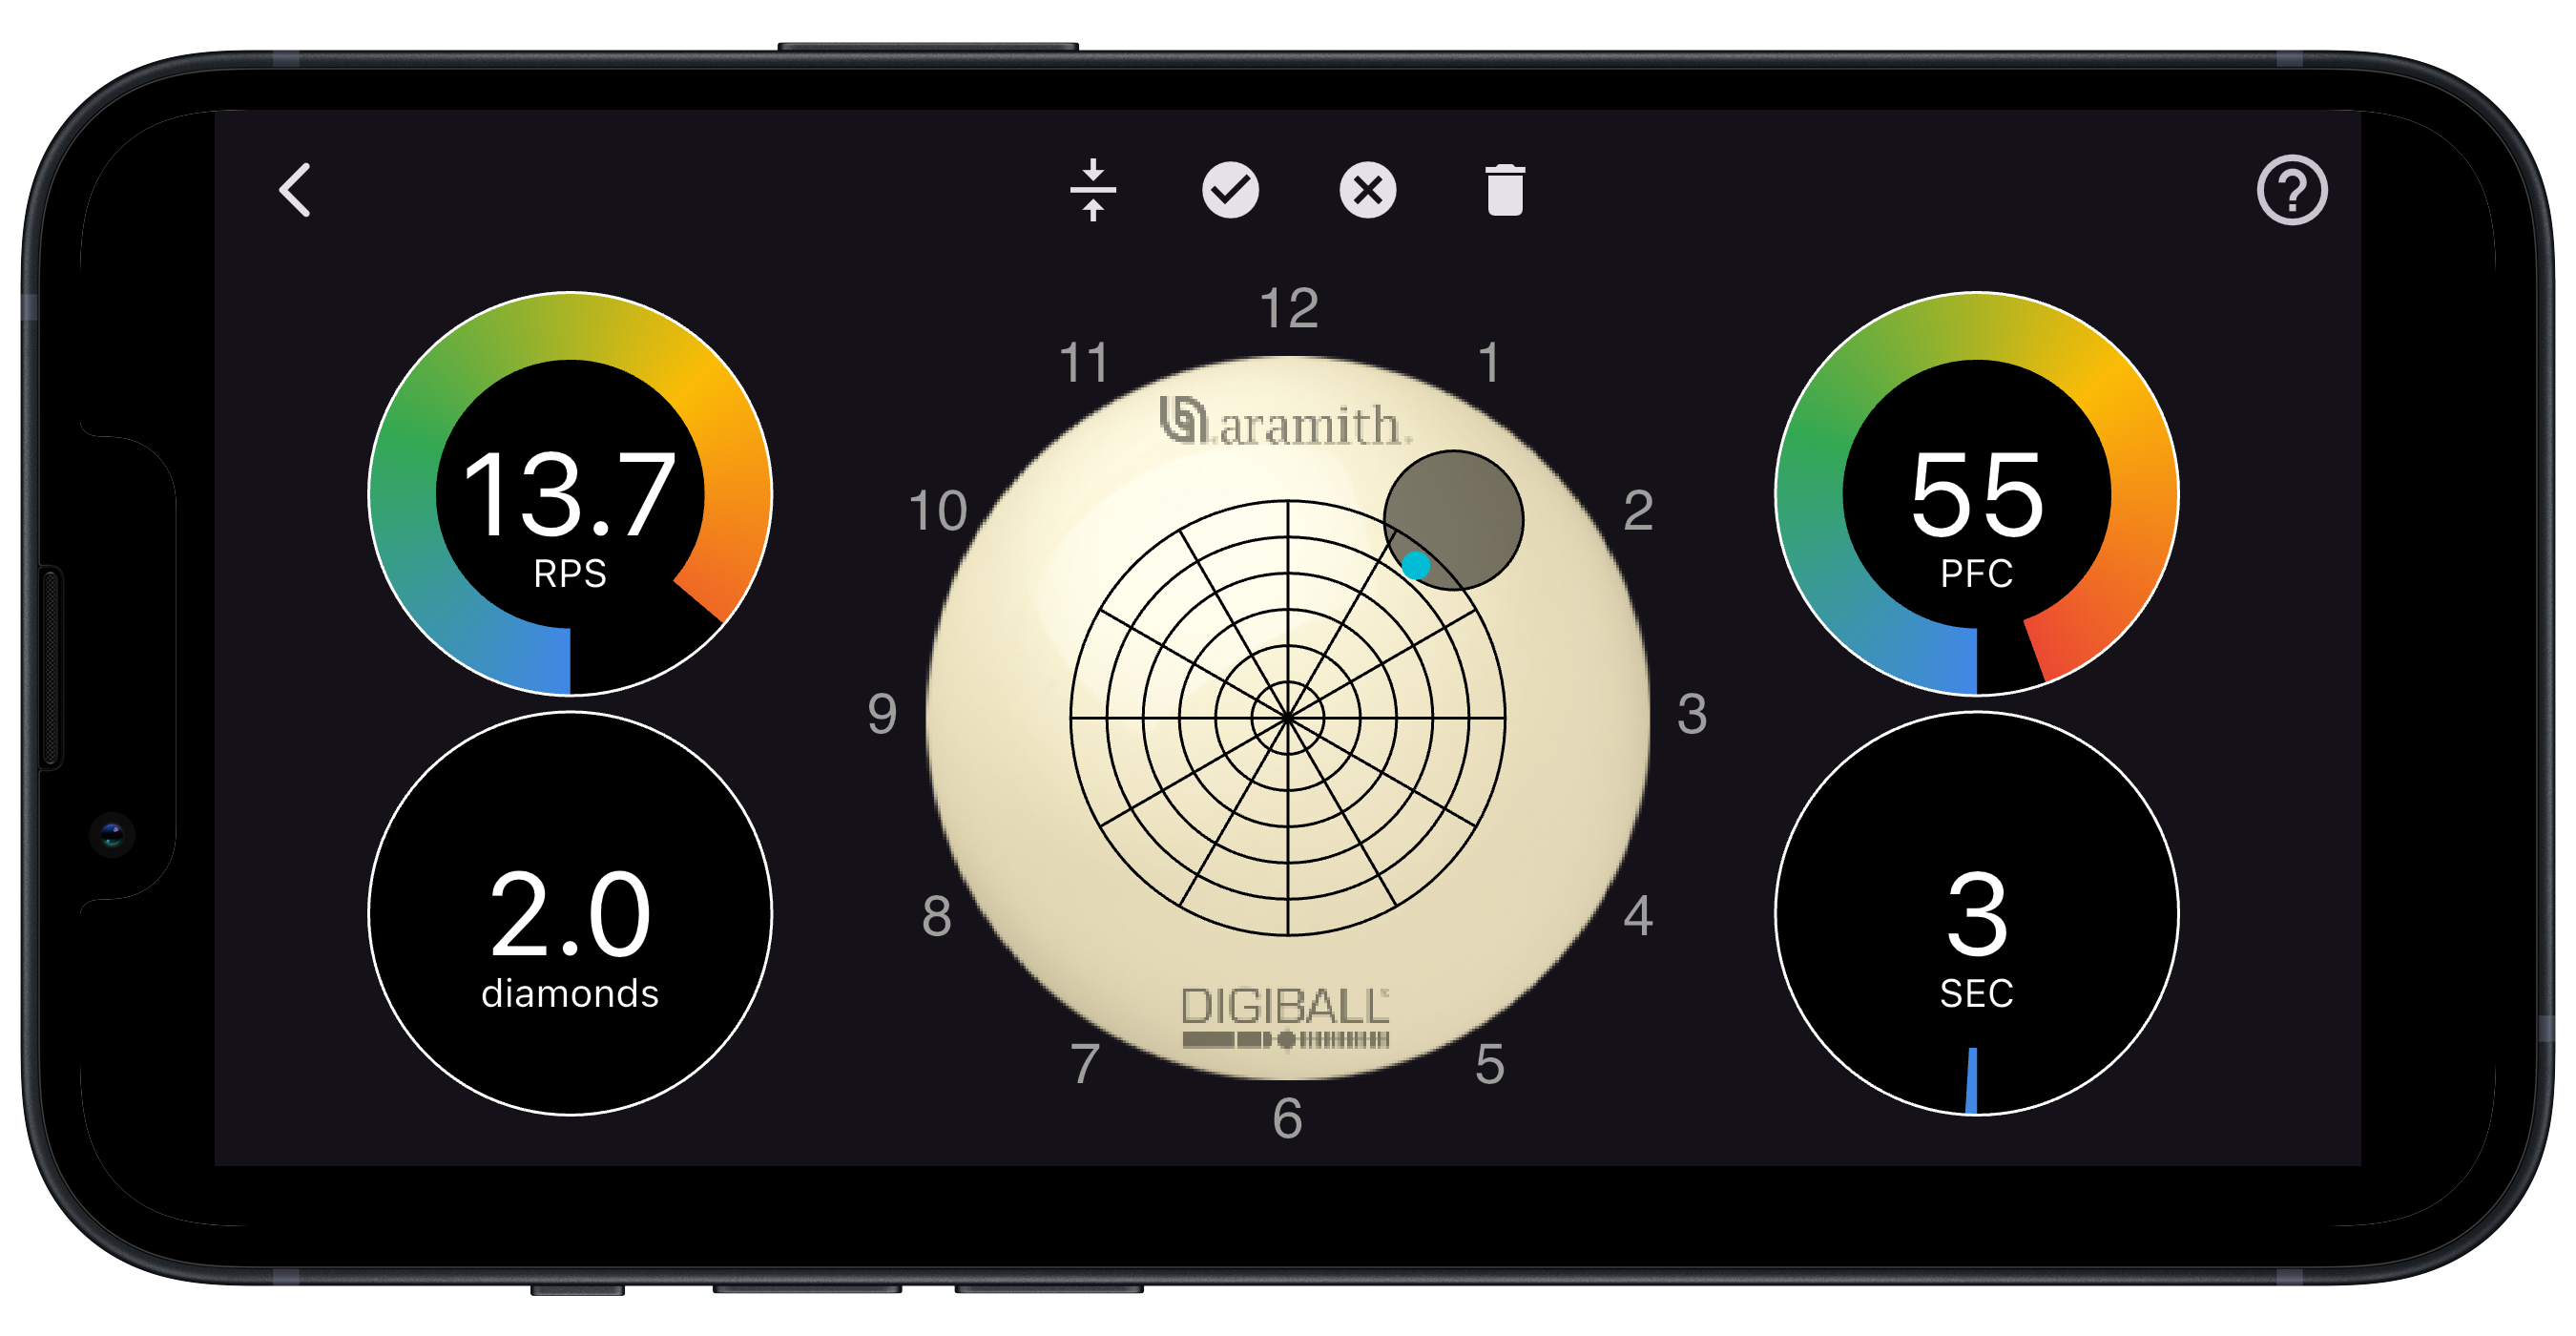
Shoot your shot and wait for the data to arrive from the DigiBall to the app.
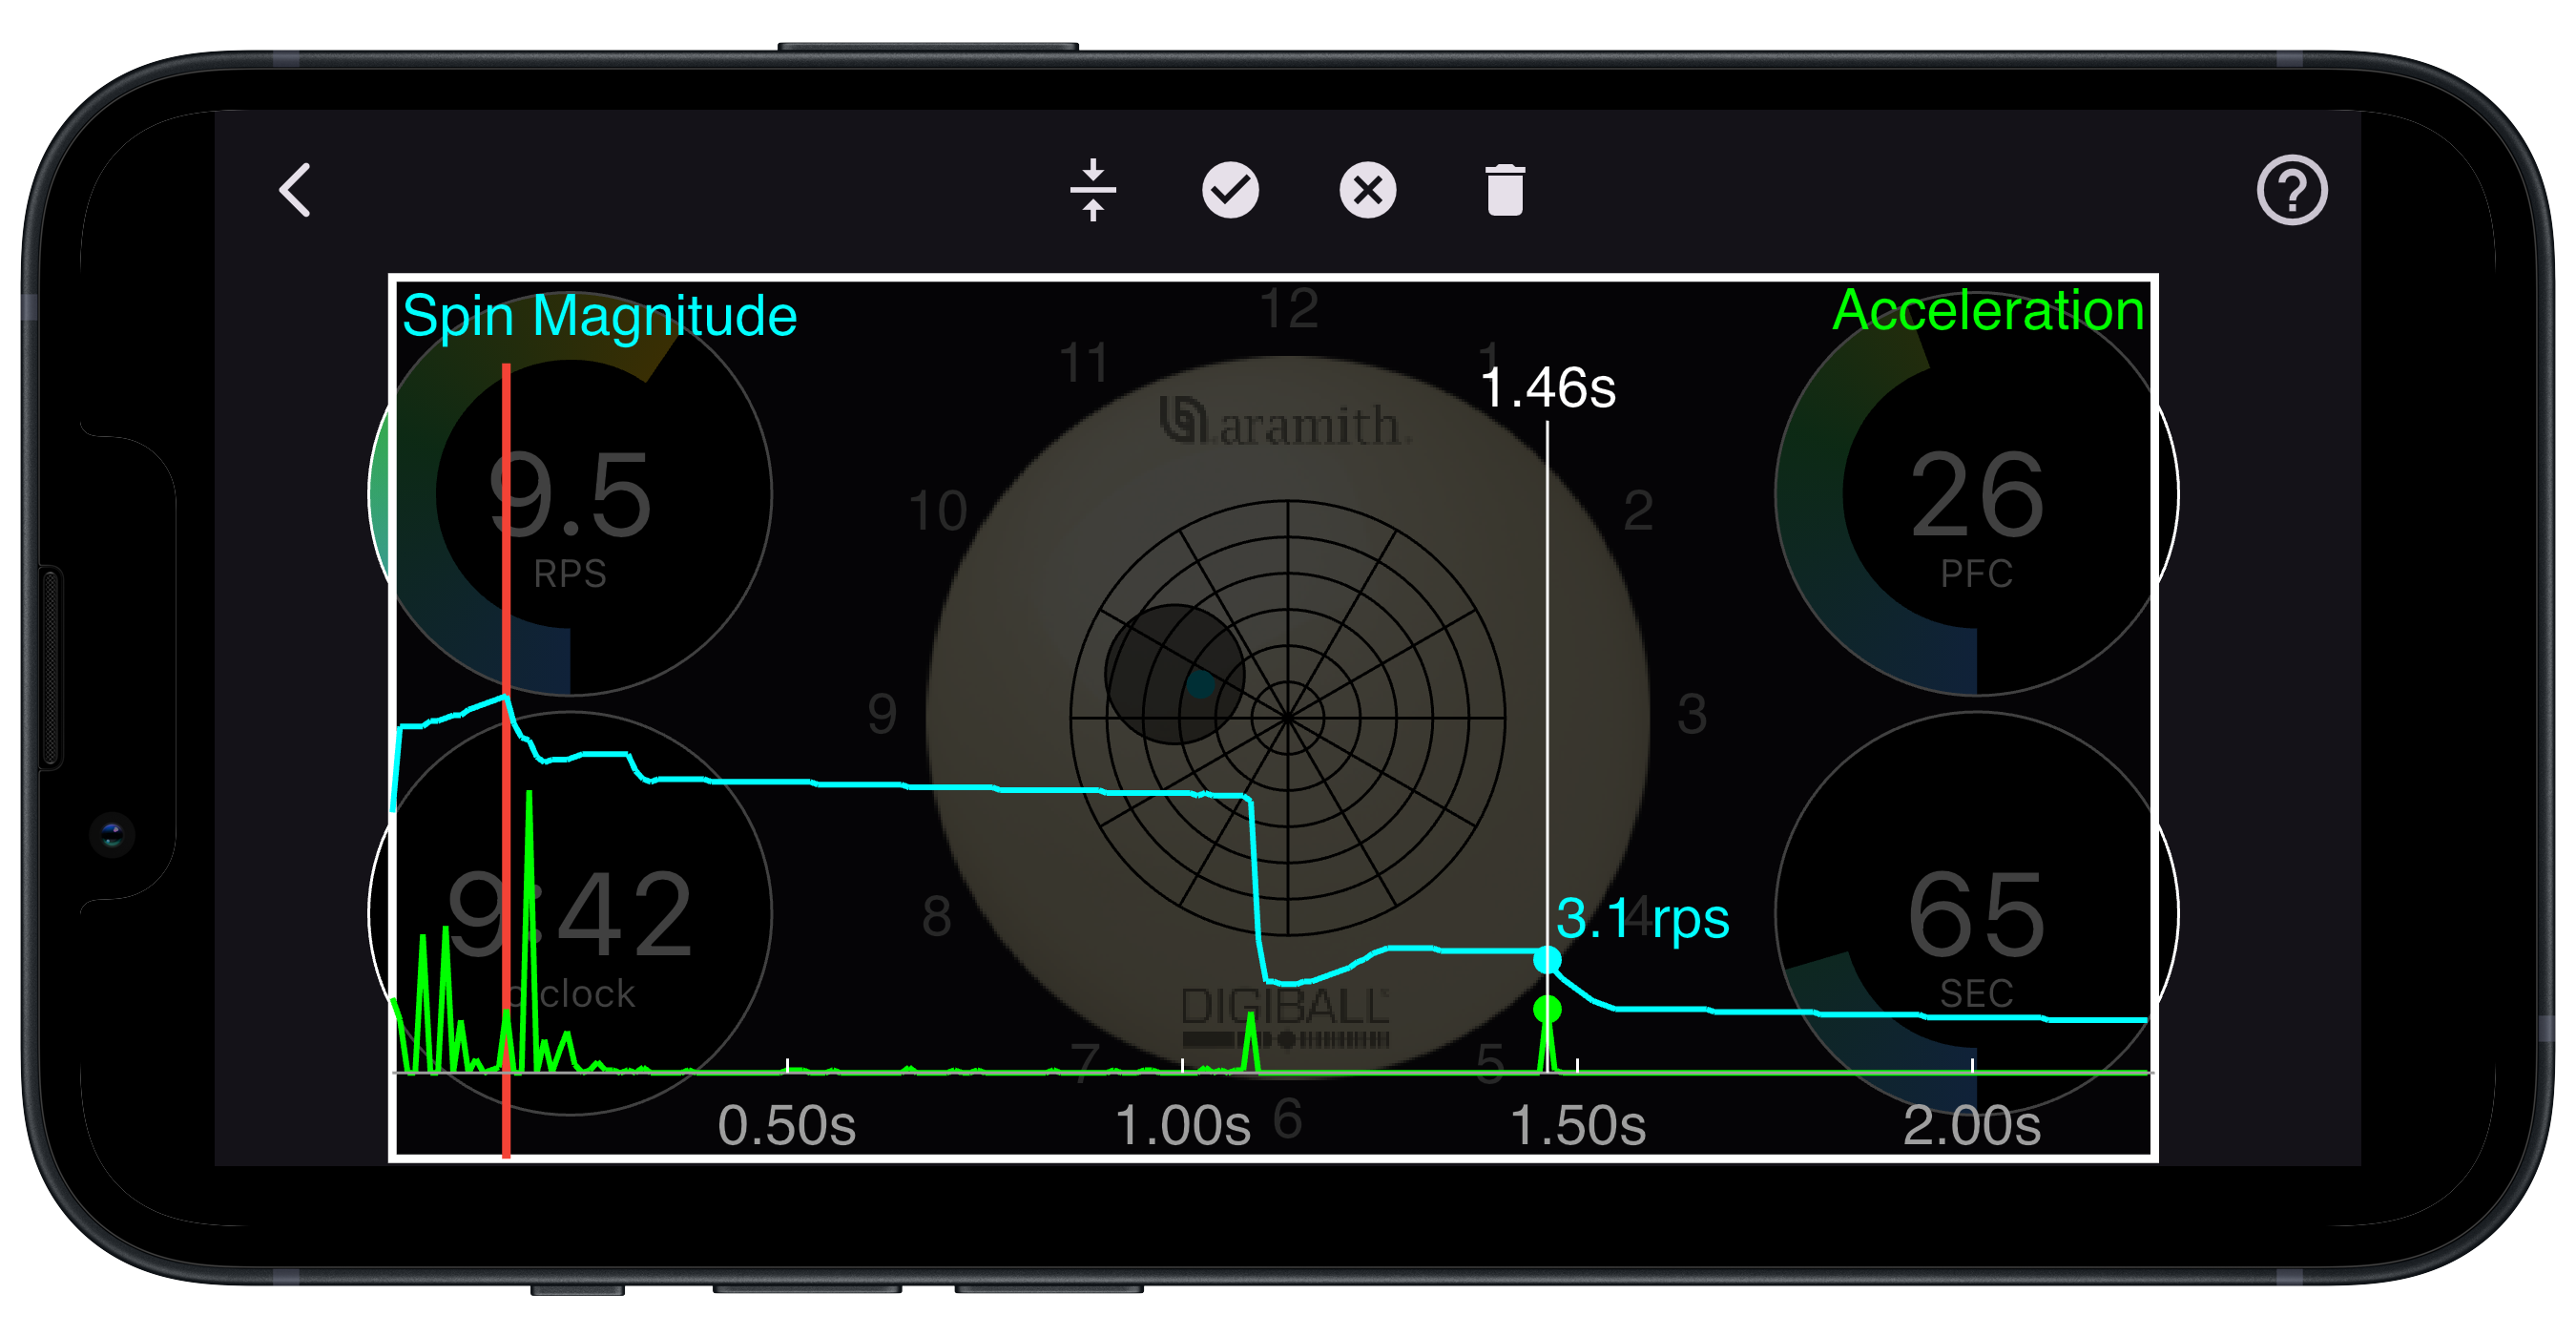
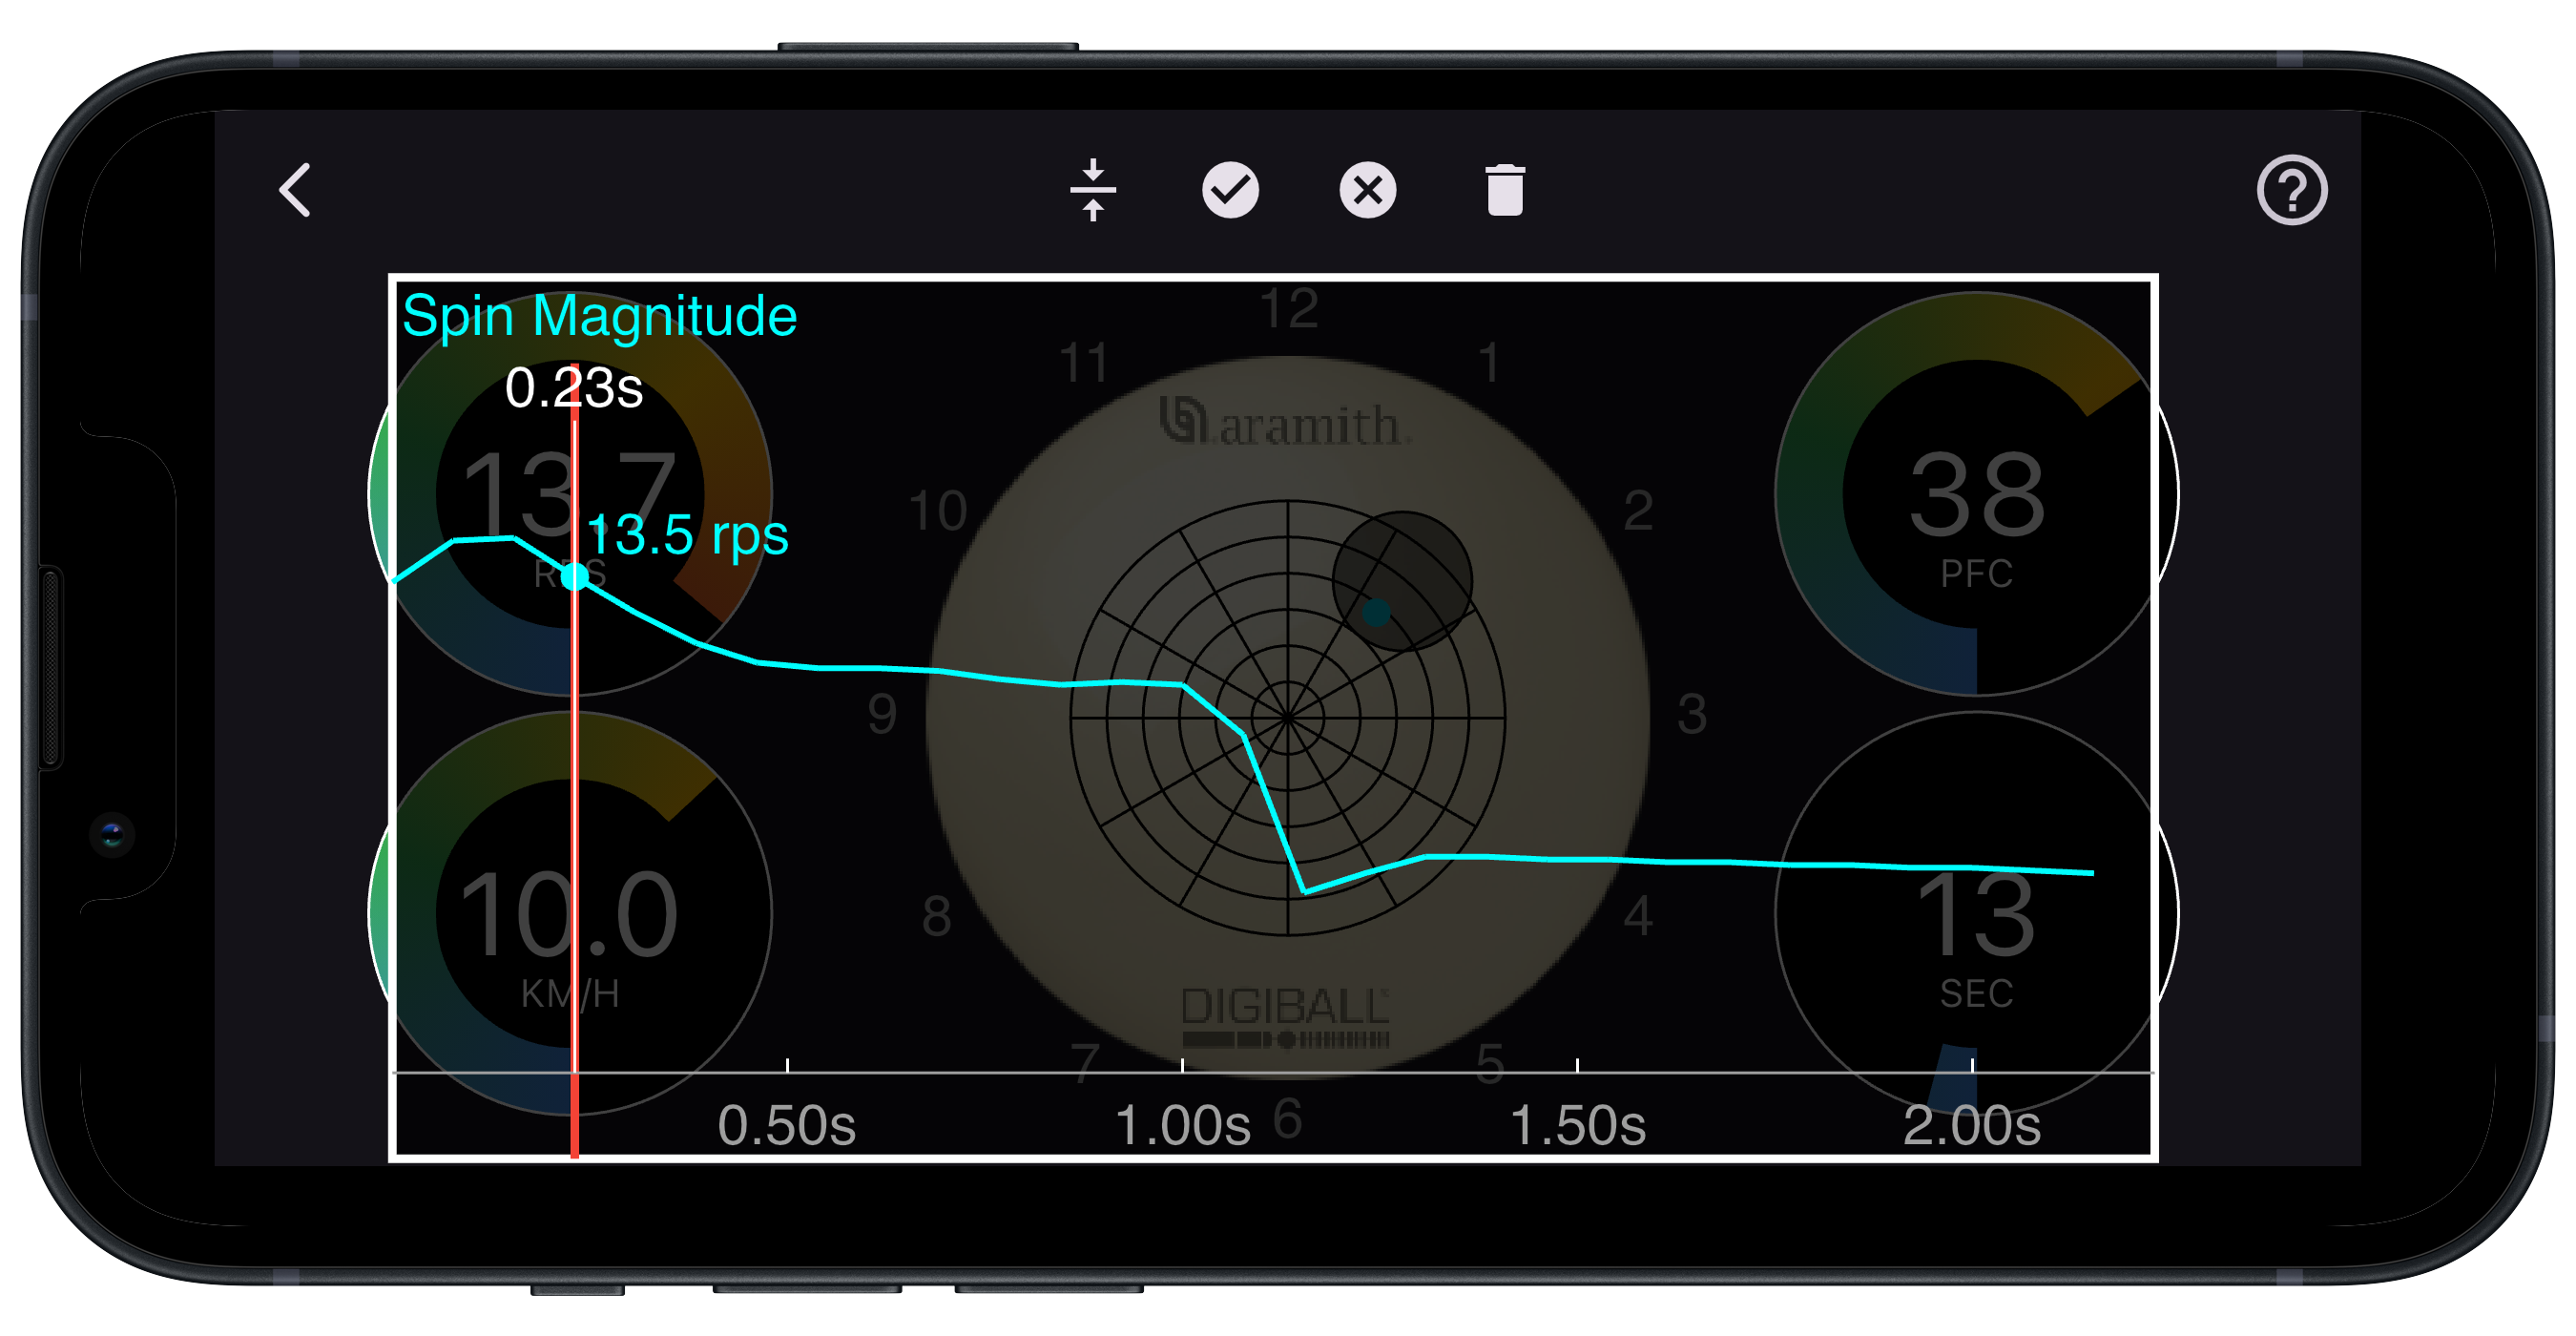
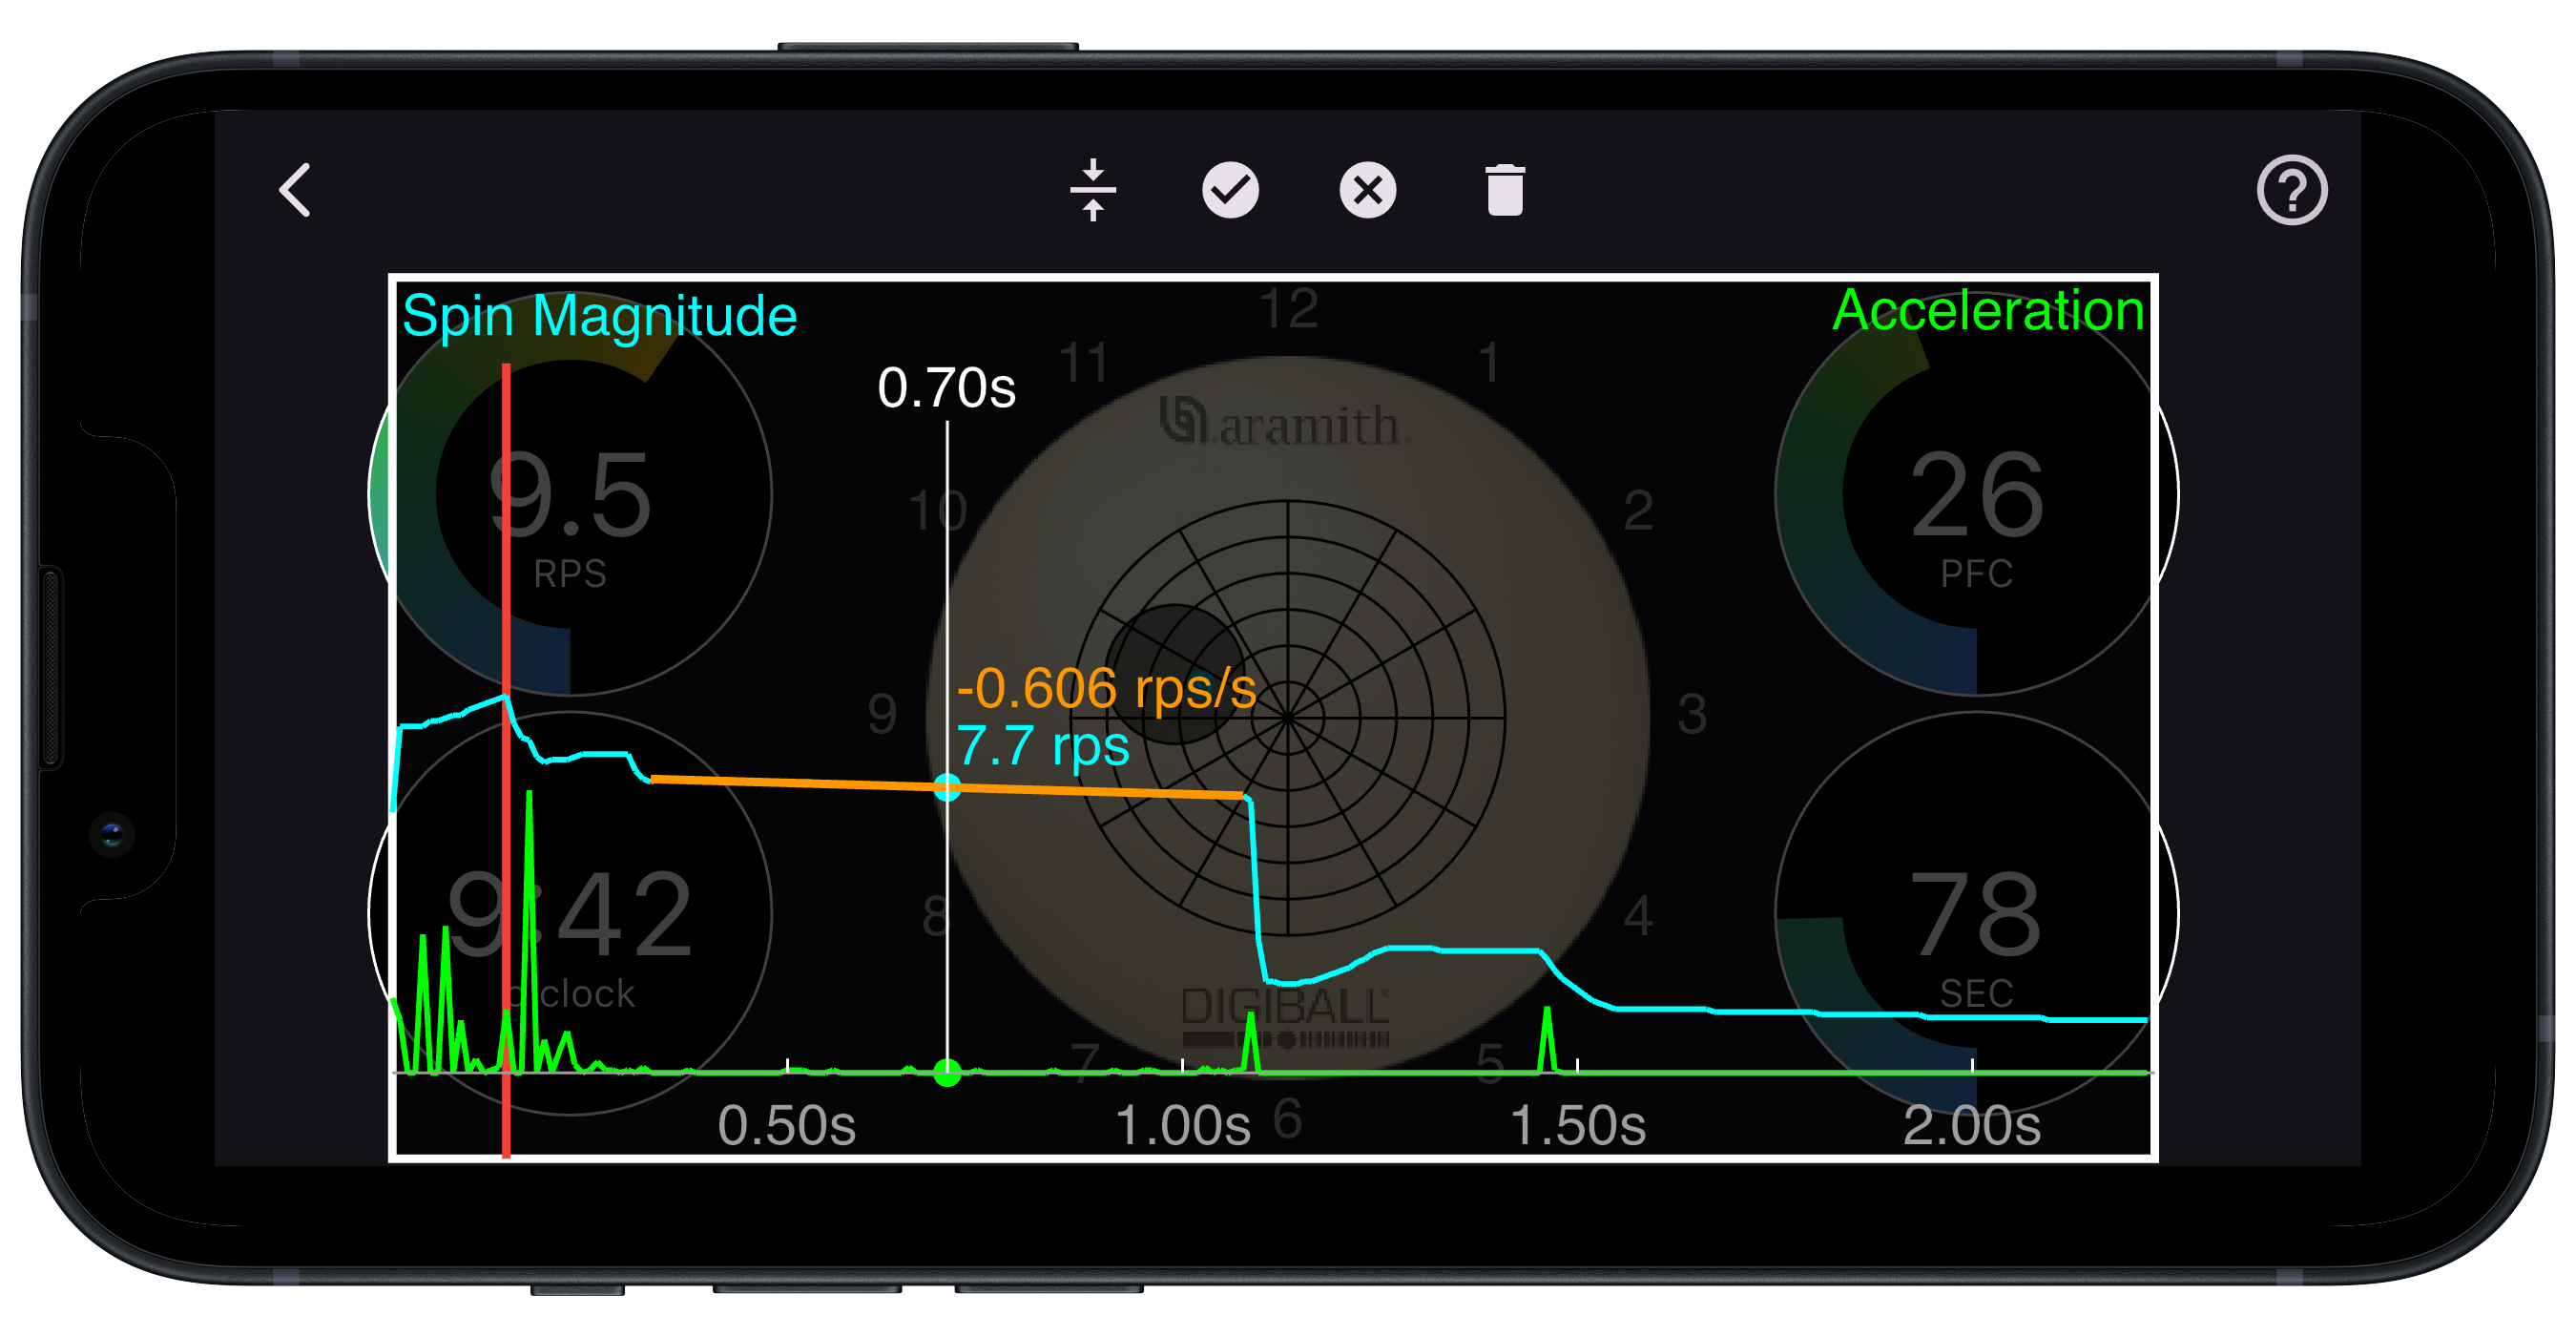
Press and hold the lower right dial (sec), and slide your finger left and right. A spin magnitude slider will appear as shown in the image. This data shows the evolution of the spin of the ball over a period of 2.2 seconds. The first collision detected after you hit the DigiBall is shown as a red vertical line. Slide the cursor to select the red line.
The measured shot speed will now be displayed in the lower left dial. You can change the units of speed measurement on the Settings page. The app will remember the last distance measured so if you are doing a drill or want to measure your breakshot from the same location, you do not need to re-enter the distance.
Press the back arrow and navigate to the Settings page. Here you will be able to change settings of the app and of the DigiBall. Press the Information icon to show more information about the setting.
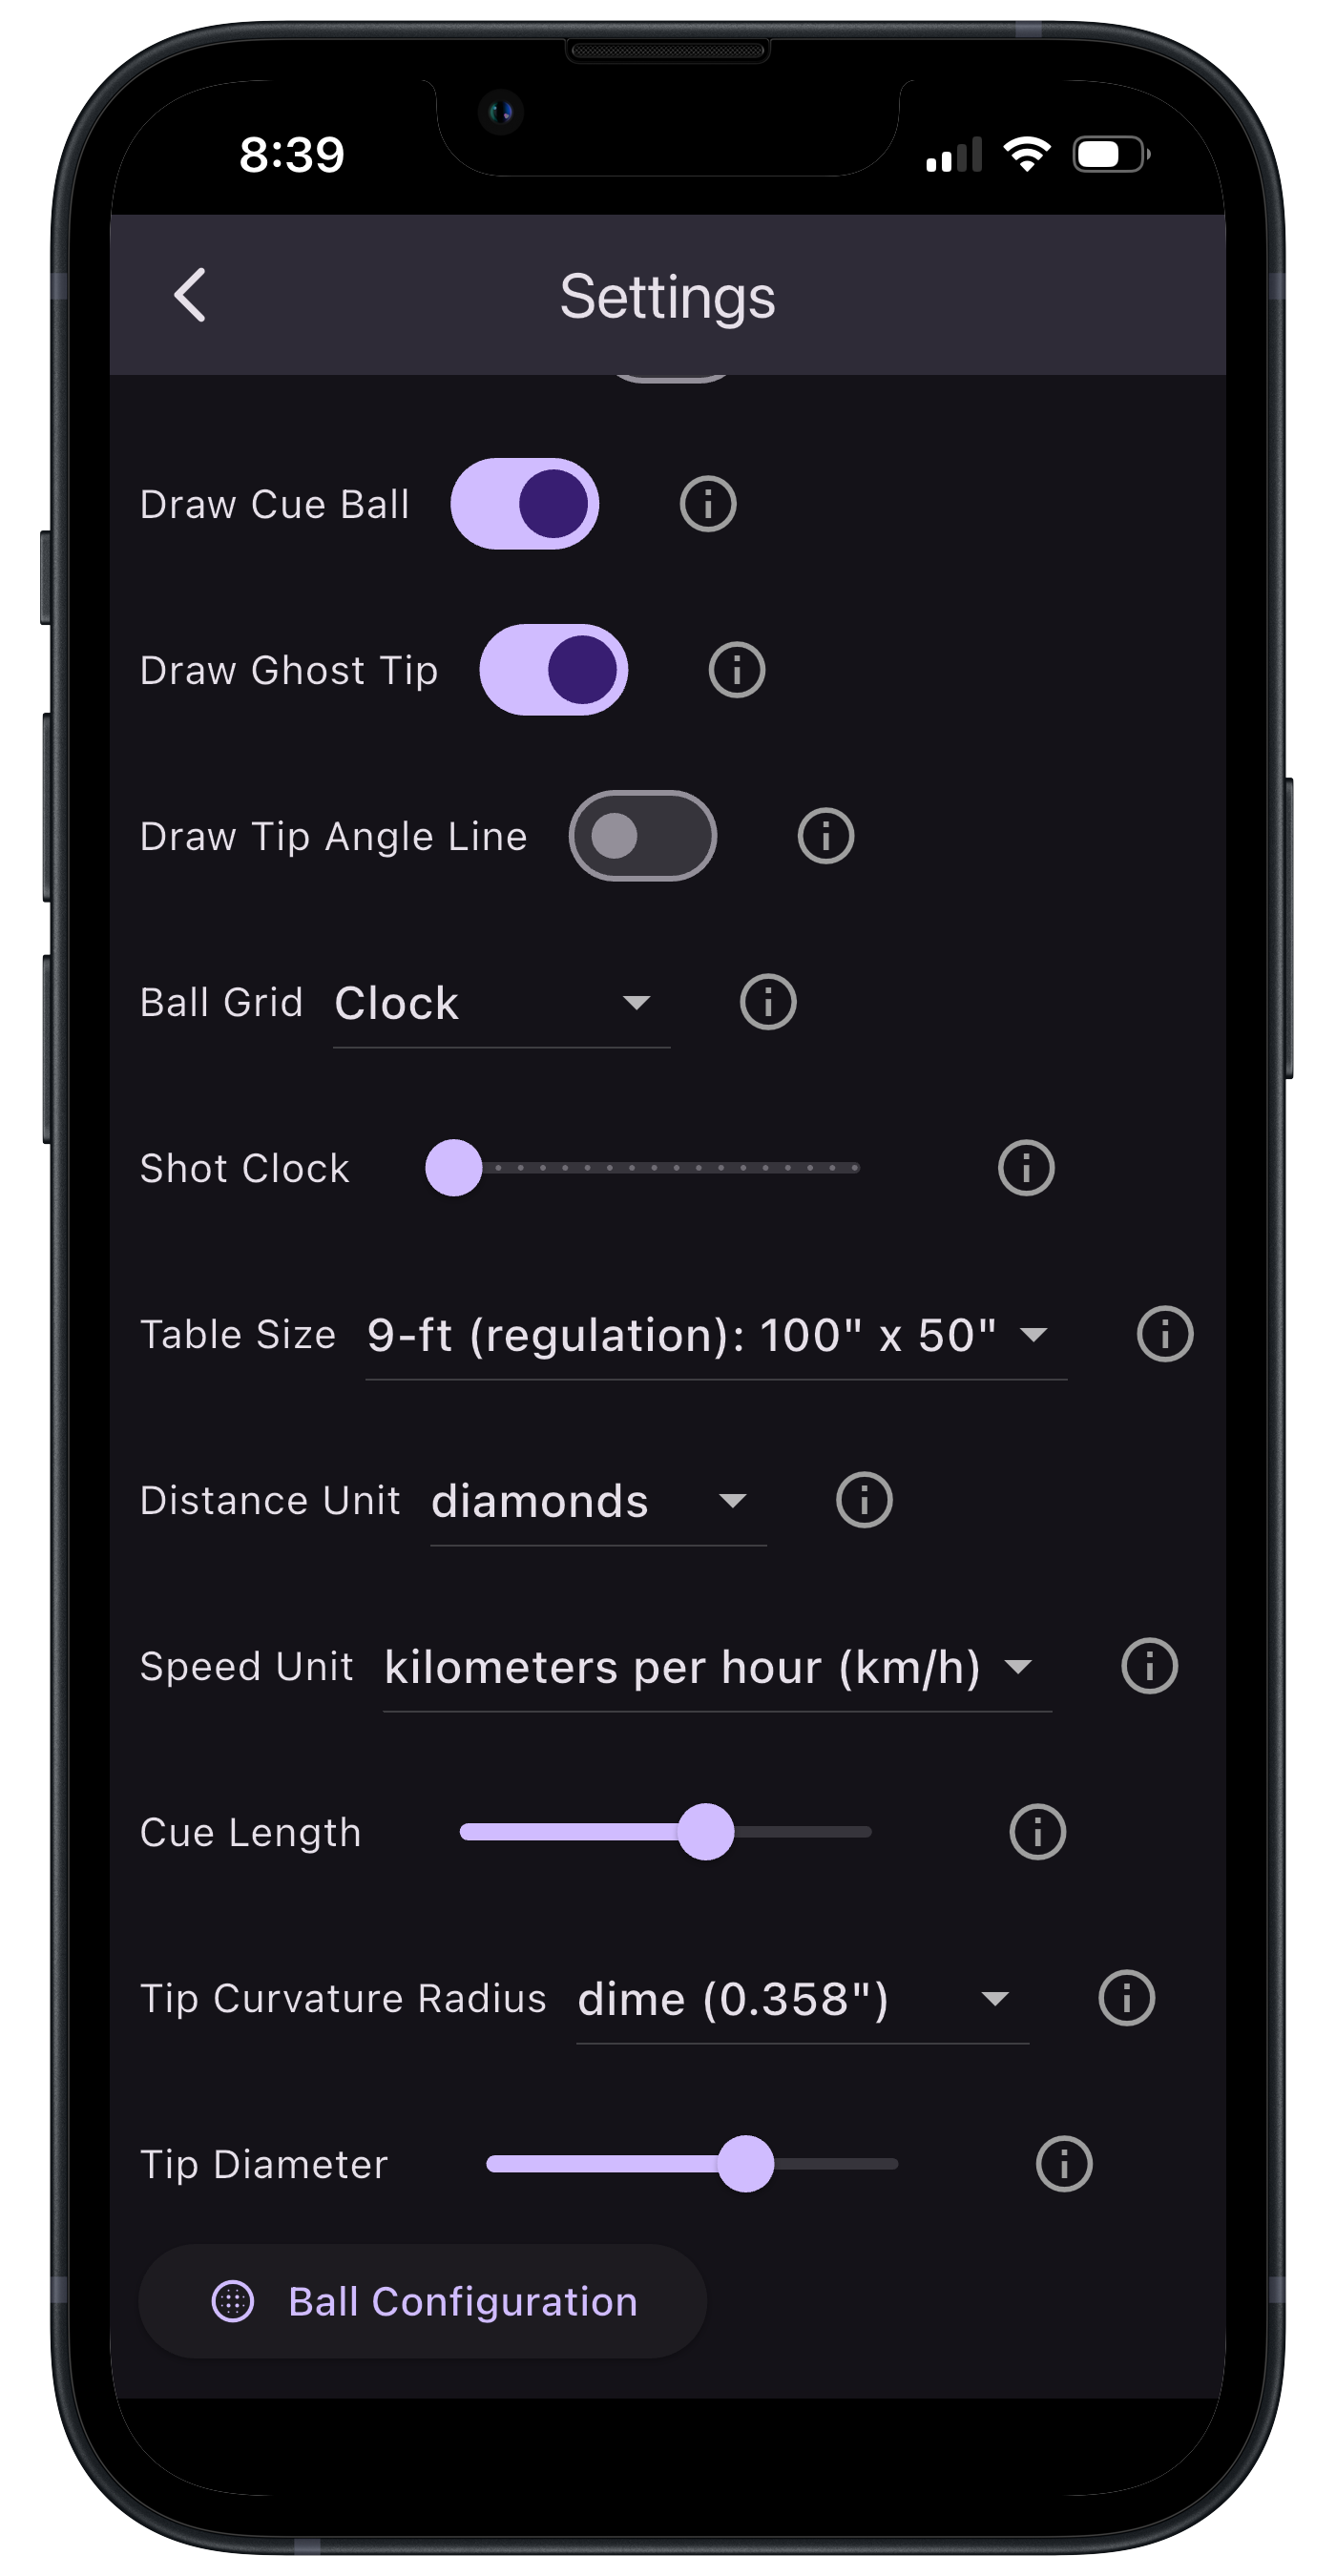
There are a few parameters that you can change in the DigiBall itself. This mostly has to do with the time series data that is visible only when you press the time dial (sec) and slide your finger back and forth to view it. You can increase the resolution of this data, show acceleration data, and change the time delay and threshold of the first collision detection event. These are interesting mostly for advanced users.

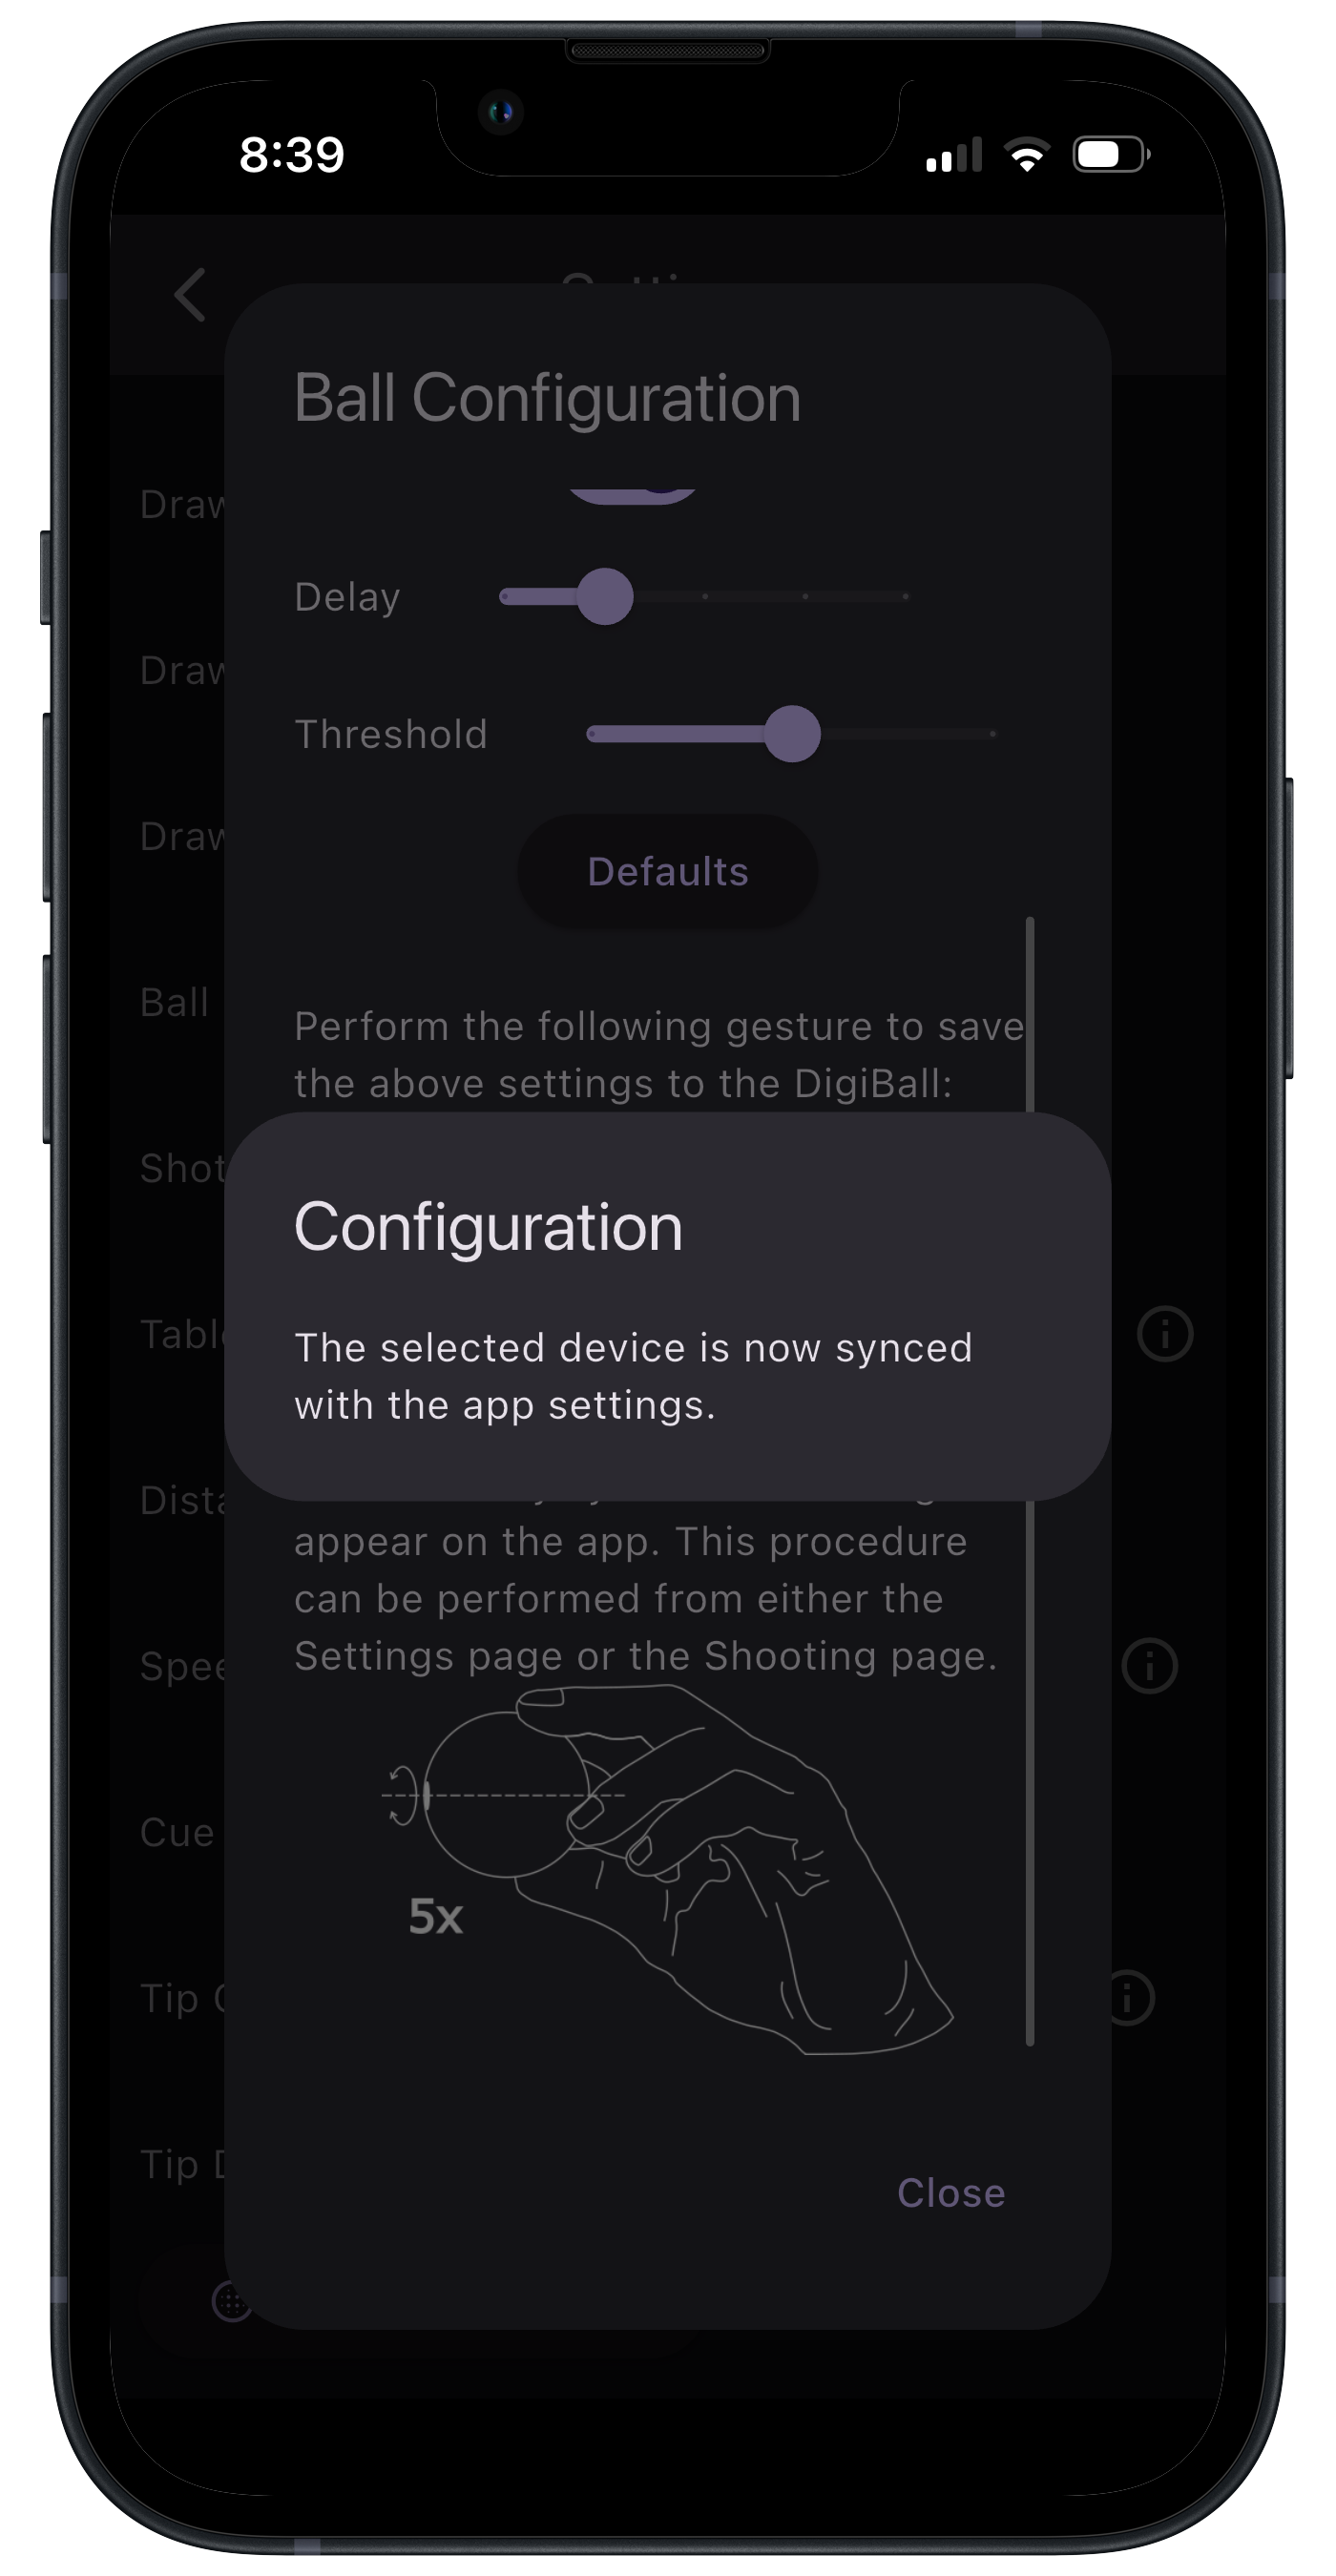
A message will appear if you successfully reconfigure the ball settings.
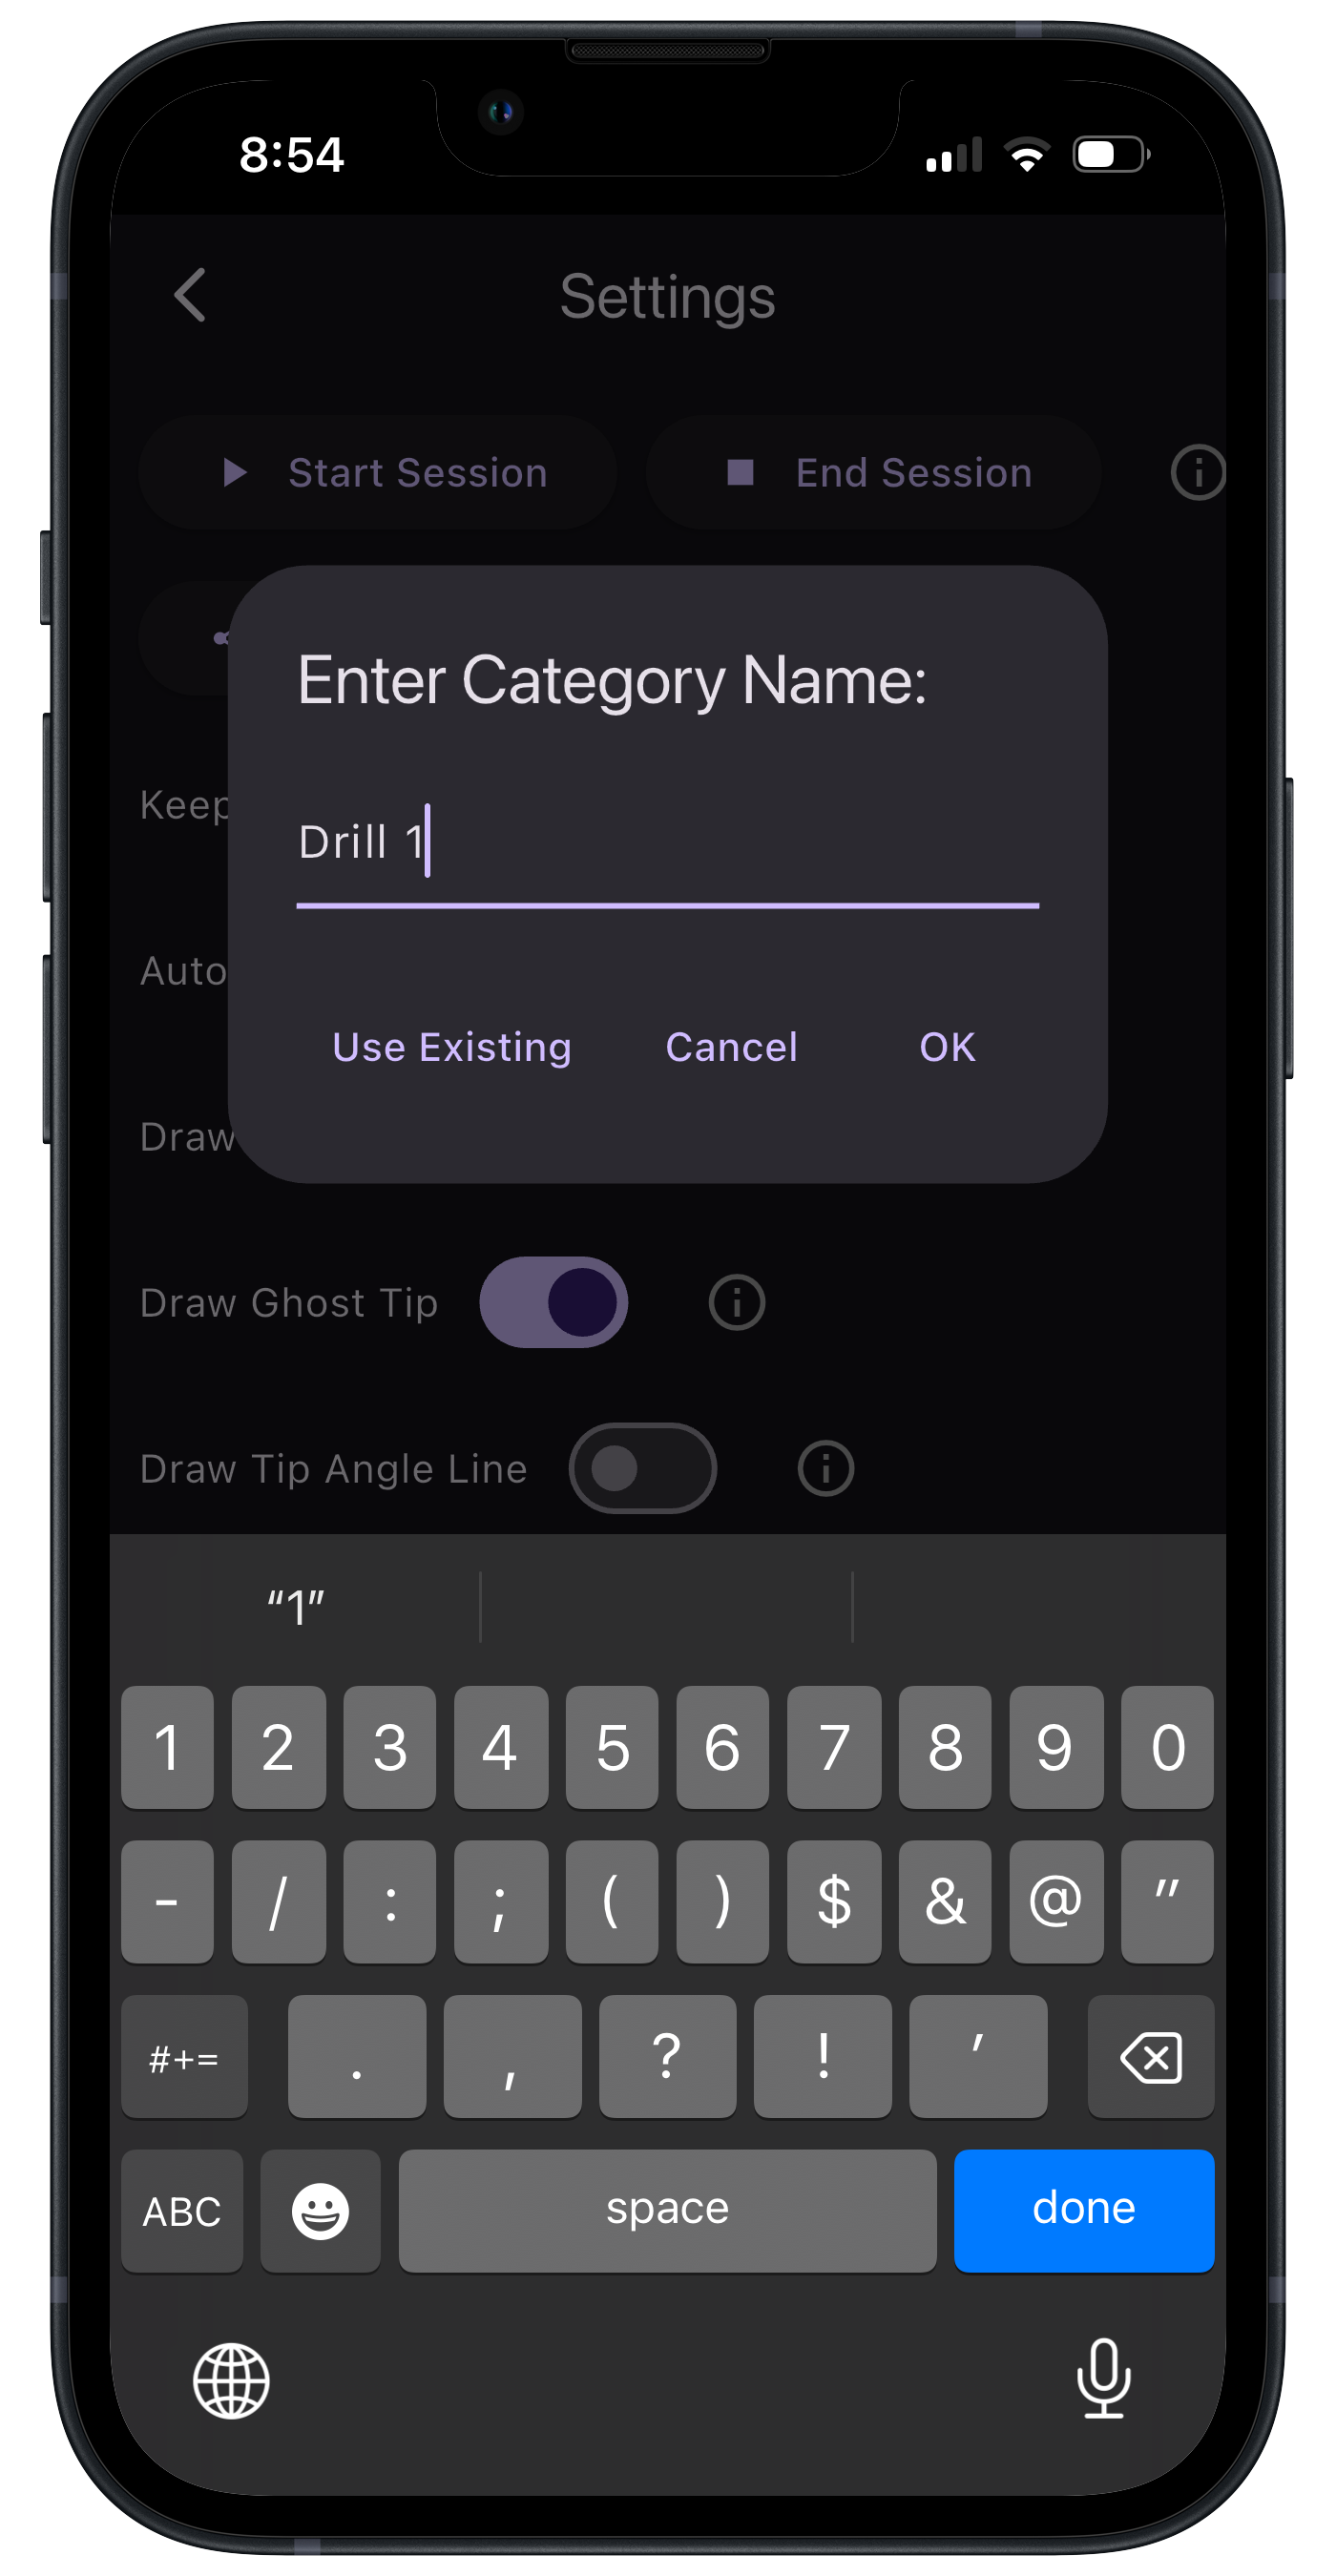
Also on the Settings page is the ability to start and stop Sessions. A Session is a group of shots in which analysis can be performed and organized. Press Start Session and enter the name of a drill, event, practice session, game, match, or whatever you want to use for a label. You may also select to add data to a previous Session by selecting Use Existing. Clock OK when done.
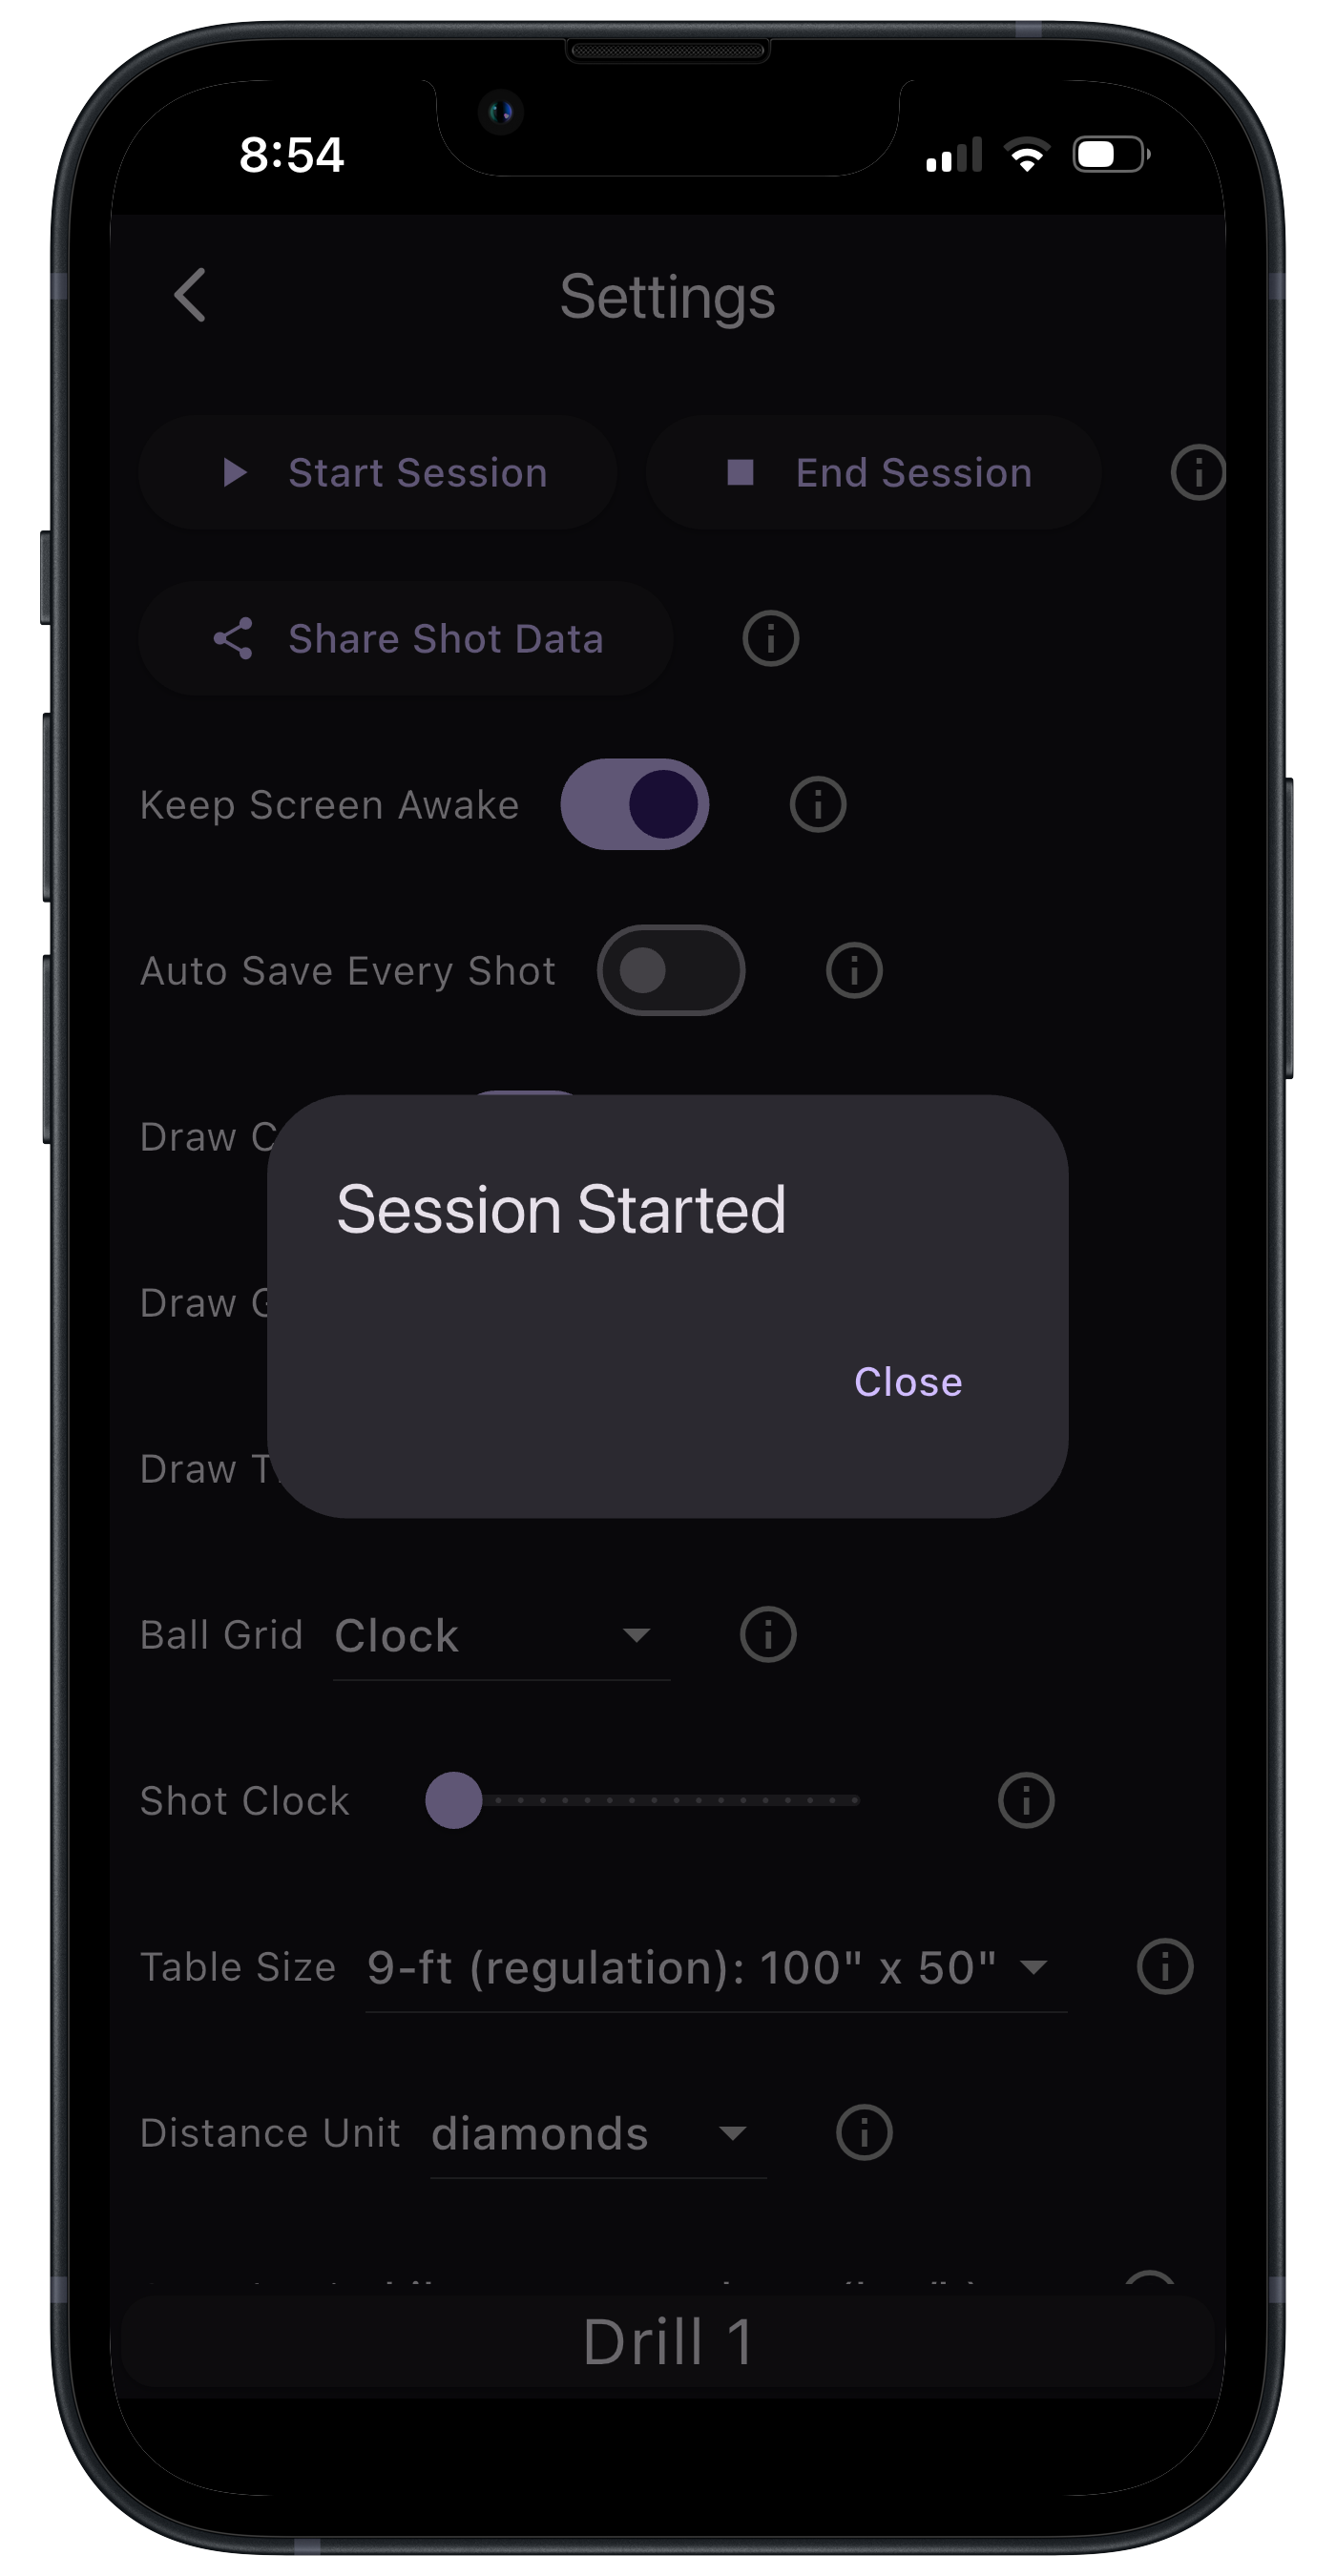
A message will appear letting you know that all shots will now be saved under the Session you started. Go back to the shooting page and start shooting!
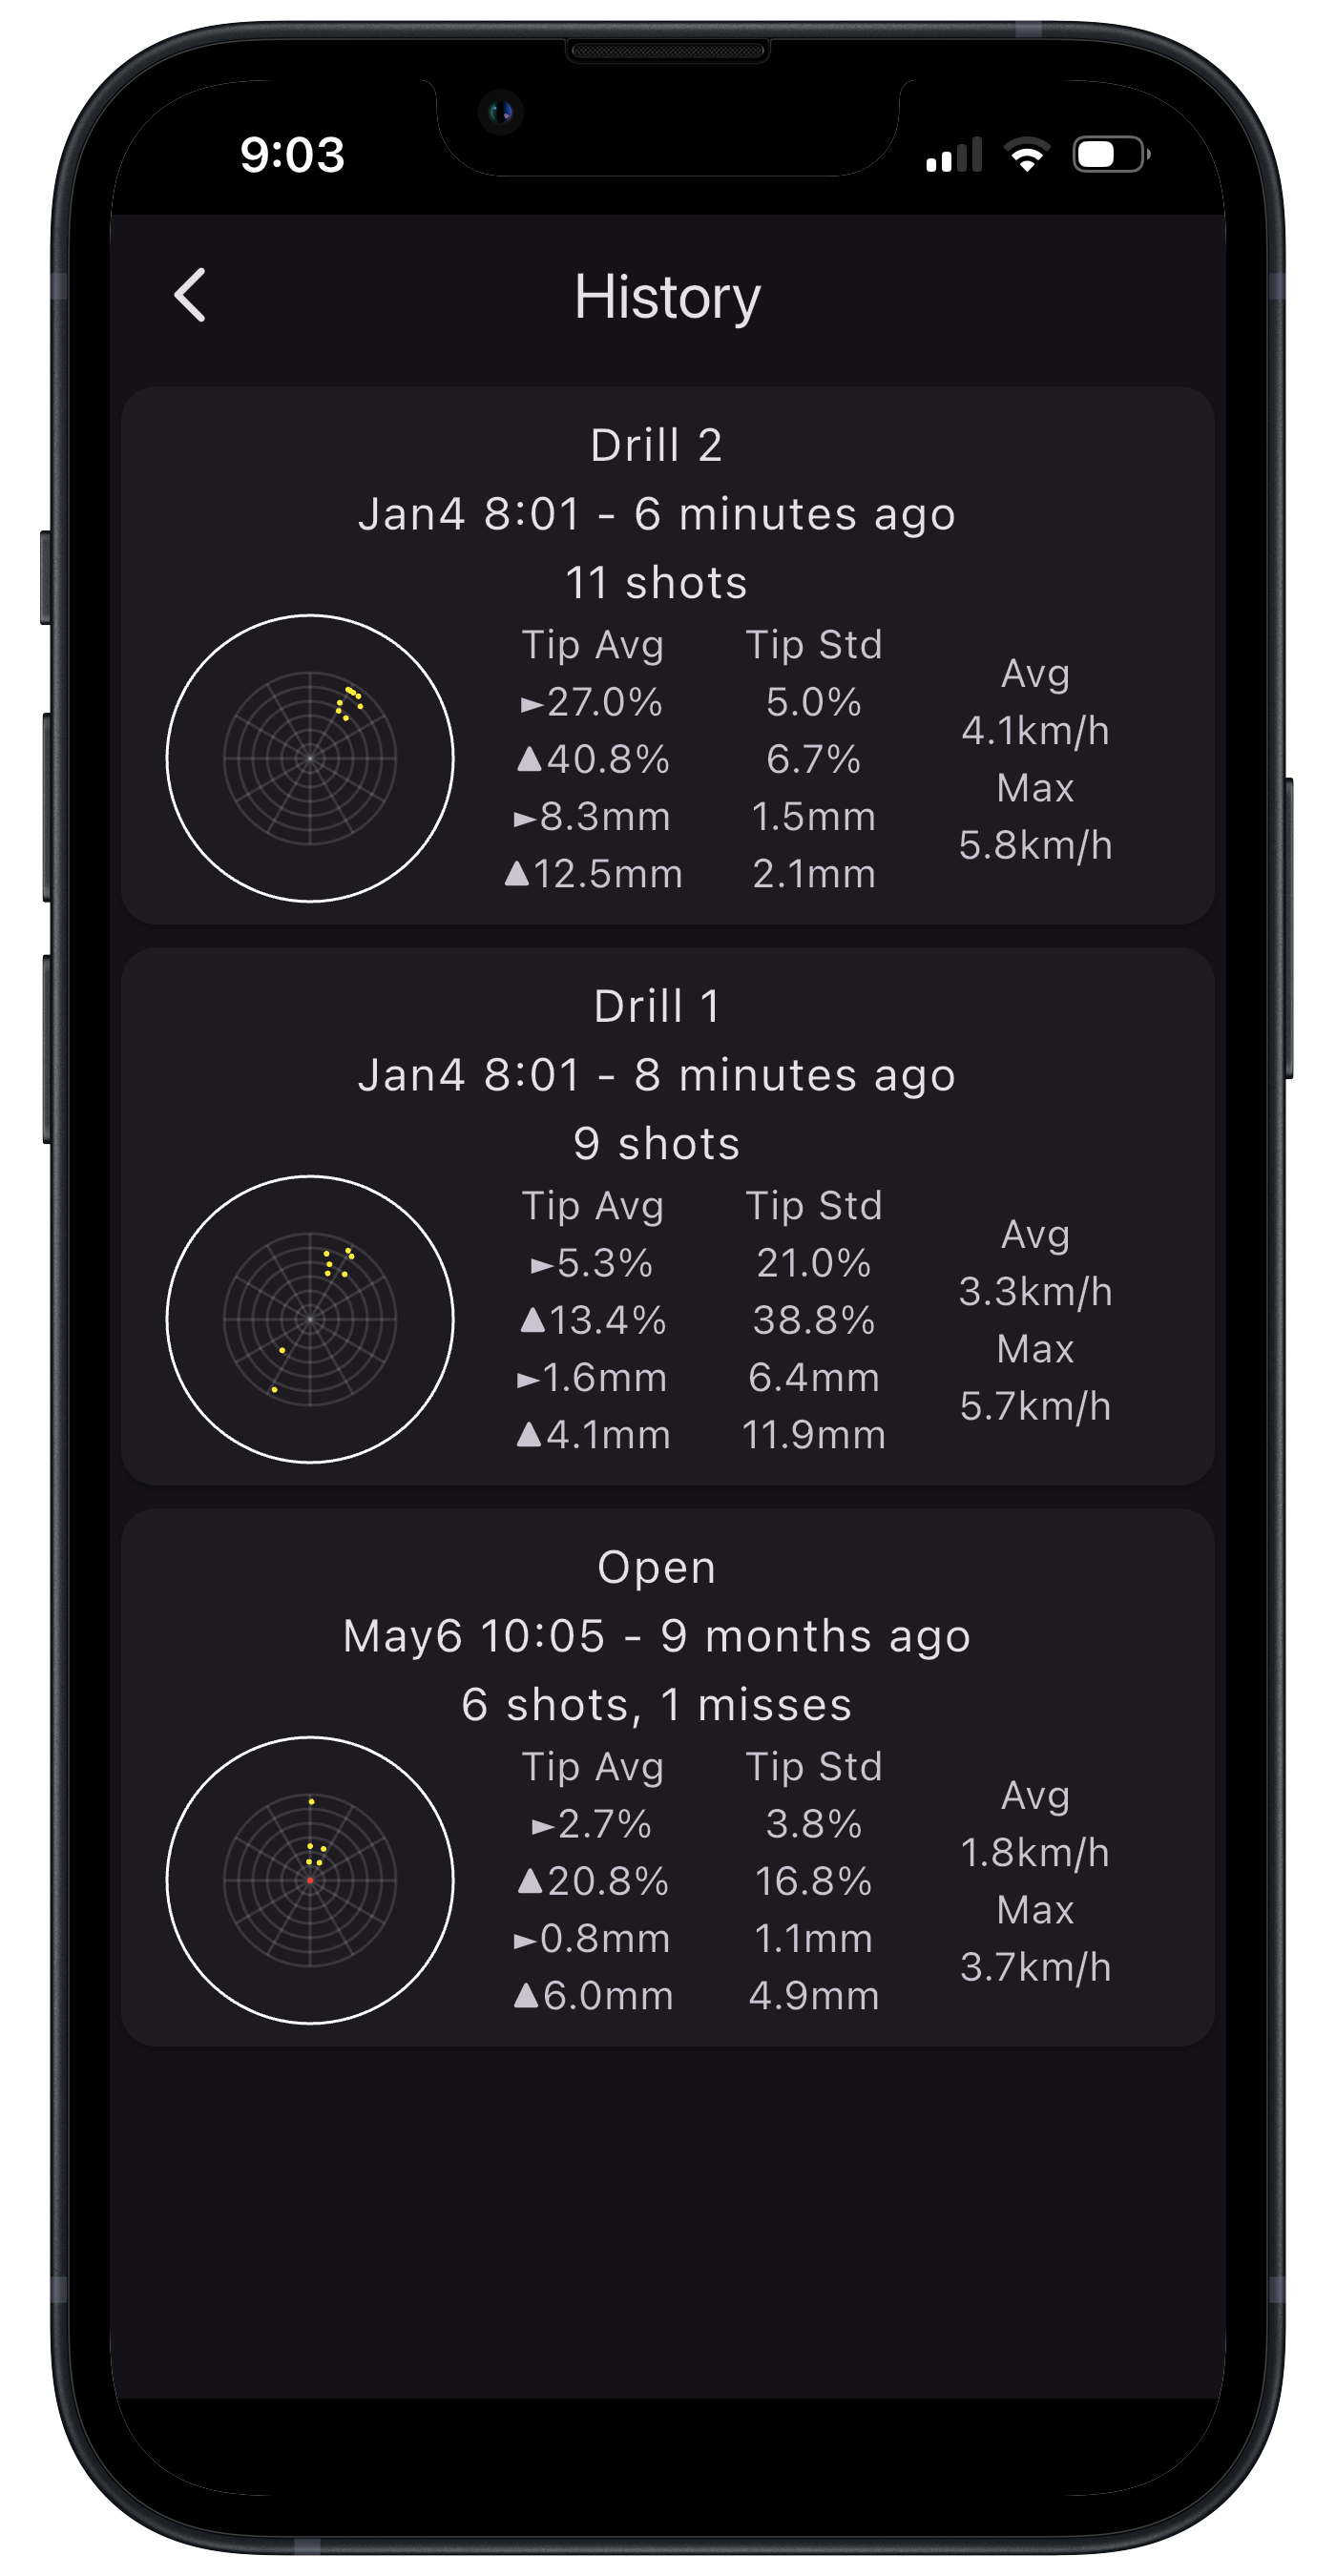
Navigate to the History page at anytime to see statistics of your current session.
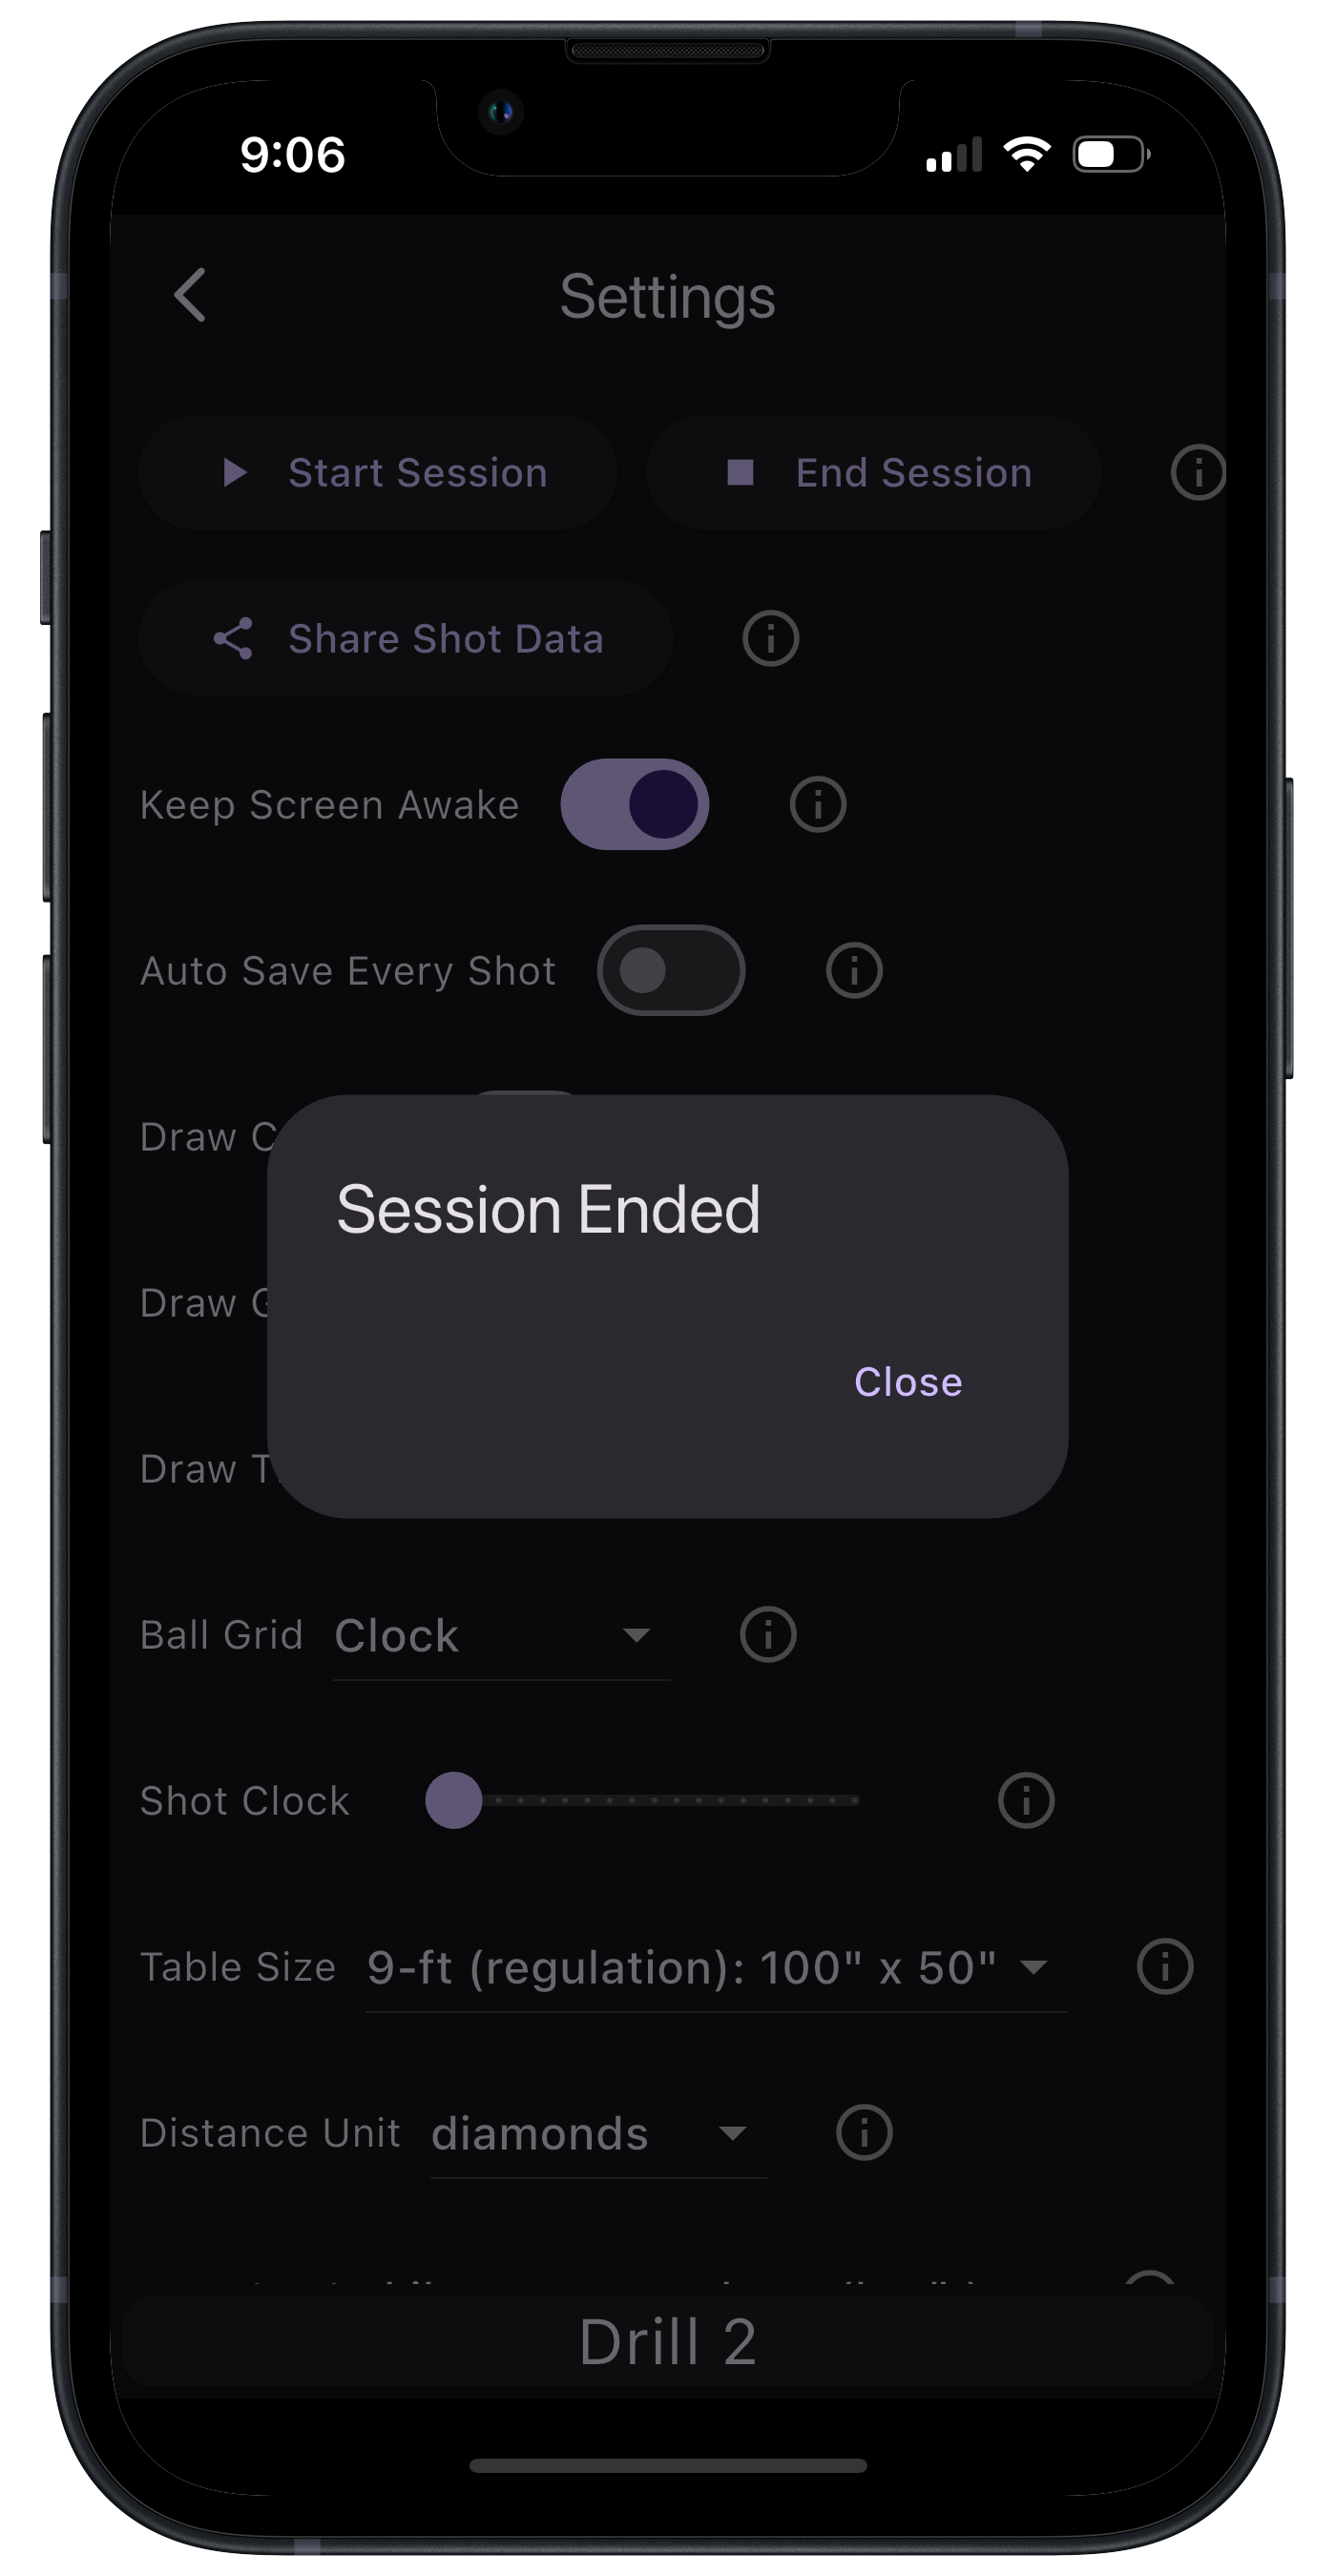
When you want to stop recording data to a Session, go back to settings and select End Session. Note: When a Session is not enabled, all shots will automatically be saved to a default session named 'Open'.
Consider this three-cushion ticky shot. The cue ball first hits the rail, and then immediately hits the red ball, followed by two more touches on the rail before it finally hits the yellow ball.
The DigiBall was hit with 9:42 o'clock English, 26% from center, with a spin of 9.5 rotations per second.
This is a view of the time series data for 2.2 seconds immediately after the DigiBall was hit. The blue line shows the spin magnitude, and the green line shows the acceleration magnitude. The vertical red line shows the time of the first collision event.
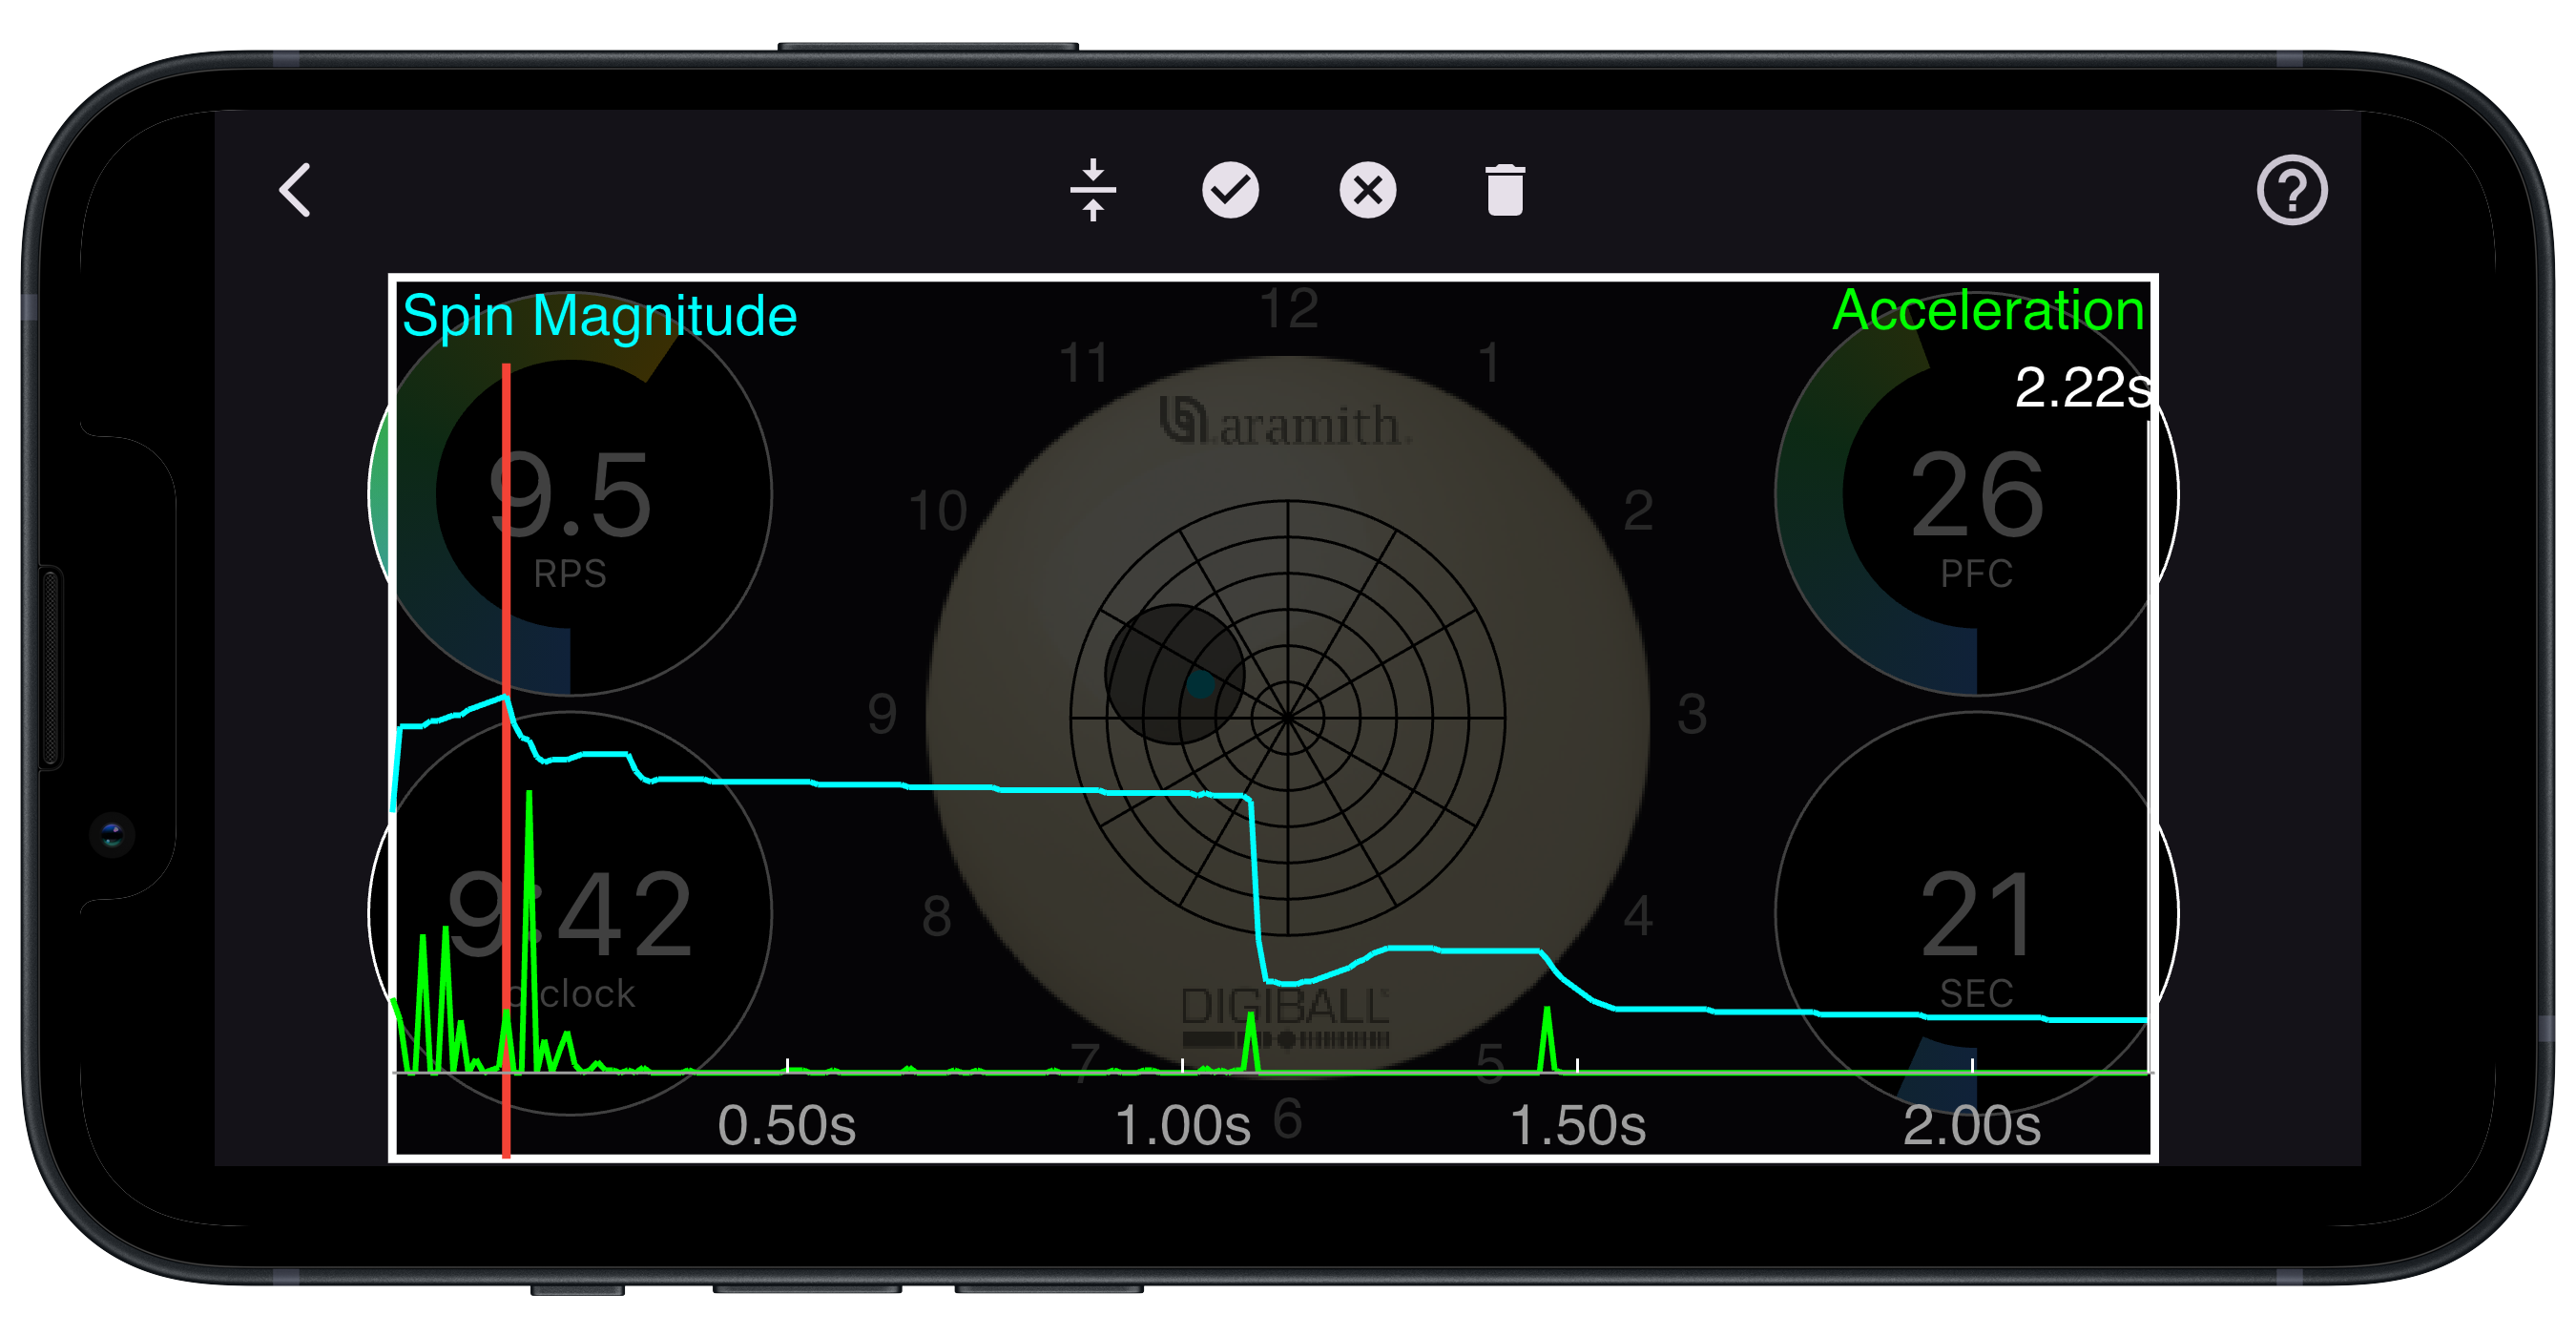
For this ticky shot, the first collision was on the short rail at 0.14 seconds after cue tip contact. The spin magnitude increases slightly from time zero due to some transition from sliding to rolling. The acceleration spikes and ripple in spin magnitude before 0.14s are caused by micro-bounces due to the cueball being hit above center.
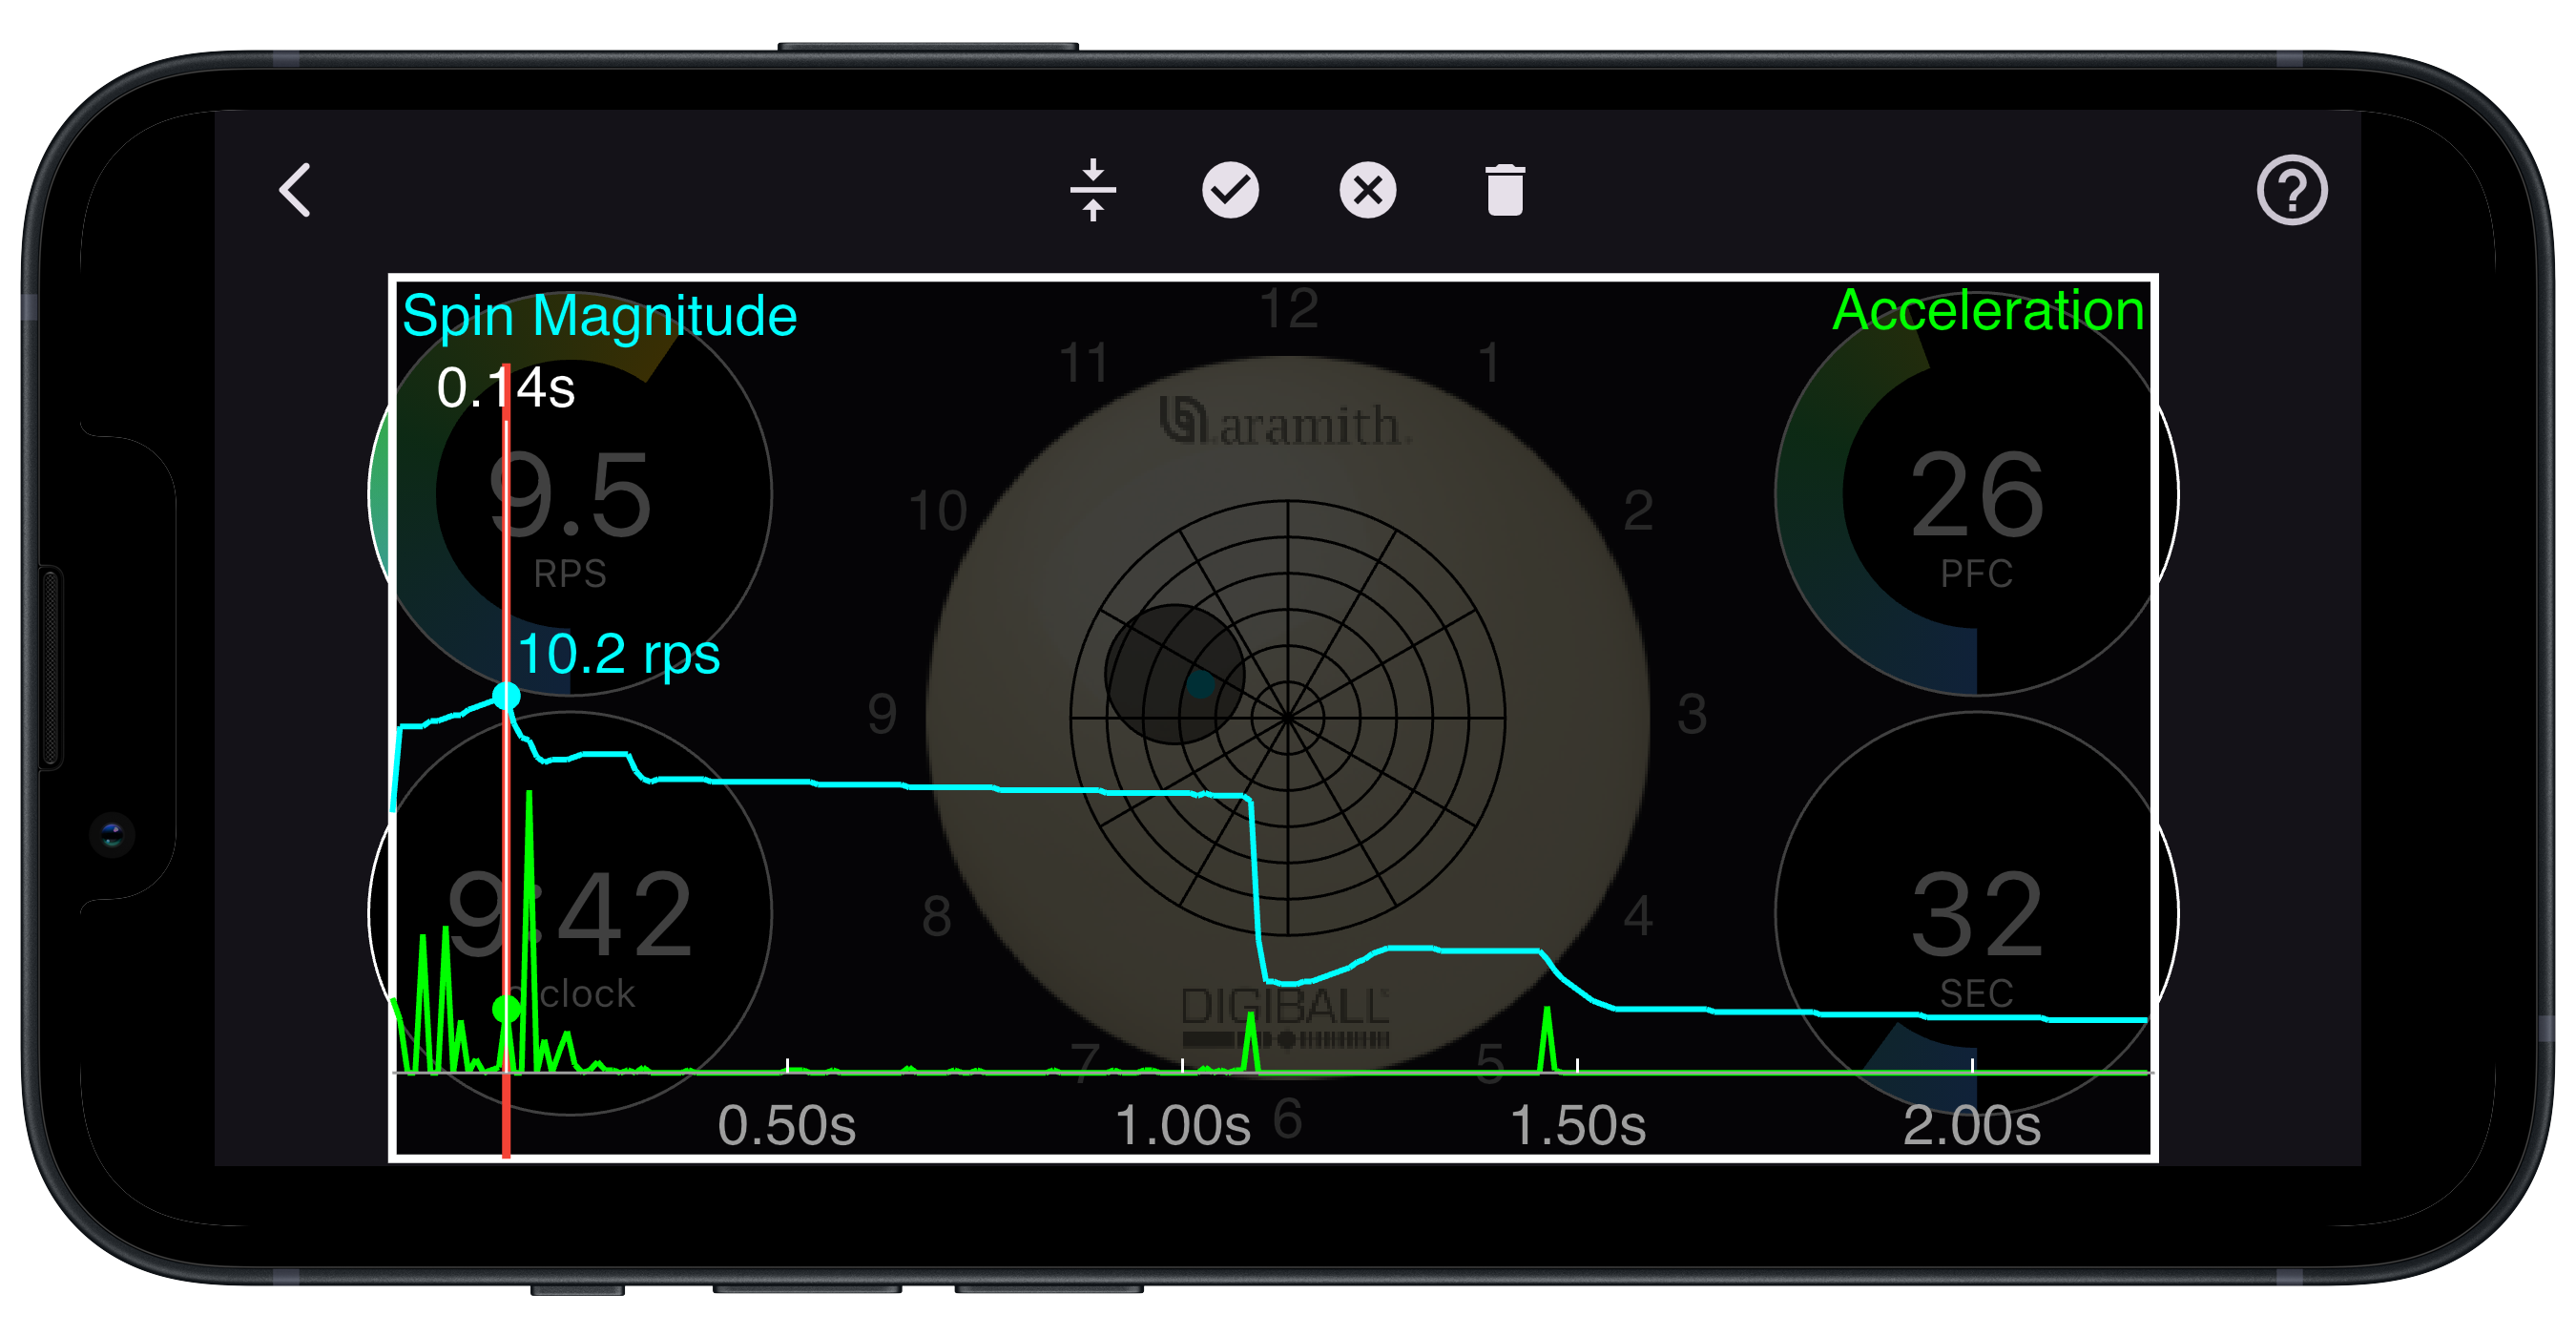
The DigiBall loses energy after hitting the first rail and the spin magnitude decreases slightly. Shortly afterwards is the largest green spike, which represents when the DigiBall hit the red ball. This is followed by another small transition from sliding to rolling with a few more micro-bounces, before hitting the second rail at a very shallow angle at 0.30 seconds. At this point the DigiBall is spinning at 8.6 rps.
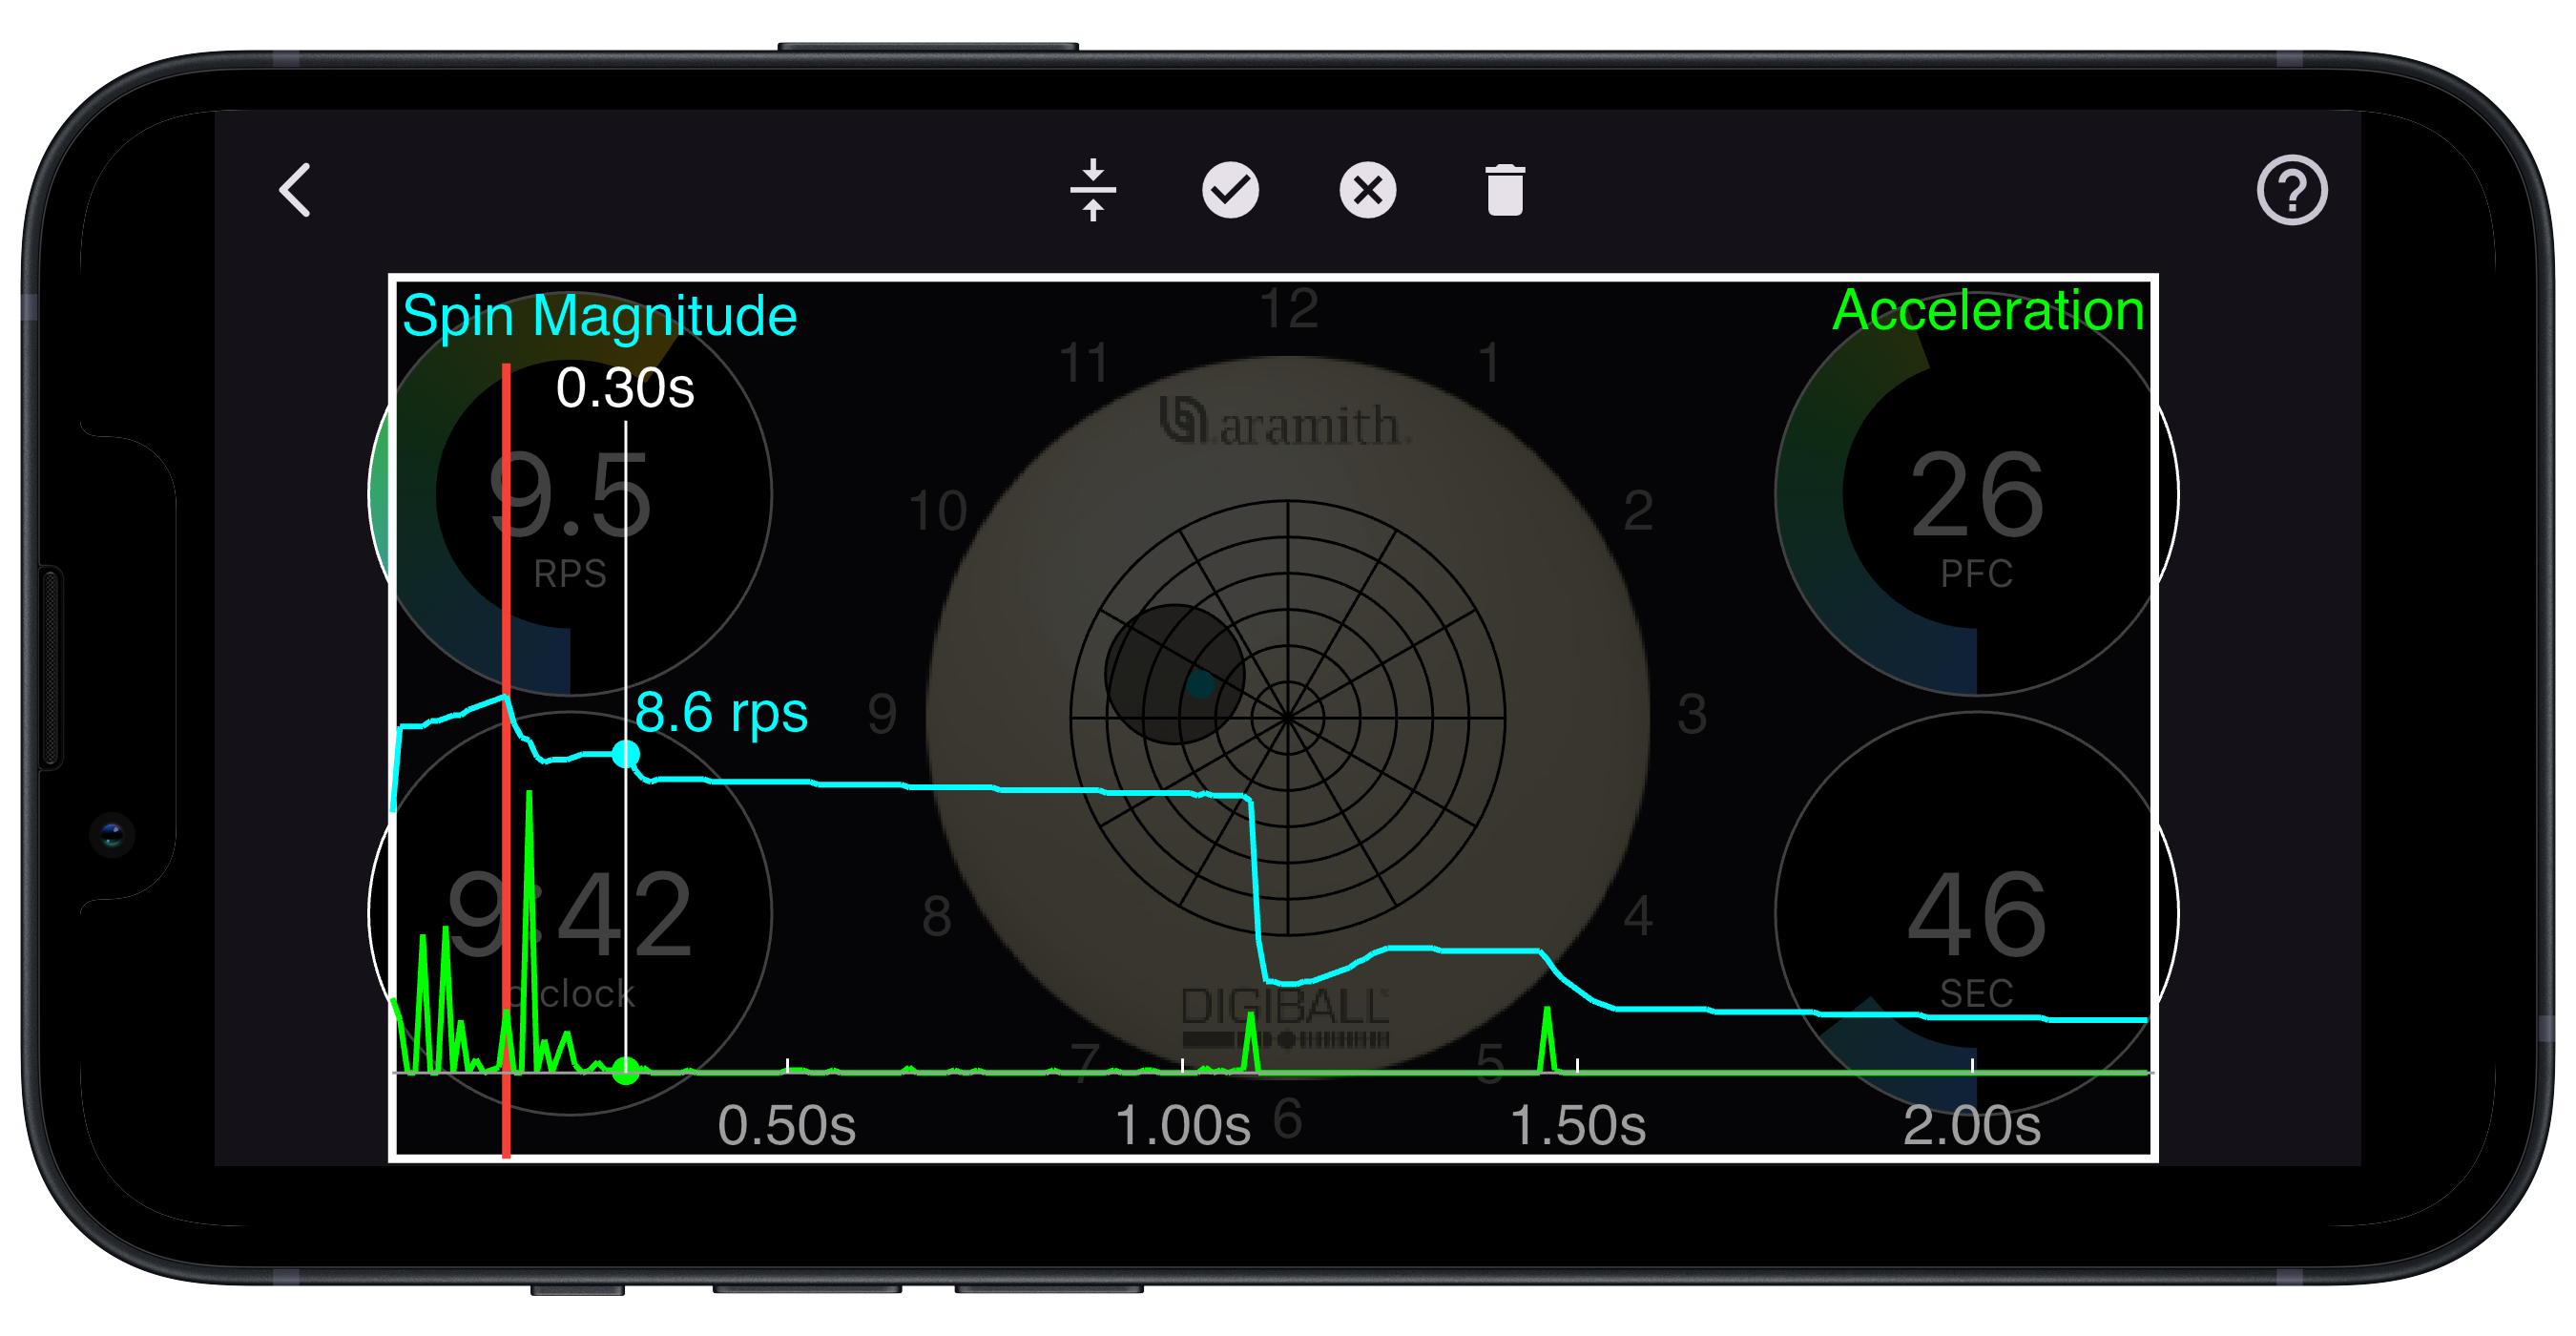
The slope of the spin magnitude between the second and third rail is -0.606 rps/s, meaning that the ball is losing 0.6 rotations per second every second.
At 1.08 seconds the DigiBall hits the third (long) rail at a steep angle. This is where the ball loses the most energy and the spin magnitude drops significantly.
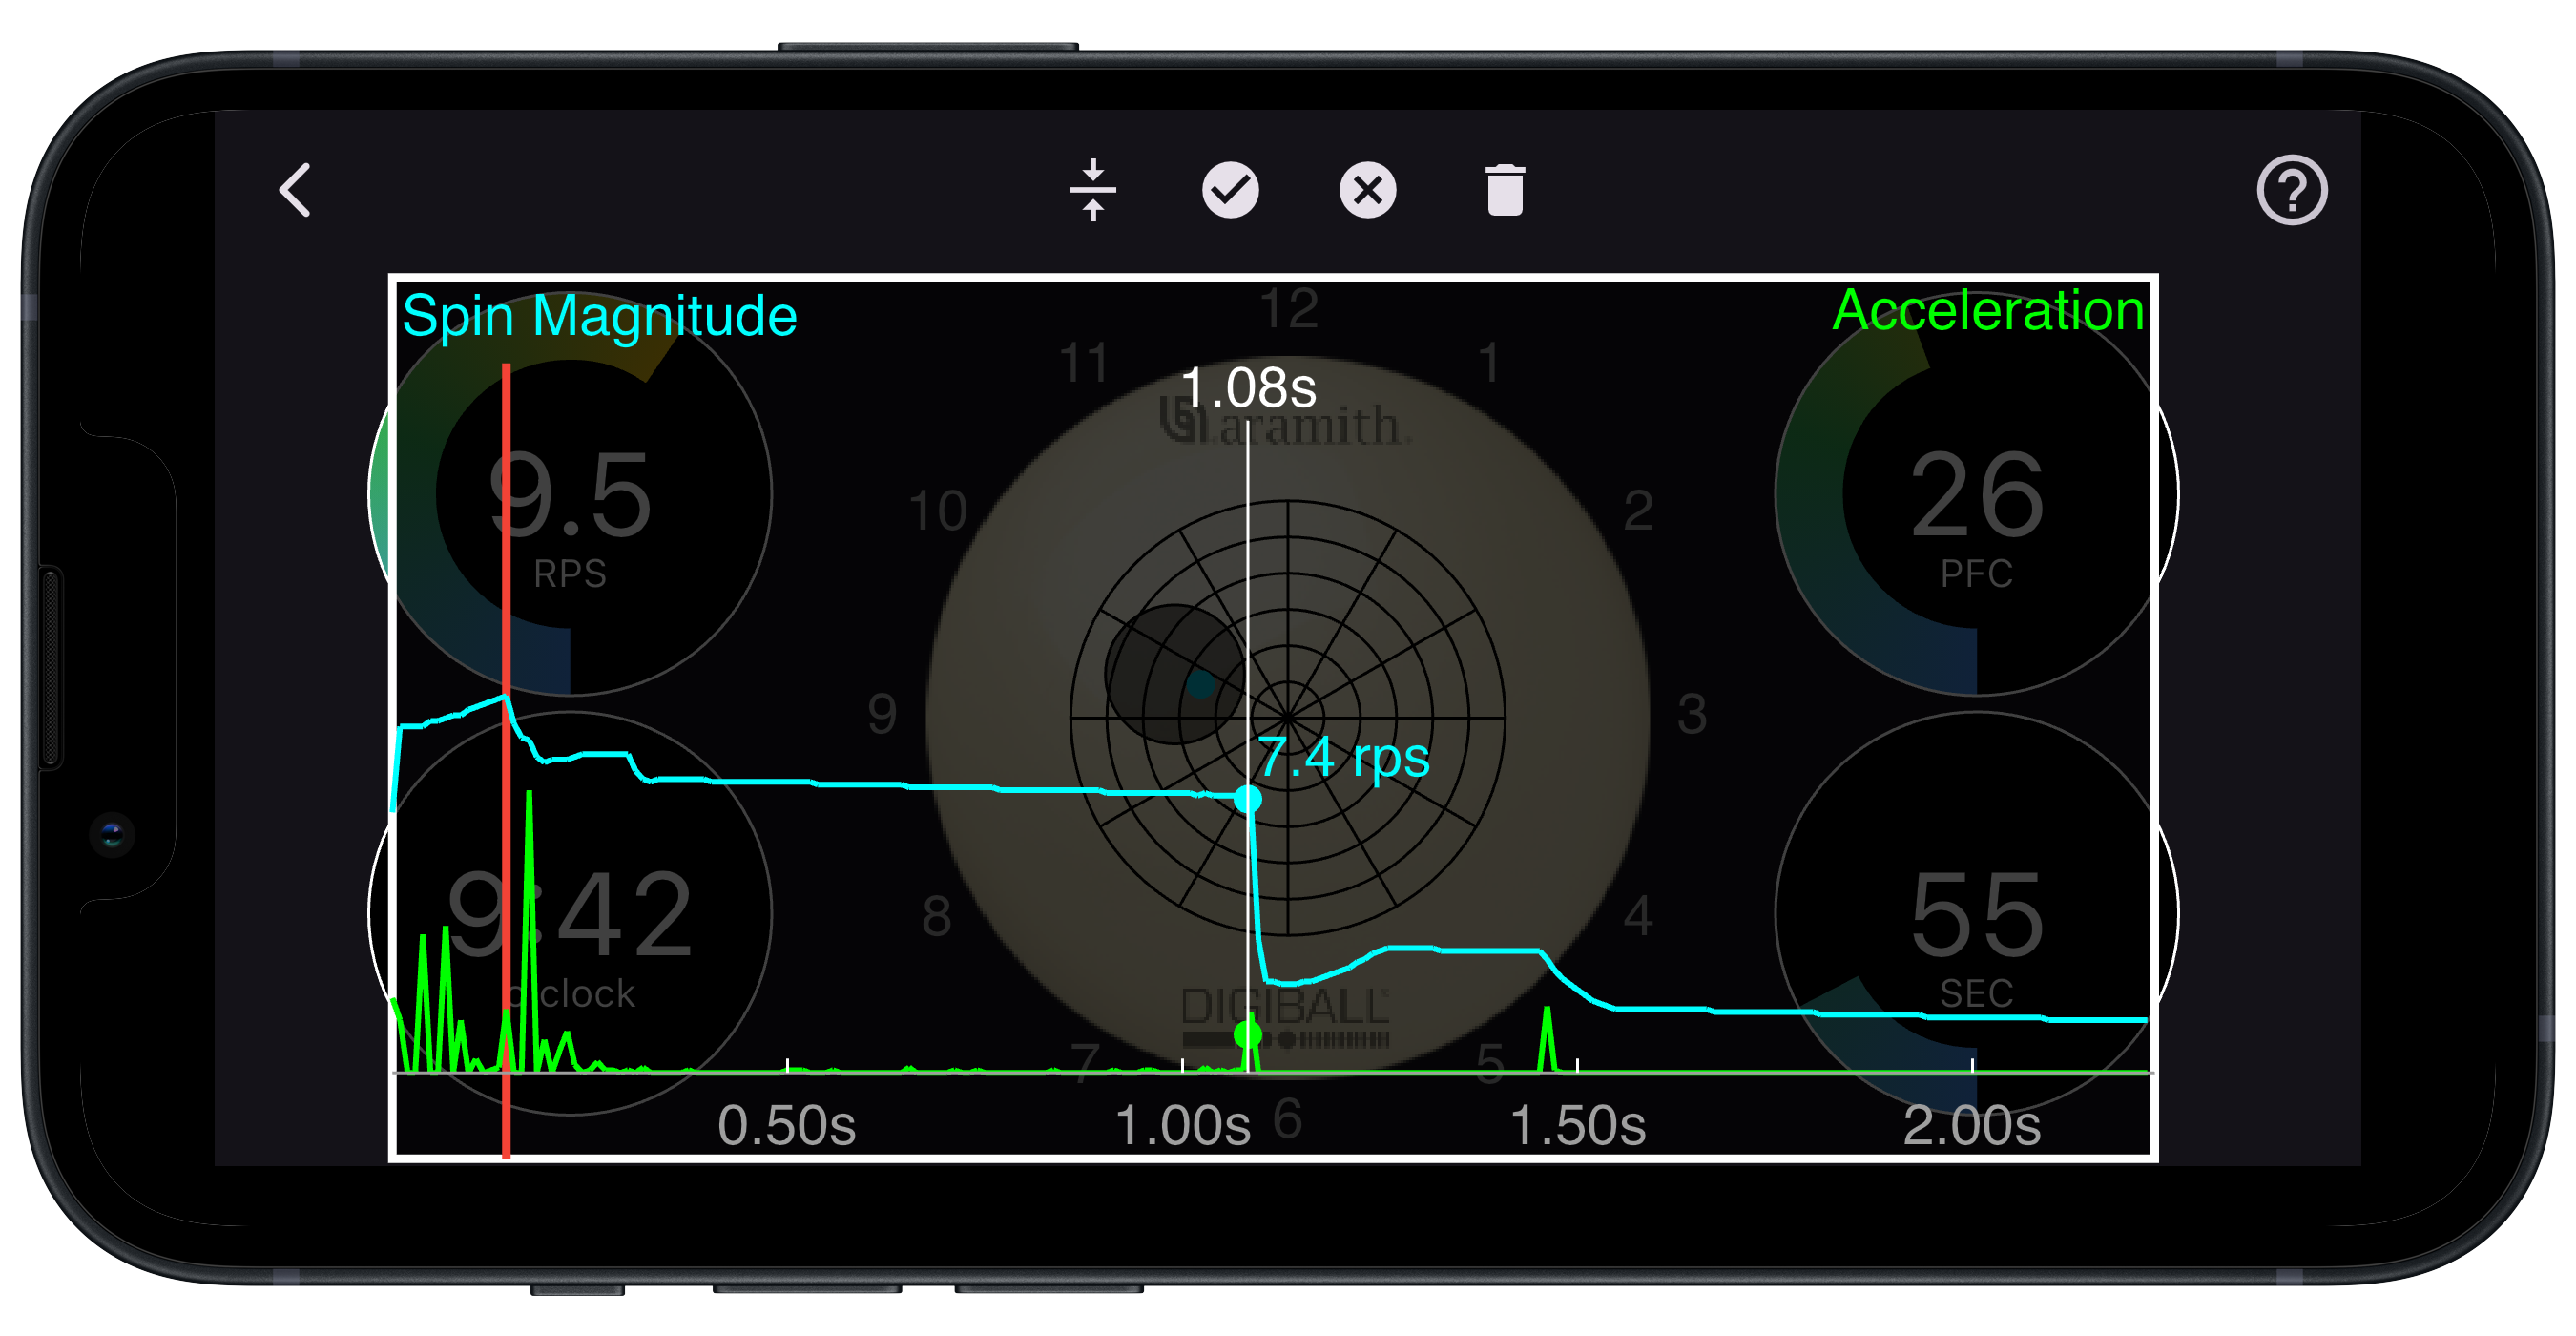
After 1.08 seconds the DigiBall again undergoes a small sliding to rolling transition and the ball picks up a little more spin. It then decays very slightly to 3.1 rps, and at 1.46 seconds it collides with the final yellow ball, scoring the point.