You are using an outdated browser. For a faster, safer browsing experience, upgrade for free today.

DigiBallScanner and OBS Setup for Windows

for the macOS tutorial please click here


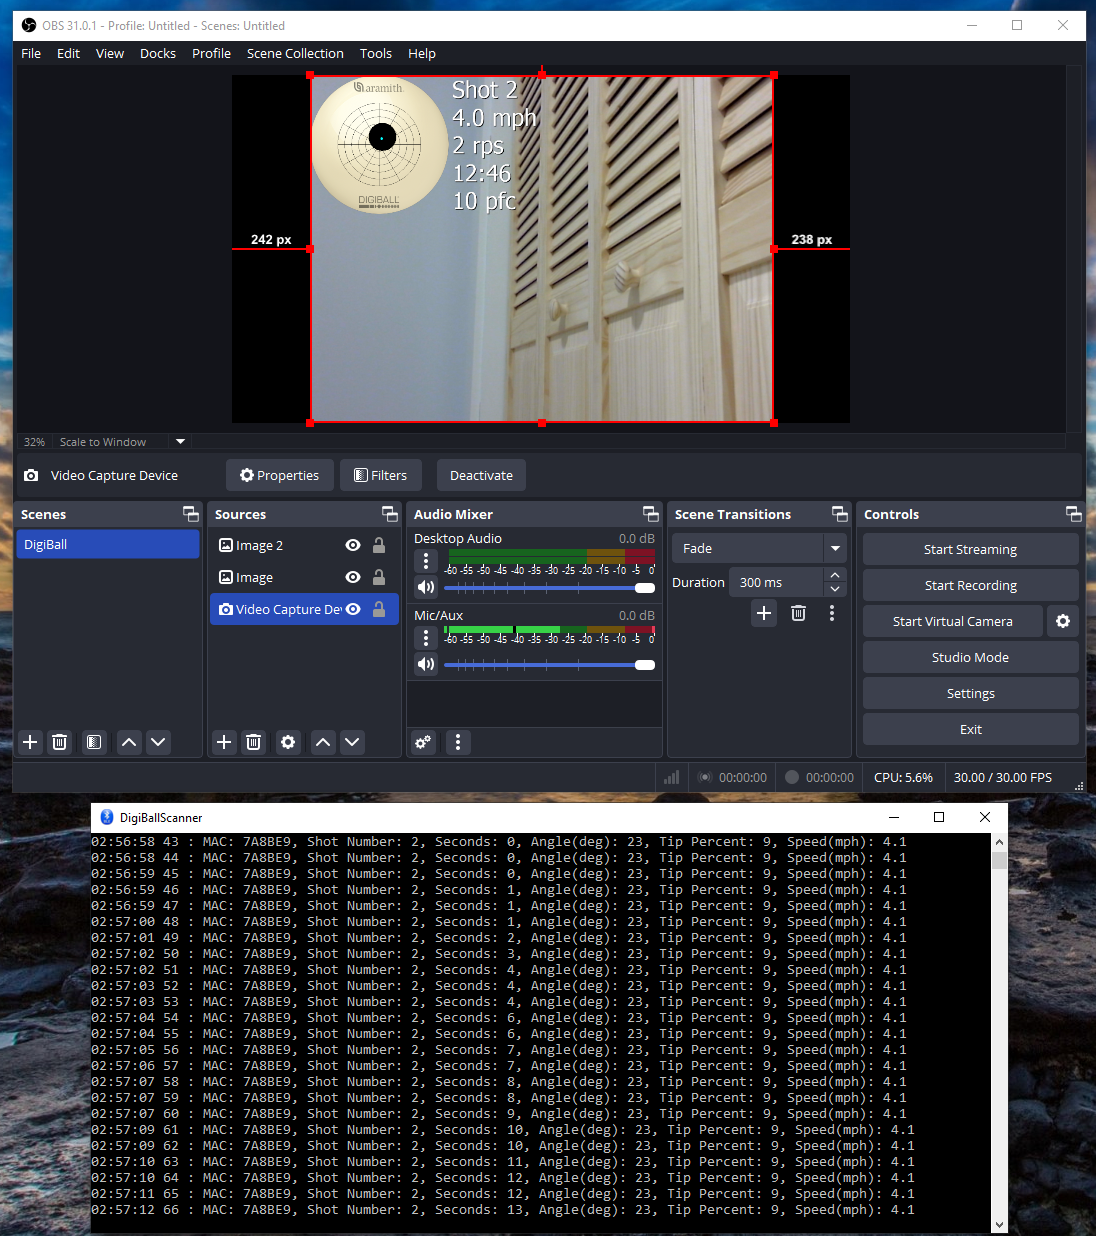
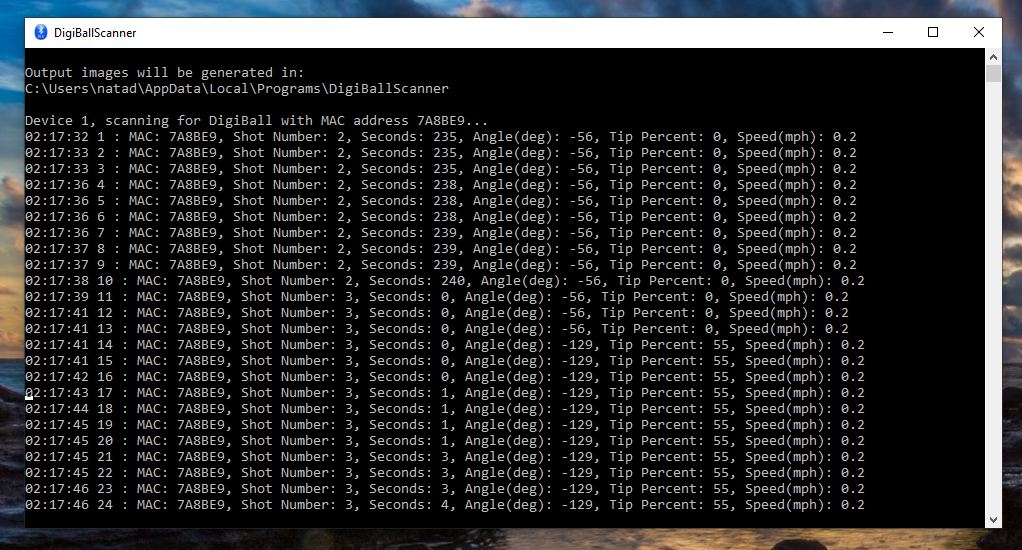
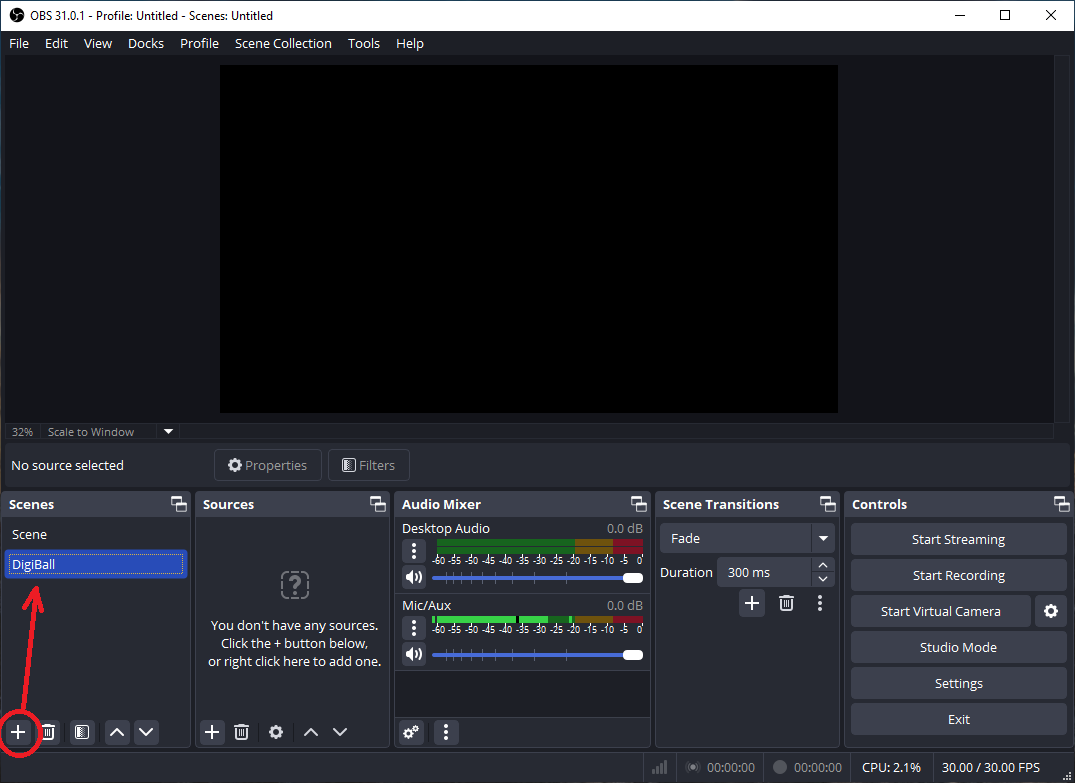
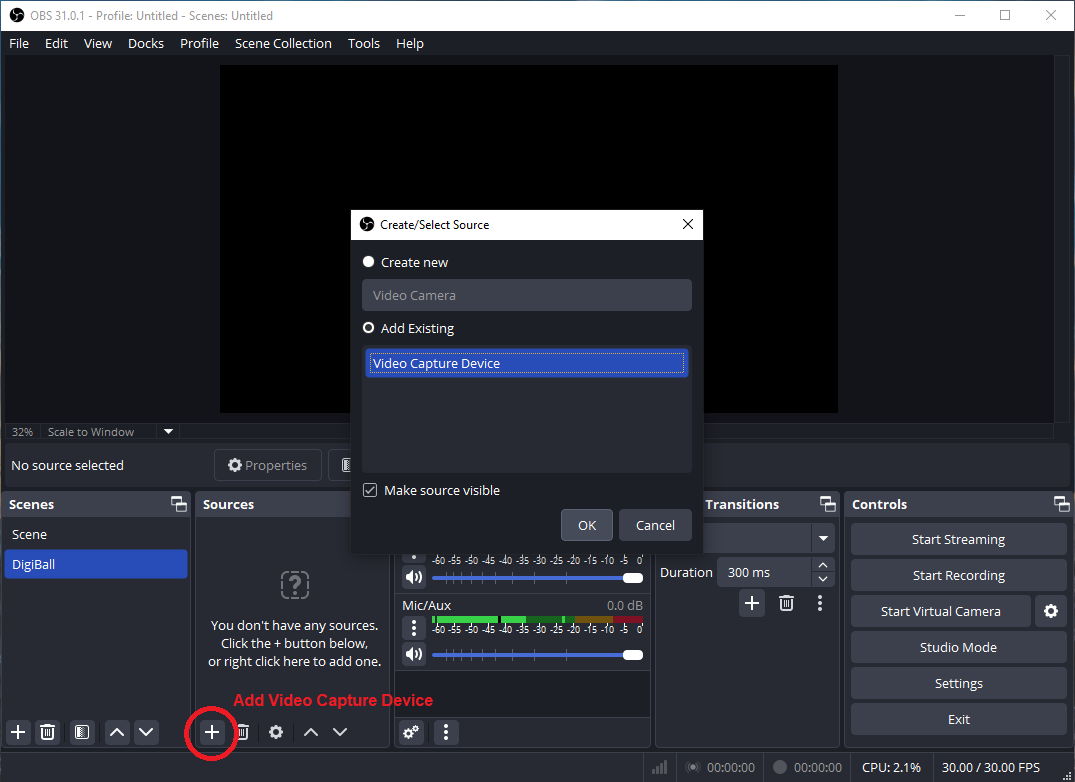
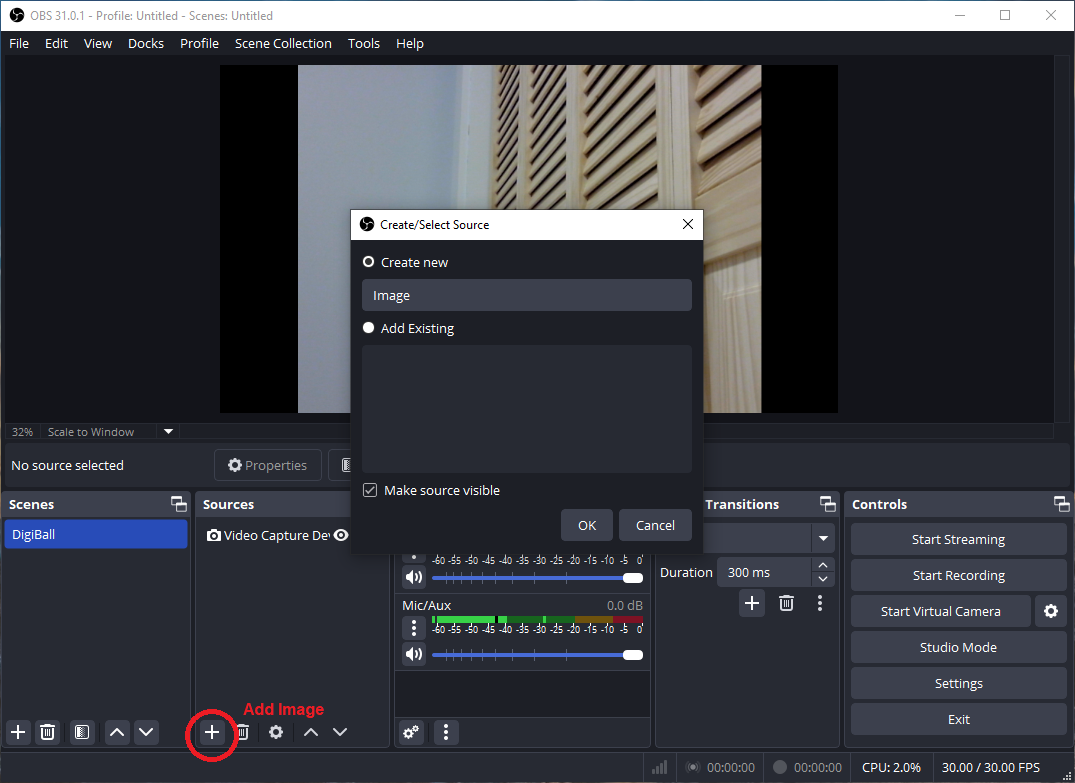
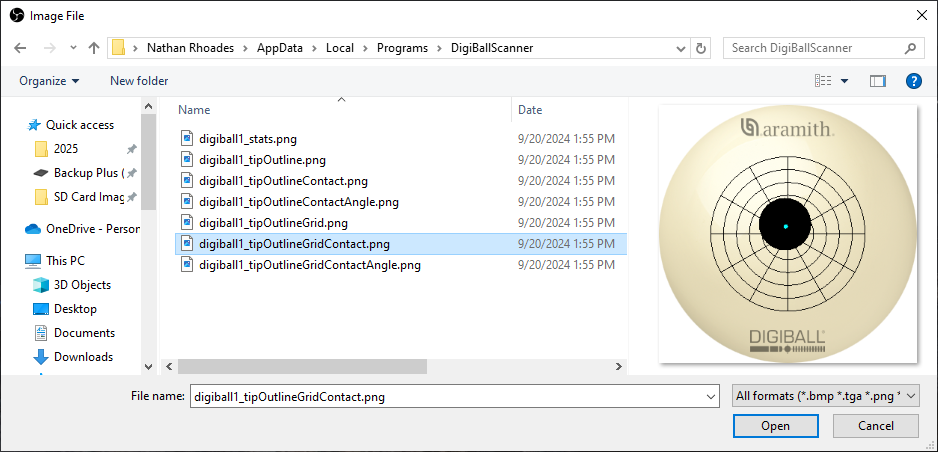
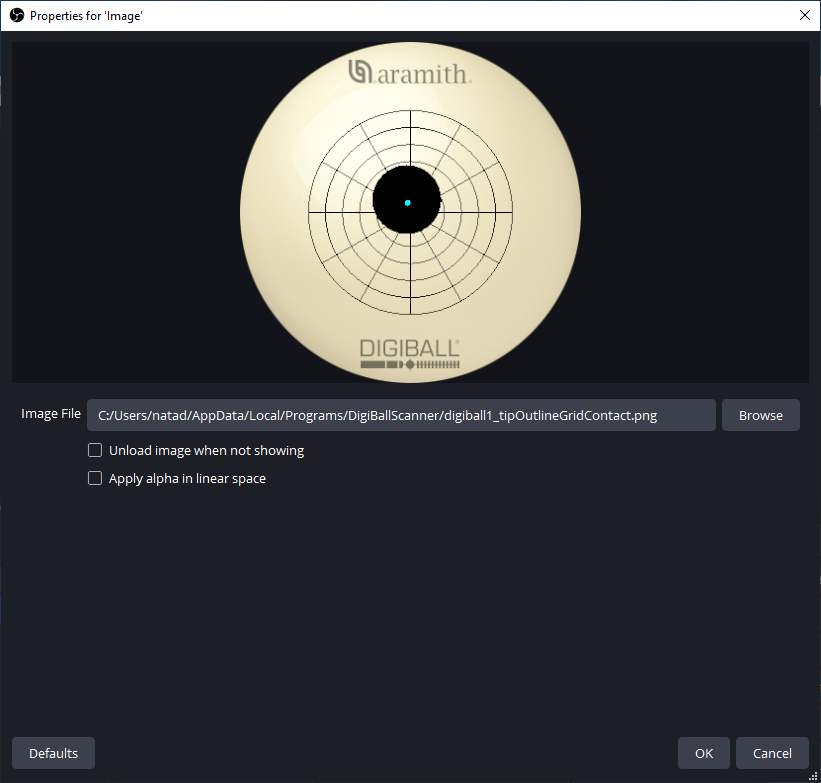
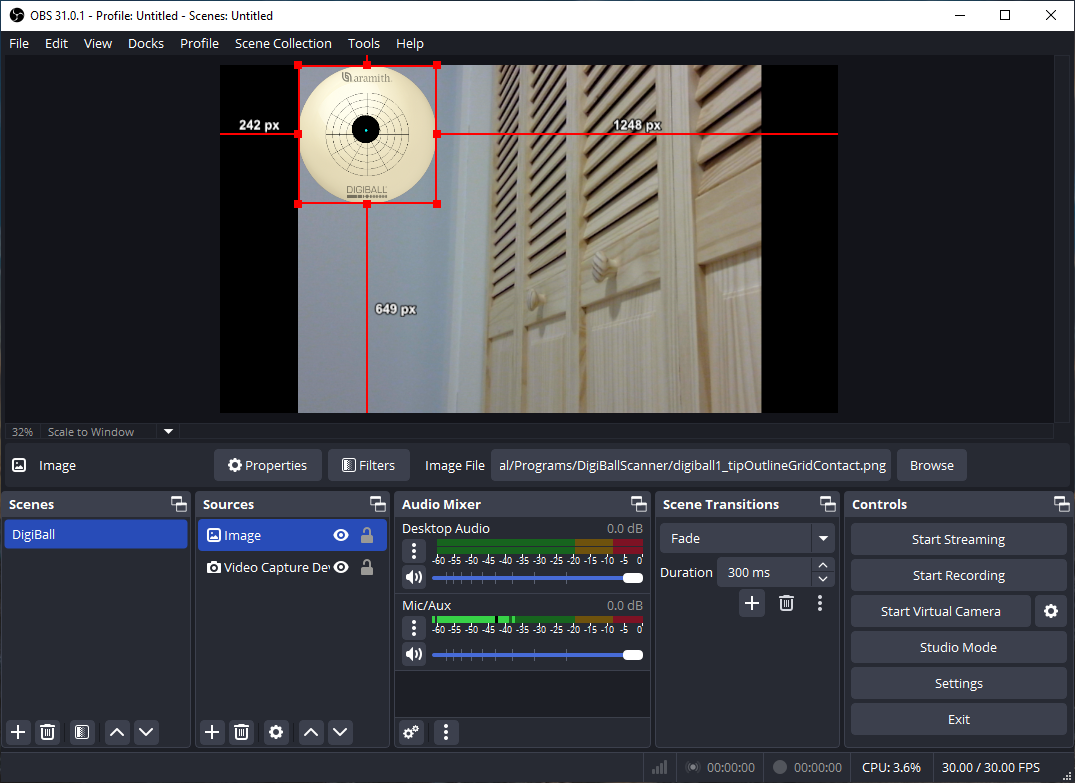
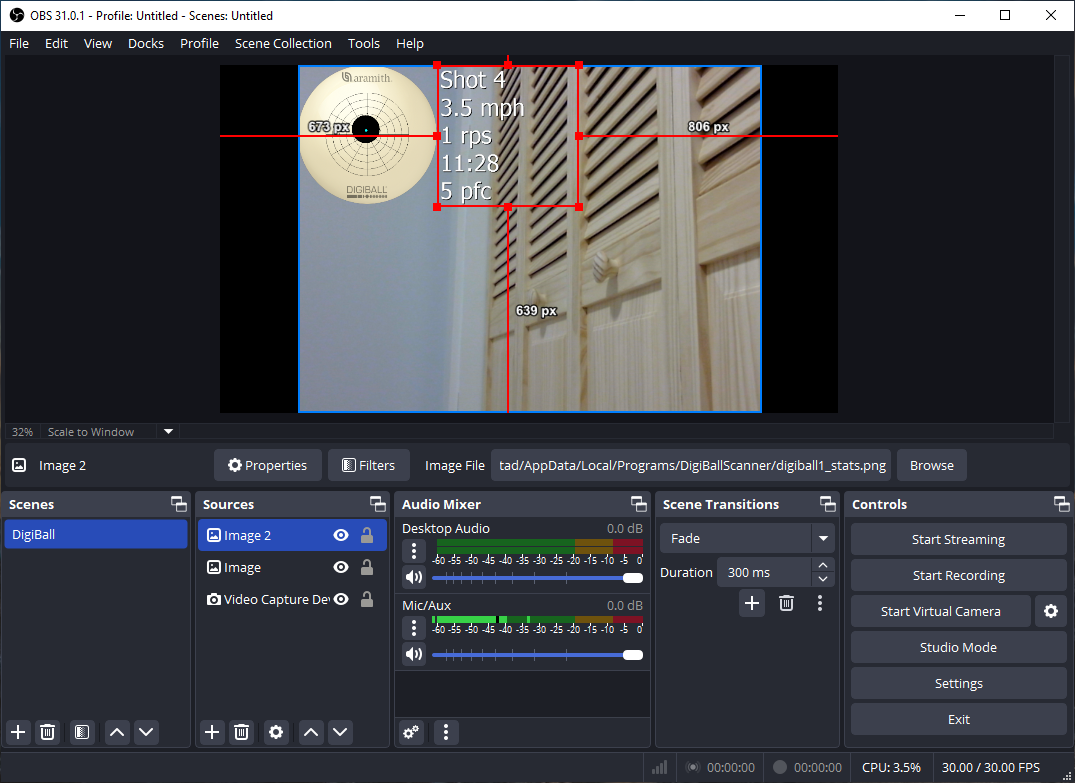
OBS Studio is a free and open source software for video recording and live streaming. An auxiliary program called DigiBallScanner automatically generates DigiBall images in real time so that video overlays of cue ball tip position, speed, spin, and other stats can be added to live games, matches and tournaments.

Links:

Open Broadcast Software (OBS): https://obsproject.com/
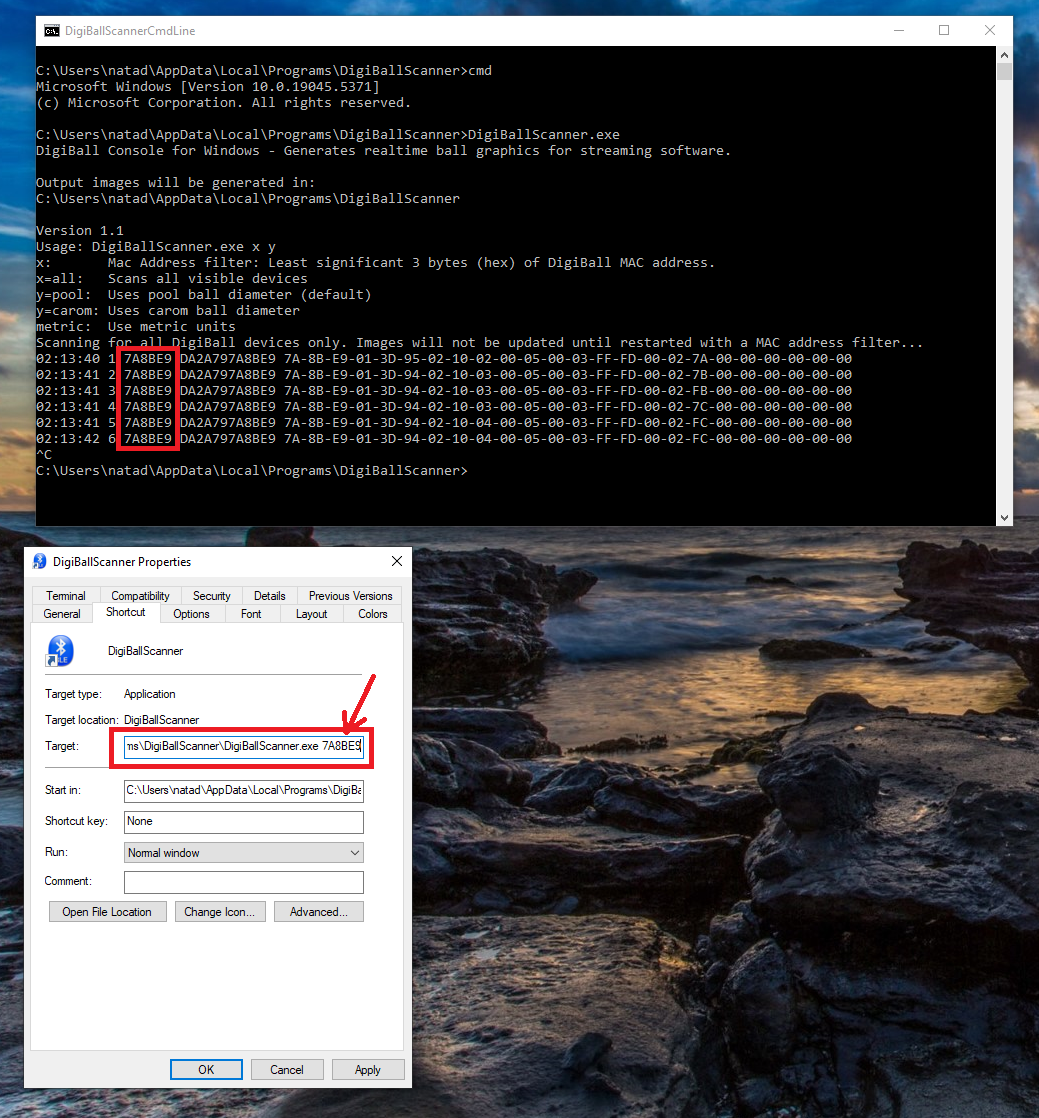
DigiBallScanner (Windows): download installation exe

Requirements

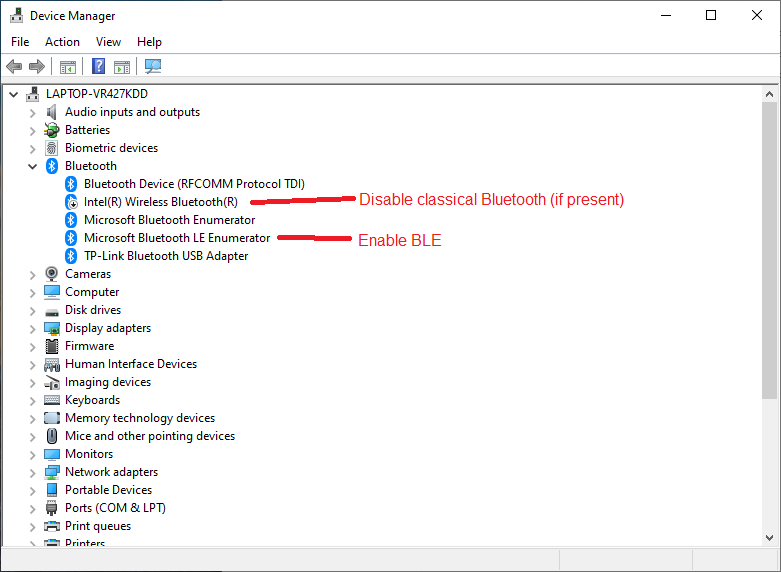
PC with Windows 10 or greater
Most computers running Windows 10+ today already have built-in BLE adapters.

Installation

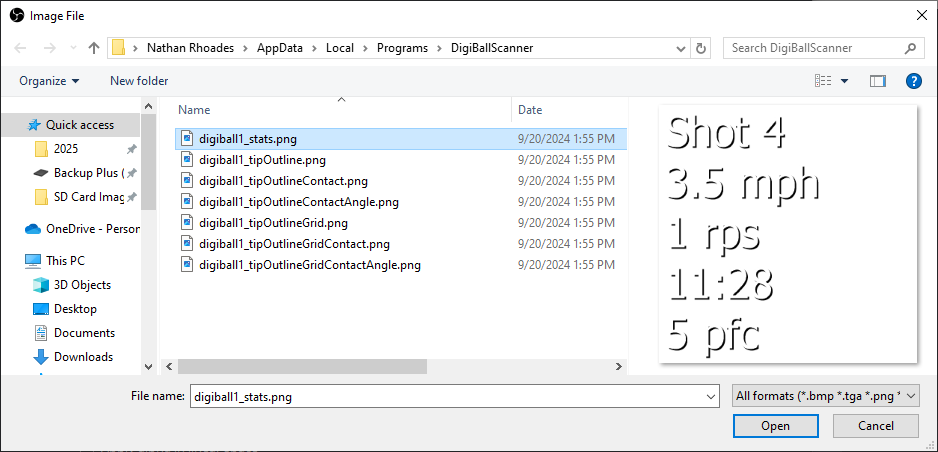
Download and install the DigiBallScanner program using the installation package found here.

Enable Bluetooth LE Adapter

  1. Go to Start and type devmgmt.msc to open the Device Manager
  2. Find Bluetooth and expand.
  3. Verify that one entry reads "Microsoft Bluetooth LE Enumerator". If you do not see this then your adapter does not support BLE. A BLE USB dongle can be purchased from a variety of vendors.
  4. Disable the classic Bluetooth adapter "Intel(R) Wireless Bluetooth(R)" by right-clicking and selecting Disable.


Configure and Run DigiBallScanner

  1. (Optional): Test your adapter. Double-click on the DigiBallScannerCmdLine icon to open a command terminal in the installation directory. Type DigiBallScanner all to scan for all BLE devices in your area. You should see activity. Close the terminal when finished.
  2. Scan for your DigiBall by clicking on the DigiBallScanner icon (or run DigiBallScanner from the terminal in the previous step). Make sure that your DigiBall is charged and awake by taking a shot or two with it. You should see activity in the terminal.
  3. Make note of the DigiBall address that you wish to use, as there may be more than one device available. Either re-run DigiBallScanner with the MAC address as the first argument, or edit the DigiBallScanner desktop shortcut and append the MAC address.
  4. You should now see information being printed related to the selected DigiBall.


Configure OBS

  1. Open OBS and click on the Plus button to create a new scene.


  2. Add your video capture device as a source.


  3. Add the DigiBallScanner-generated cue ball image as an overlay image. Click the Plus icon in Sources and select Image.


  4. Navigate to the DigiBallScanner installation directory. This path can be found by right-clicking on the DigiBallScanner icon and selecting "Open file location". Copy and paste the path here, and then choose one of the generated cue ball images. In this example the image with a tip-outline shadow and a grid is used.


  5. Click OK.


  6. Position and size the overlay image where you want it to appear in the video.


  7. If you want to add additional numerical information, feel free to another image and do the same with the digiballX_stats.png image.


(Optional) Add Video and Audio Delays

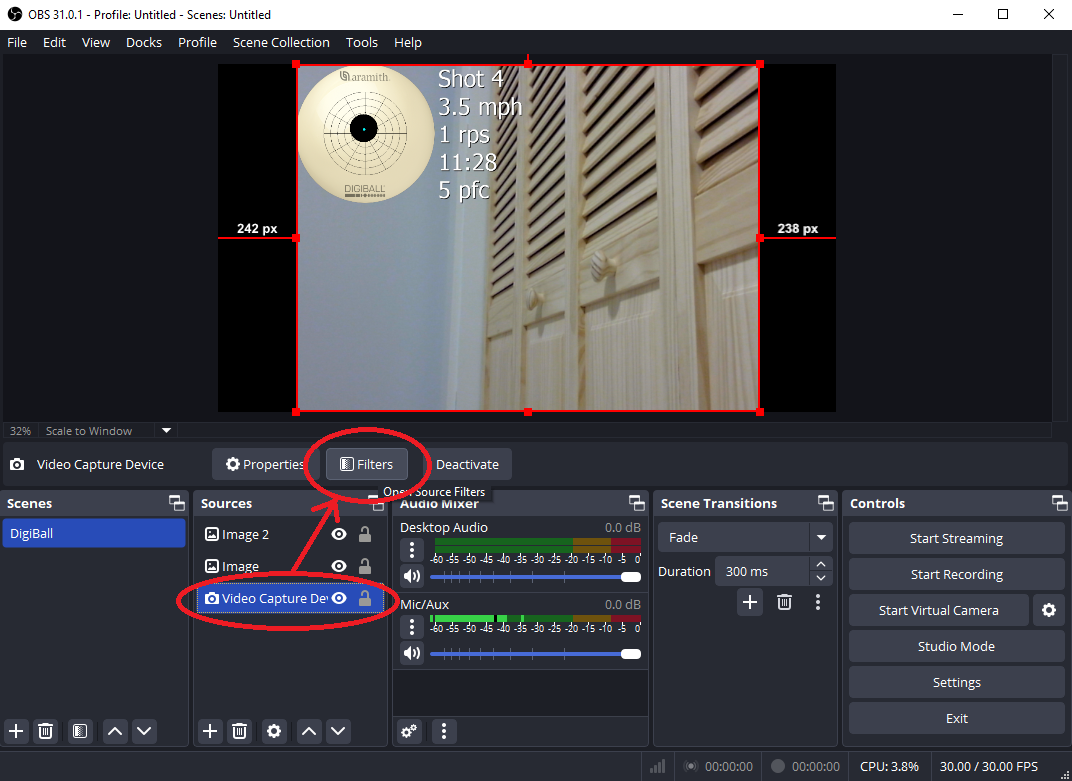
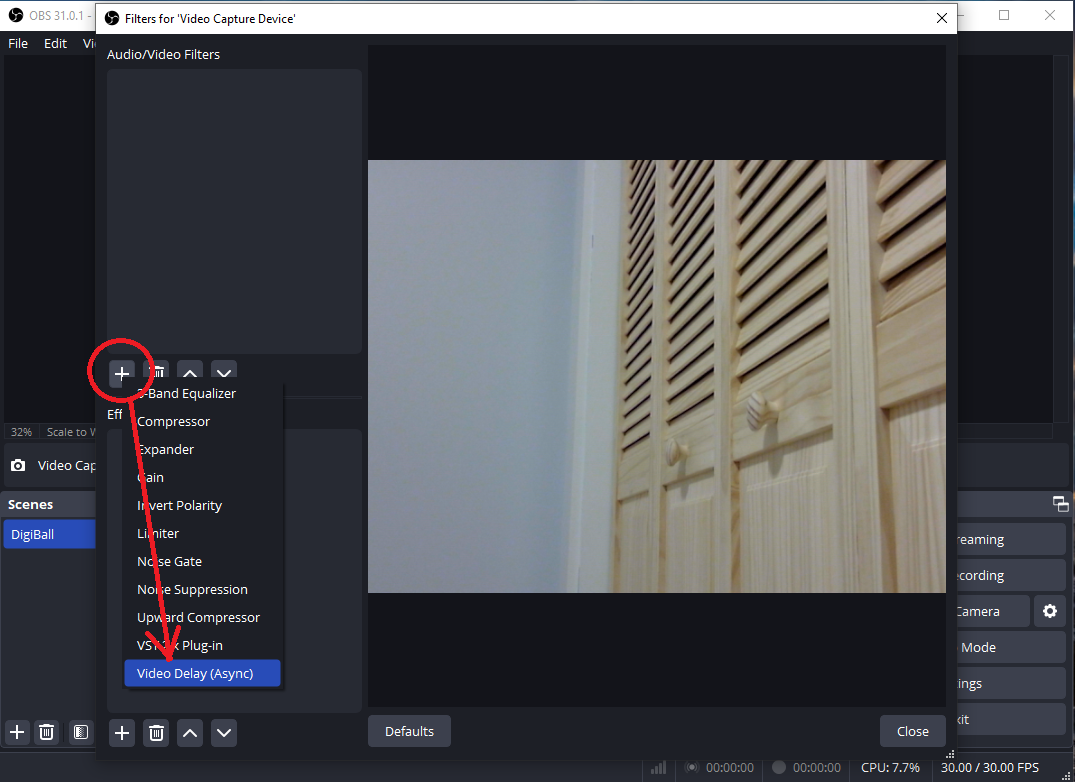
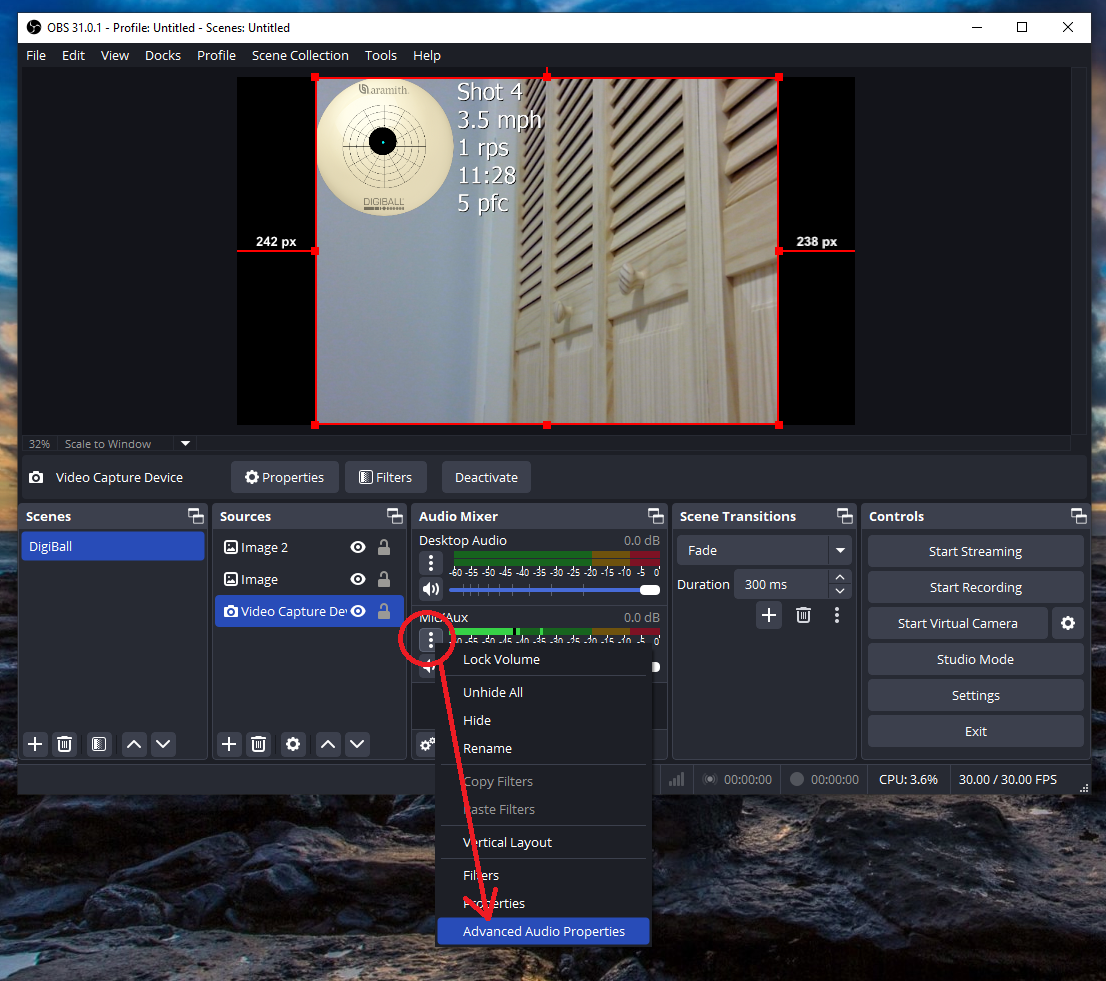
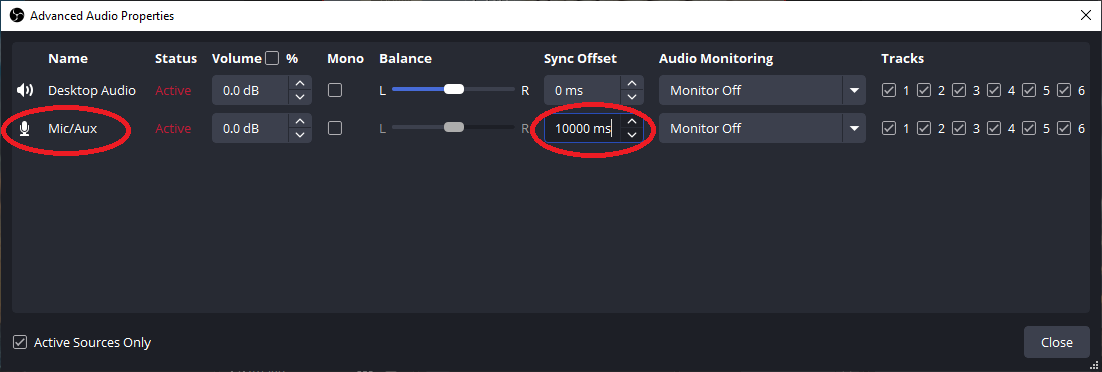
You can create the effect of the DigiBall graphic updating before a shot is taken by adding a fixed delay to the video and audio inputs.


  1. To add a video delay, click on the Video Capture Device source and then click on the Filters button.


  2. Add a Video Delay (Async) filter.


  3. Change the delay to 10000ms to add 10 seconds of video delay.


  4. If you want to also add a sound delay to the microphone recording the table sounds, then select the source from the Audio Mixer and go to Advanced Audio Properties.


  5. Change the Sync Offset to 10000ms for the appropriate audio source. You may need to tailor the exact delay depending on your particular microphone.


All Done! Stream or Record using the DigiBall!

Make sure that DigiBallScanner is still running, and then click the Start Recording button to create a video. The video location is in your My Documents/Videos folder by default. Press Stream to start streaming if you are set up for it.